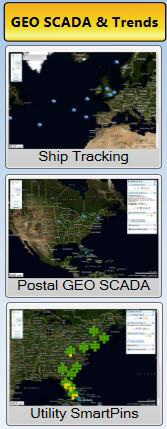

EarthWorX is a GENESIS64 provider that incorporates high-resolution maps into a GraphWorX64 display. An EarthWorX map can be added to any GraphWorX64 display as an added layer. You do this by adding an EarthWorX Viewer to the display from the GraphWorX Controls ribbon, which opens a map to which you can then add useful GraphWorX64 features. Using an EarthWorX map is helpful for monitoring geographically disbursed sites, not only on a global scale, but also on a local scale. Some of the features you can take advantage of include:
Using a worldwide map or a local, regional map
Using SmartPins for reporting statuses and warning conditions at a glance
Using PushPins that mark significant points and their statuses on the map
Creating views that let runtime users "fly" over long distances (see Creating 2D Views for Runtime Users)
Displaying actual land features on your maps
Confining or expanding the zoom level of the map (see Zoom Capabilities in an EarthWorX Map)
Configuring Pick actions that let runtime users act based on conditions that they see unfolding before them
Importing GPS tracks and routes from a .GPX file (see Import Button on the EarthWorX Ribbon)
Monitoring logistical traffic using GPS input
Using GraphWorX features as part of your interactive map, including shapes, 3D views, and layers
Access to multiple Map Systems
|
|
Note. If you are running GENESIS64 on Windows 7 and are using Multitouch, several Multitouch features are available to runtime users. For more information, refer to GENESIS64 Features on Windows 7. |
Examples of EarthWorX displays are provided in the GENESIS64 GenDemo.
GenDemo Examples

The remainder of this topic describes the basic features of the EarthWorX Viewer. For a more complete understanding of how to create an EarthWorX map, refer to Working With EarthWorX.
The figure below shows the initial display of an EarthWorX map in GraphWorX64. The Project Explorer on the left shows the selected EarthWorX Viewer object; SmartPins and PushPins are also listed here as well as other GraphWorX64 objects. Since you can only add one EarthWorX map to a display, only one is ever listed in the Project Explorer. Note the EarthWorX Configuration ribbon above the map, and the EarthWorX Viewer properties at the right. These features are described below.
An EarthWorX Sample Display

Notice that the EarthWorX Viewer in the Project Explorer has three icons next to it ![]() .
.
The Eye icon means you can see the EarthWorX map in the display; click the Eye and the EarthWorX map will be hidden in the display.
The lock means that the EarthWorX map layer is currently locked and can't be modified; click once on the lock to unlock the map.
The globe simply identifies the object as an EarthWorX map.
The EarthWorX Configuration ribbon is available in GraphWorX64 after you have added an EarthWorX map to the display. The ribbon appears when the EarthWorX Viewer object is selected in the Project Explorer. Use the ribbon to configure and manipulate the EarthWorX map that you are creating. You can learn more about this ribbon in the topic EarthWorX Configuration Ribbon.
EarthWorX Configuration Ribbon in GraphWorX64

In addition to the Ribbon are the EarthWorX Viewer properties, which display on the Properties tab when the EarthWorX Viewer is selected in the Project Explorer. Use these properties to also configure and manipulate the EarthWorX map. For detailed information, see EarthWorX Viewer Properties.
EarthWorX Viewer Properties

See also:
EarthWorX Control - Quick Start