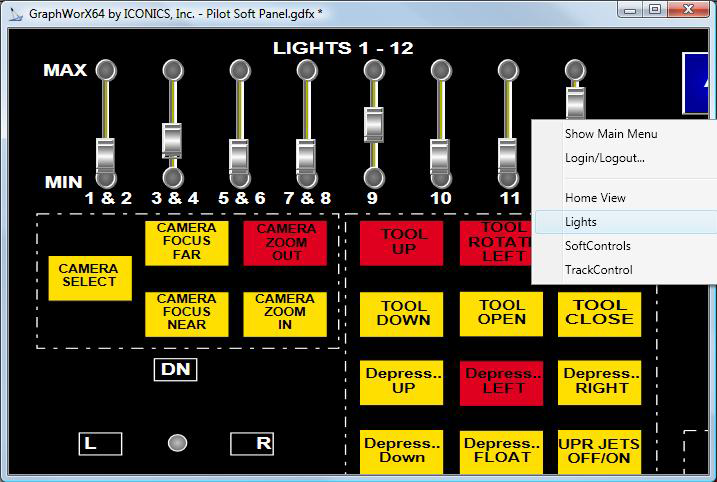
This runtime view focuses on the light switches of a large console. Note the presence of the right-click menu, which lists all available views in the display.
Some 2D GraphWorX displays may be quite large. To help runtime users navigate large or complex displays, you can create views that automatically zoom and scroll to areas of detail that runtime users need access to. A view is a snapshot of a portion or subsection of a display. The same pre-set views that you create for runtime users will be available to you during configuration. During runtime, users can right-click the display to see a list of views; in configuration mode, you can see a display's views by right-clicking the display and selecting Custom Views. Clicking on a view takes you to that view.
Some examples of how you might use views including the following. In a display that incorporates an EarthWorX map shows the North American locations of a corporation's industrial plants, you create views that show an aerial view of each plant's campus. Another display monitors valves, water pressure, and water levels at 35 stations; you create a view for each station or each cluster of stations so that runtime users can easily skip to that view to see a station's read-outs. A third display is a vast console in which runtime users can scroll left and right, or they can use views to go directly to a section of the console. Click here to see the Lights view of a larger console.
Before you begin, here are some strategies for creating 2D views:
When deciding which views need to be created in a GraphWorX 2D display, consider how much of the display needs coverage and at what zoom level do they need to be covered.
One view, typically the Home View, should show the display in its entirety.
Views can focus on high-use features of the display or areas where runtime users will need to react quickly.
When naming views, give them names that make their content obvious to runtime users.
If moving objects are part of the view, make sure the view encompasses the area that the objects move to if this is an intrinsic factor in the view. For example, if the view is intended to monitor vehicle locations based on GPS read-outs, make sure the view encompasses the entirety of the routes.
A view is not “aware” of the objects that appear in it. For that reason, if you rearrange the objects in a display, it is possible that you will need to reconstruct your views.
To create a new view in a 2D display:
Position the GraphWorX display so that your work surface shows exactly what you want to the view to look like. This may involve zooming in and out or scrolling up, down, left, or right to position the display. To do this, you can use the scrollbars, and the Zoom In and Zoom Out icons on the View ribbon. If the display contains an EarthWorX Viewer, you can use the Zoom levels in the map to zoom in and out. (For more information, refer to Zoom Capabilities in an EarthWorX Map.)
From the Zoom section of the View ribbon, click the Custom Views icon, then select Add Current View from the drop-down menu. The Custom Views dialog box displays.
In the Name field, type the name of the current view and click OK.
Click the Custom Views icon again to make sure the new view appears in the drop-down menu.
To rename, delete, or re-sequence a view:
From the Zoom section of the View ribbon, click the Custom Views icon, then select Edit Views from the drop-down menu. The Custom Views dialog box displays.
To delete a view, select the view from the list on the left, then click the Remove button.
To change a view's sequence in the list, select the view, then click the up or down arrow button.
To rename a view, select the view, then type the new name in the Name field.
Click OK when you are done. The dialog box closes.
Click the Custom Views icon again to make sure your changes appear in the drop-down menu.
After you have defined views in a display, runtime users can go from view to view. To do so, the runtime user simply right-clicks the view and selects one of the views from the list.
Alternatively, you can create a button that users can click to go to a specific view. For more information, refer to Set up a Button that Runs Views.
See also: