|
|
The features on this page require a GENESIS64 Advanced license and are not available with GENESIS64 Basic SCADA . |
|
|
The features on this page require a GENESIS64 Advanced license and are not available with GENESIS64 Basic SCADA . |
To Add a Custom Encoder/Decoder:
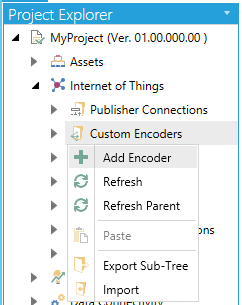
In the Workbench, expand a project and the expand the Internet of Things node. Right-click on the Custom Encoders/Decoders node, as shown below, and then click on Add Encoder/Decoder.
Add Encoder/Decoder from Project Explorer in the Workbench

-OR-
Select Custom Encoders/Decoders then click on the Add Encoder/Decoder button (shown below) in the Edit section of the Home ribbon in the Workbench.
Add Encoder/Decoder Button

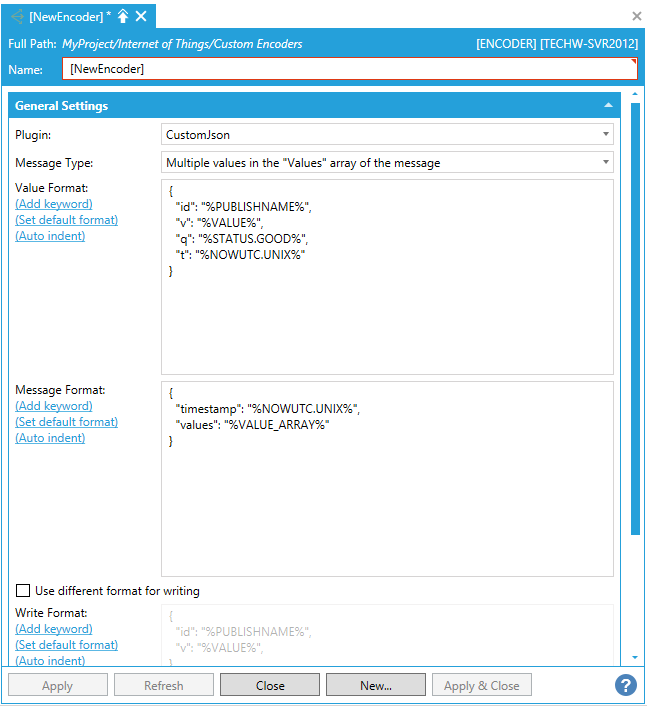
This opens the Custom Encoder/Decoder properties window, as shown below, in the Workbench. Enter a Name for the Custom Encoder/Decoder in the top text entry field.
Custom Encoder/Decoder Properties in the Workbench

Plugin - Use the pulldown menu to select from available plugins (e.g. CustomJson).
Message Type - Use the pulldown menu to select from 'Multiple values in the "Values" array of the message', 'One value for each message', Multiple values for each message', or "The whole message is a dataset".
Value Format - Enter the value format in the text entry field. Sample text is provided to demonstrate the syntax. Click on the Add keyword link to open the Keyword Selection Form window in order to select a keyword for the custom format for each property (Value, Message, Write). Click on the Set default format link to reset back to the default format shown. Click on Auto indent to automatically indent the message text.
If you selected the Message Type of 'Multiple values in the "Values" array of the message', you can now edit the Message Format section, utilizing the same links specified in 'Value Format' above. If you selected 'One value for each message', you will see the contents of the Value Format reflected in the Message Format field in real time.
Use different format for writing - Clicking this checkbox allows you to provide a different Write Format, utilizing the same links specified in 'Value Format' above.
When you have completed your settings, click on the Apply button. Click on Close to return to the Workbench. Your new Custom Encoder/Decorder will now appear in the Project Explorer.
See Also:
IoTWorX Configuration in Workbench