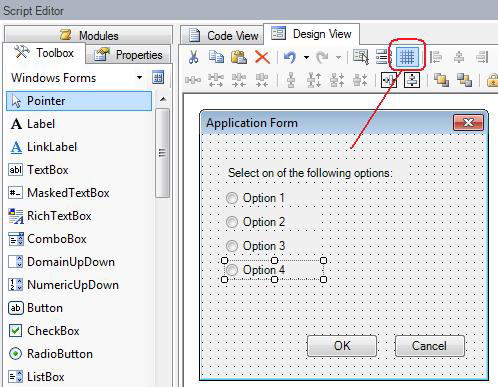
In the Script Editor, the Design View tab (shown on the right in the following illustration) is a graphical work area where you configure forms. This tab appears only when a form is selected in the Modules tab.
Design View Tab of the Script Editor
There are a few ways to create a form. To add a form from a GraphWorX64 display, see the steps in the Scripts that Use a Form or Dialog Box topic.
Alternatively, to create a form in the Script Editor, you can drag and drop controls from the Toolbox tab, format text and labels, and configure properties for the form as well as all objects contained in the forms. For an example of how to create a form, refer to Scripts that Use a Form or Dialog Box. After drawing components onto the form from the Toolbox tab, you can move them around and resize them as necessary on a work surface that is similar to the GraphWorX64 design surface. The Design View's form lets you resize objects and provides a grid and toolbar buttons that help you move and arrange objects in the dialog box. The form itself is an object that you can select and resize as necessary.
When you are working with the forms designer, the Toolbox tab lets you import selected .NET Windows forms controls (e.g. label, check box, combo box, etc.) into your forms, and the Properties tab lets you configure properties for your forms and objects within the forms. When you are designing a form in the Design View tab, the Script Editor automatically inserts properly formatted, color-coded, and commented text in the Code View tab. You can switch back to the Code View tab at any time to modify the code that is generated by the form designer.
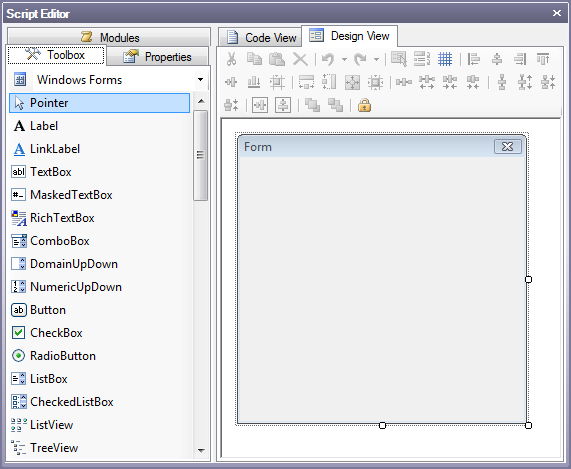
The toolbar in the Design View tab of the Script Editor, shown in the figure below, enables you to create and edit forms for scripts.
Design View Toolbar

Design View Toolbar Buttons
|
|
Cut: Puts one or more selected objects to the Windows clipboard, removing them from the work area. Cutting data or objects to the clipboard replaces the contents previously stored there. |
|
|
Copy: Copies selected objects to the clipboard. Copying data to the clipboard replaces the contents previously stored there. |
|
|
Paste: Places a copy of the objects currently in the clipboard into the work area. The objects remain on the clipboard until you copy or cut another object to the clipboard. Use this command to insert a copy of the clipboard contents at the insertion point. |
|
|
Delete: Deletes the selected objects from the work area. |
|
|
Undo: Reverses the last editing action. |
|
|
Redo: Restores the last editing action that was undone. |
|
|
Select All: Highlights all objects in the work area. |
|
|
Tab Order: Assigns a numerical value to items in the form designer that is used to define the navigation order for selecting controls via the TAB key during runtime. |
|
|
Toggle Grid: Shows and hides the grid on the selected form. |
|
|
Align Left Edges: Aligns the left sides of two or more selected objects. |
|
|
Align Horizontal Centers: Aligns the horizontal centers of two or more selected objects. |
|
|
Align Right Edges: Aligns the right sides of two or more selected objects. |
|
|
Align Top Edges: Aligns the tops of two or more selected objects. |
|
|
Align Vertical Centers: Aligns the vertical centers of two or more selected objects. |
|
|
Align Bottom Edges: Aligns the bottoms of two or more selected objects. |
|
|
Align to Grid: Aligns the selected objects to the form grid. |
|
|
Make Same Width: Makes two or more selected objects the same width. |
|
|
Make Same Height: Makes two or more selected objects the same height |
|
|
Make Same Size: Makes two or more selected objects the same height and width |
|
|
Size to Grid: Resizes the selected objects to fit the form grid. |
|
|
Even Space Horizontally: Puts an even amount of space (on the horizontal axis) between two or more selected objects in the work area. |
|
|
Increase Horizontal Spacing: Increases the amount of space (on the horizontal axis) between two or more selected objects in the work area. |
|
|
Decrease Horizontal Spacing: Decreases the amount of space (on the horizontal axis) between two or more selected objects in the work area |
|
|
Remove Horizontal Spacing: Removes the space (on the horizontal axis) between two or more selected objects in the work area. |
|
|
Even Space Vertically: Puts an even amount of space (on the vertical axis) between two or more selected objects in the work area. |
|
|
Increase Vertical Spacing: Increases the amount of space (on the vertical axis) between two or more selected objects in the work area |
|
|
Decrease Vertical Spacing: Decreases the amount of space (on the vertical axis) between two or more selected objects in the work area |
|
|
Remove Vertical Spacing: Removes the space (on the vertical axis) between two or more selected objects in the work area. |
|
|
Center Horizontally: Centers the selected object in the form on the horizontal axis. |
|
|
Center Vertically: Centers the selected object in the form on the vertical axis. |
|
|
Bring to Front: Moves the selected object in front of all other objects in the work area. |
|
|
Send to Back: Moves the selected object in behind all other objects in the work area. |
|
|
Lock Controls: Freezes all objects in the form designer so they cannot be moved/resized. |
In the Design View tab, right-clicking in the work area opens a shortcut menu, as shown in the figure below, providing you with convenient menu commands for designing forms.
Design View Shortcut Menu
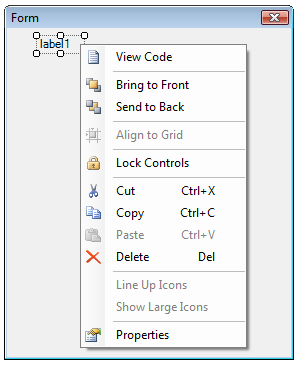
Design View Shortcut Menu Commands
|
Command |
Shortcut Keys |
Function |
|
View Code |
|
Switches to the Code View tab, allowing you to view and edit the form module code text generated by the form designer. |
|
Bring to Front |
|
Moves the selected object in front of all other objects in the work area. |
|
Send to Back |
|
Moves the selected object in behind all other objects in the work area. |
|
Align to Grid |
|
Aligns the selected objects to the form grid. |
|
Lock Controls |
|
Freezes all objects in the form designer so they cannot be moved/resized. |
|
Cut |
CTRL+X |
Moves one or more selected objects to the Windows clipboard, removing them from the work area. Cutting objects to the clipboard replaces the contents previously stored there. |
|
Copy |
CTRL+C |
Copies selected objects to the clipboard. Copying objects to the clipboard replaces the contents previously stored there. |
|
Paste |
CTRL+V |
Places a copy of the objects currently in the clipboard into the work area. The objects remain on the clipboard until you copy or cut another object to the clipboard. Use this command to insert a copy of the clipboard contents at the insertion point. |
|
Delete |
Delete |
Deletes the selected objects from the work area. |
|
Line Up Icons |
|
If you add "non-visual" components to a form, such as a Timer or an ImageList, an extra split window will appear at the bottom of the form editor containing icon representations of those non-visual components. Selecting Line Up Icons arranges all of the icons in the bottom window in a straight line. |
|
Show Large Icons |
|
Displays all icons for "non-visual" components in the bottom window as large icons. |
|
Properties |
|
Displays the properties for the selected form or control in the Properties tab. |
See also:
Scripts that Manipulate Objects at Runtime
Scripts that Use a Form or Dialog Box