![]()
Before you begin, make sure you understand Scripting Basics. You should also have some basic code experience in the .NET environment.
|
|
Before you begin, make sure you understand Scripting Basics. You should also have some basic code experience in the .NET environment. |
The Script Editor makes it easy for you to create dialog boxes or pop-up forms for use with scripts in your GraphWorX64 displays. You can create a form for any task you may have for your scripts. For example you may want to prompt runtime users to enter information, make a selection, or confirm an action. This topic makes use of an example to describe how to create and use forms with scripts that you create. Forms you create using the Script Editor can have any appearance that you want while you write your own code to handle the logic behind the form.
Start with a new GraphWorX display, then do the following:
Starting in configuration mode in GraphWorX64, add a button to your display. On the button's Dynamics tab, select the button's Pick dynamic, then for the Command property select the Run Script command. (For more information, refer to Buttons.)
In the middle of the Dynamics tab's toolbar, click the Events button ![]() . This displays the possible events related to this dynamic, which in this example is just the RunScript event.
. This displays the possible events related to this dynamic, which in this example is just the RunScript event.
Double-click on the RunScript event, which creates a function by using the dynamic's name and the dynamic performed. The Script Options dialog appears.
Select the Add a new Form check box. Also, select the Show Form as Modal check box so that the user cannot do any other action before confirming the information in the form.
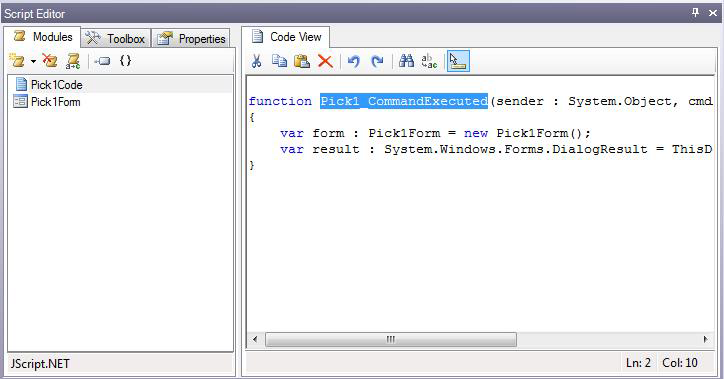
Click OK in the Script Options dialog. You will be brought to the Script Editor with the Modules tab (described in Modules Tab) on the left and the Code View tab (described in Code View Tab) on the right. Click here for an example.
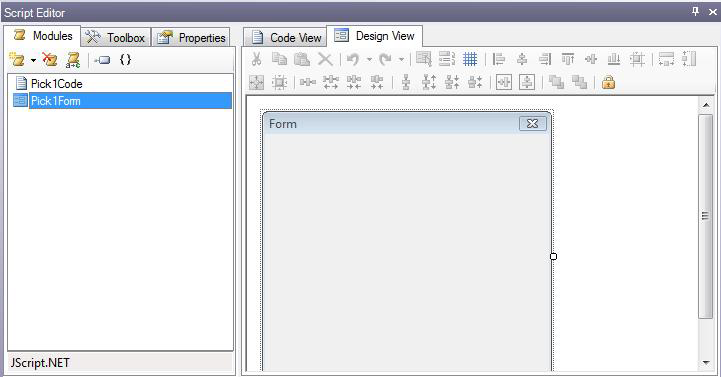
In the Modules view, select the form (in this example, it is called Pick1Form). This displays the form in the Design View tab (described in Design View Tab) on the right. Click here for an example. The form is empty, and is ready for you to design it. Now you will create a form that looks like the following:
Sample Form Created with This Example
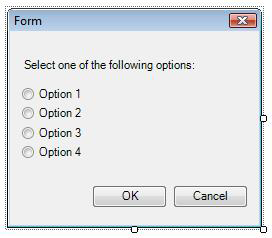
On the Script Editor's Toolbox tab, select the controls you want to add to the form and drag them onto the form. The top-most line in the dialog is a Label component, the next four lines are RadioButton components, and the OK and Cancel buttons are Button components. To create a component's text, select the component, then go to the Script Editor's Properties tab, and type the text in the Text property. Then return to the Design View tab to resize and position the components on the form. For help, refer to Toolbox Tab.
Next, you will create a handler for the OK and Cancel buttons' Click events, which will dismiss the dialog. You will also create a variable that will host the selection value, starting from the Selection property.
Go to the Code View tab. Just after the Pick1Form declaration, add the following property: public var Selection : int; . It will look like this:
// Pick1Form
public class Pick1Form
{
public var Selection : int;
This property’s value will be 1, 2, 3 or 4, depending on which option has been chosen. 1 is the default. The value will be 0 if the runtime user clicks the Cancel button.
Next, you're going to define the two event handler functions, starting with the OK button. On the Design View tab, double-click the form's OK button; this takes you to the Code View tab with the form's OK button code selected. Assuming that the OK button is button1_Click, define the event handler function like this:
public function button1_Click(sender : System.Object, e : System.EventArgs)
{
if (radioButton1.Checked) this.Selection = 1;
else if (radioButton2.Checked) this.Selection = 2;
else if (radioButton3.Checked) this.Selection = 3;
else this.Selection = 4;
form.DialogResult =
System.Windows.Forms.DialogResult.OK;
form.Close();
}
Now define the event handler for the Cancel button. On the Design View tab, double-click the form's Cancel button; this takes you to the Code View tab with the form's Cancel button code selected. Assuming that the Cancel button is button2_Click, define the event handler function like this:
public function button2_Click(sender : System.Object, e : System.EventArgs)
{
form.DialogResult =
System.Windows.Forms.DialogResult.Cancel;
form.Close();
}
The form itself is useless if you don't call it and bring it up in a script module. The code to call and show the form is automatically generated for you but you do need to integrate it so that, when the runtime user clicks the button you added back in step 1, it uses the form you just created. To do this, return to the Script Editor's Module tab and select the Code module (in this example, it is called Pick1Code); the Code View tab displays the module's code. It looks something like this:
function Pick1_CommandExecuted(sender : System.Object, cmdArgs : Ico.Gwx.CommandExecutionEventArgs)
{
var form : Pick1Form = new Pick1Form();
var result : System.Windows.Forms.DialogResult = ThisDocument.ShowModalScriptForm(form.Form);
}
To this code, add two additional lines so that the full function that brings up the form is as follows:
function Pick1_CommandExecuted(sender : System.Object, cmdArgs : Ico.Gwx.CommandExecutionEventArgs)
{
var form : Pick1Form = new Pick1Form();
var result : System.Windows.Forms.DialogResult = ThisDocument.ShowModalScriptForm(form.Form);
var selection : int = form.Selection;
MessageBox.Show("Result is: " + result + ", Selection is: " + selection);
}
This code instantiates and shows the form, getting back its DialogResult value. It defines a variable for reading the form’s Selection property, then shows the result and the selection to the user. (In a real application, you would use this information to take action rather than show it to the user.)
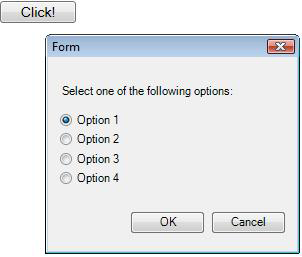
Click the Runtime button (at the top-right of GraphWorX64) to go to runtime, where the button you created in step 1 displays. Click the button to open the dialog box. You should see something like the following:
Runtime Version of the Button and the Form that It Opens
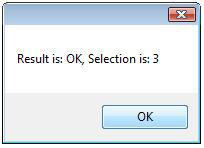
Click Option 3, then click OK. You should see a dialog box that looks something like the following:
The Runtime User Clicks OK
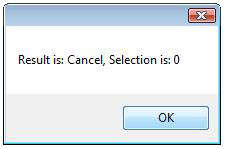
Click OK in this dialog box to close it. Click the display button again to open the dialog box, but this time click Cancel. You should see a dialog box that looks something like the following:
The Runtime User Clicks Cancel
To return to Configuration mode, click the Configure button.
See also:
Scripts that Manipulate Objects at Runtime
Adding Debugging Messages to Scripts