Source Tab (GridWorX Viewer)
After following the instructions in Adding a GridWorX Viewer, complete the following instructions to select a subscription and Data Tag.
- Use your mouse to outline an empty rectangle in your GridWorX viewer workspace.
- Click on the graph that appears. The Configure your Control dialog box is displayed.
- Click on Grid beneath the grid control. This opens the Source Tab properties for the grid, as shown below.
GridWorX Viewer - Source Tab
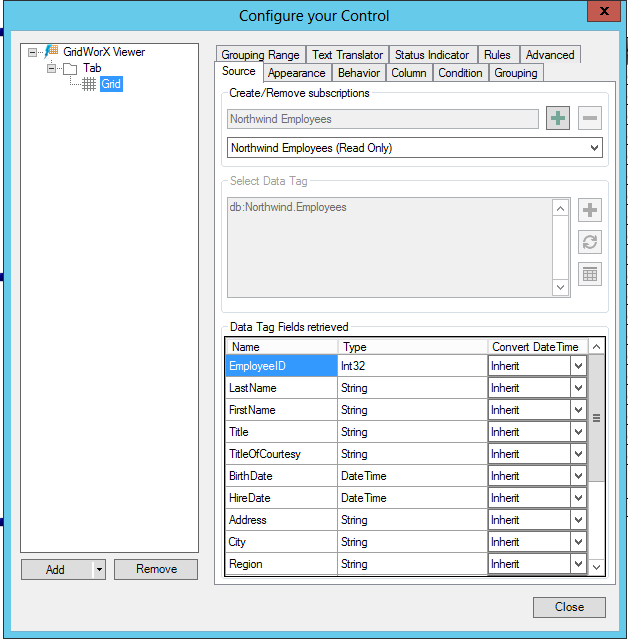
- In the Create/Remove subscriptions section, click on the plus button (+) to add a new subscription. You can also click on the minus button (-) to remove a listed subscription. Once added, you can confirm or edit the name of the subscription in the text entry field. You can also select an existing subscription to edit from the pulldown menu beneath the text entry field. Once you have added or are editing a subscription, this enables the Select Data Tag section.
- Click on the plus button to select a data tag. The Data Browser opens. Browse to your configured data source. For example, you may select Databases > SQL Server > Northwind > Data Sources > Customers. Click OK. The Data Tag Fields retrieved load into the Source tab. These are the data fields that will be added to the grid.
See Also:
Appearance tab
Behavior tab
Column tab
Condition tab
Grouping tab
Grouping Range tab
Text Translator tab
Status Indicator tab
Advanced tab
GridWorX Configuration Ribbon
Adding a GridWorX64 Viewer