Once your IoT device has been provisioned in the IoT Hub in your selected cloud service (e.g. Azure portal), you can then manage that device in the Workbench.
To Configure Your IoT Device in the Workbench
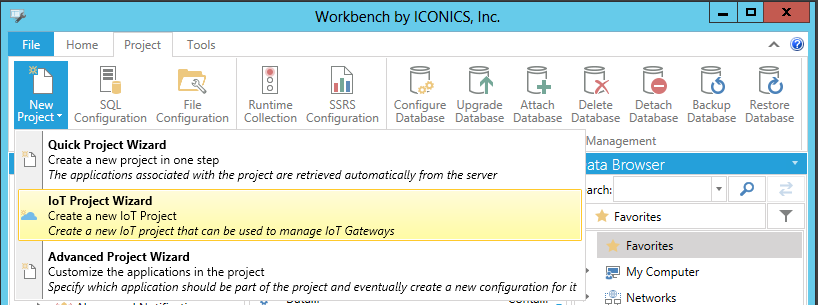
Open the Workbench then click on the New Project button in the Project Tools section of the Project ribbon, then on the IoT Project Wizard selection, as shown below.
New IoT Project Wizard Selection from the New Project Button in the Project Tools Section of the Project Ribbon in Workbench
-OR-
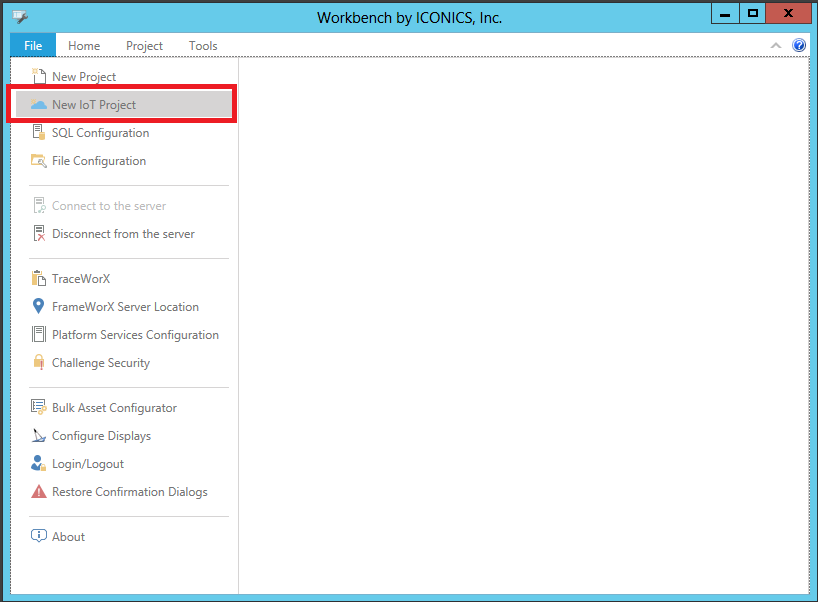
Click on File in the top left of the Workbench and then on New IoT Project, as shown below.
New IoT Project Selection in the File Menu of the Workbench
This opens the Create Azure project Wizard window, as shown below.
Create Azure project Wizard Window
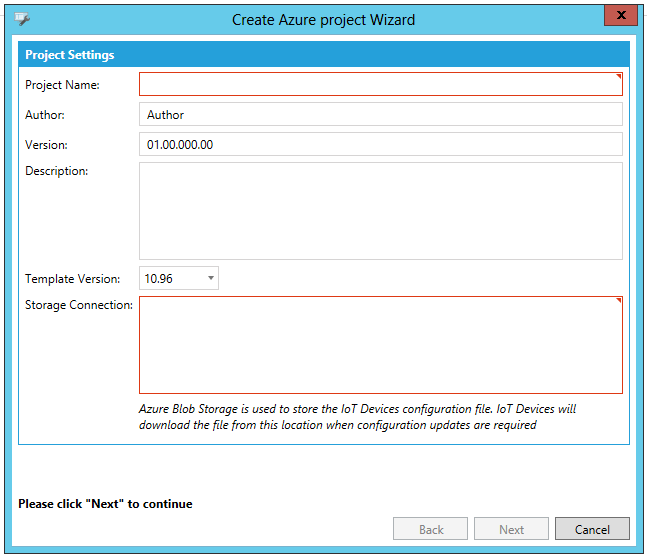
Project Settings
Project Name - Enter a project name for the IoT project in the text entry field.
Author - Enter the IoT project author's name in the text entry field.
Version - Enter the IoT project version number in the text entry field.
Description - Enter a description for the IoT project in the text entry field.
Template Version - Use the pulldown menu to select the ICONICS product template version to use. Backwards compatibility options are also available. See Create 10.95 IoT Projects and Templates.
Storage Connection - Enter the Azure storage connection location in the text entry field.
Note that Azure Blob Storage is used to store the IoT Devices configuration file. IoT devices will download the file from this location when configuration updates are required.
Note: Once the form is submitted, the procedure will try to retrieve all the available IoT devices and the configuration for each one of them. This may take several seconds due to the publisher's settings.
Once you have completed your settings, click OK.
Your added existing or new IoT subscriber connection(s) will make some changes to the Project Explorer in the Workbench. The new IoT Project(s) will appear. Double-click on an added IoT Project node in order to make any changes to its properties, shown below.
IoT Project Properties in the Workbench

General Settings
IoT Subscription - Enter a name for the IoT Subscription. This may already be filled.
Author - Enter the name of the project author if one is not already listed.
Version - Enter a version for the project if one is not already listed.
Description - Enter a description for the project if one is not already listed.
Last Update - This field will show the day/date/time of the last change to the IoT Project.
Click Apply to save your changes and Close to return to the Workbench.
See Also: