Working in the Unified Data Manager
The Unified Data Manager is a graphical front end to a stored database. The items you see in the Item tree are records in that database, and the values for each item are data stored with each record. In some instances such as expressions the UDM takes input and evaluates that input based on the formula defined, and then returns output to the GENESIS64 client that has requested the data.
To open the Unified Data Manager in the classic Workbench:
-
From the Windows desktop, click on Start > All Programs > ICONICS > Tools > Unified Data Manager.
-
Or, while in the classic Workbench, in the Project Explorer click on the Unified Data Manager button  in the tray at the bottom or the Unified Data Manager provider bar.
To create a new database or attach to databases:
-
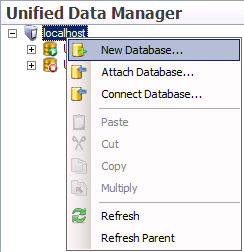
Right-click on the machine level node and click New Database from the menu. This opens the Create Database wizard.
Database Menu
-
Follow the steps in the wizard, which guides you through the creation of a new database.
Note: The Attach Database command launches a slightly different version of the Database Wizard where you must specify an attachment.
When you have two or more databases, only one can be active. To make a different database active,
right-click on the database node in the Project Explorer and select the Make Active command, or drop down the Database icon on the ribbon's Home tab. (Both methods are shown in the figure below.) As a result, in the Project Explorer the green database icon for the active database replaces the red database icon for the inactive database.
Menu commands for databases include: Make Active, New Database, Delete, Attach, Detach Connect, Disconnect, Upgrade, Backup, and Restore.
Database Right-Click Menu (Left) and Database Icon Menu (Right)

Folder and Items
The Workbench uses a system of folders and items for each of the different types of items that are stored in the Unified Data Manager. Each item node that you see opens a different type of data that is stored in the database, and each item type has its own data form.
To create a new item:
-
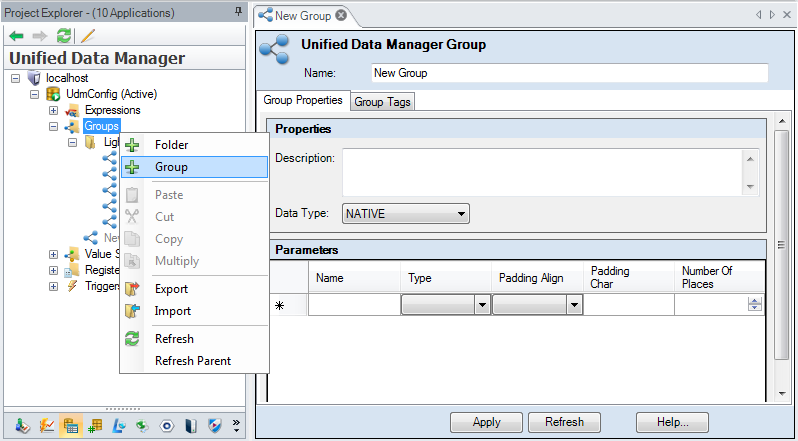
Right-click on the node name and select the + <item name type> command, as shown in the figure below.
-
Fill out the configuration form.
-
Click the Apply button to save your definition.
The New Group Command and a Configuration Form
To create a new folder:
-
Right click on the item type node and select the + Folder command, as shown in the figure above.
-
Enter a name for the folder in the Name text box; then click the Apply button.
-
Create new items that your folder will contain.
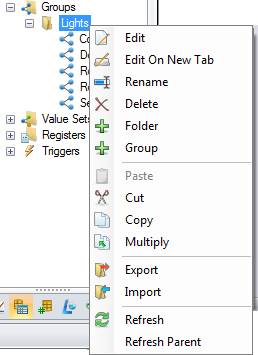
You can create subfolders and items at the folder level, but both of these commands are missing at the item level. The context menu for a folder is shown in the figure below.
Folder Context Menu
Each of the different configuration forms are described in the following topics:
Cut, Copy, Paste, Multiply
If you have items or folders that can be used in other locations or could serve as a template for other items, use the Cut, Copy, and Paste commands to move these items around. The Multiply command is particularly convenient for creating a number of new items. Shown below is the Multiply Options dialog box.
Multiply Options Dialog Box

After entering the number of items you will create in the Number of items combo box you can alter the Base Values, first number of the item added to the name and the number of decimal places in the Numeric Places combo box. For example, if you change Complete to Full, enter a first number of 1 and set the numeric places to 3 when you click OK you see the items Full001, Full002, Full003, Full004, and Full005 appended to your list of items or folders.
See also:
Unified Data Manager