A Value Set allows you to write pre-configured sets of values into a group of data tags. The Value Sets tree control in the Unified Data Manager enables you to configure sets of values for data tags. Features of Value Sets include:
Create and edit Value Sets.
Create folders for Value Sets.
Value Sets are available as read/write data tags with string data type.
Parameters are supported.
Values are written synchronously to target OPC servers.
Import/export ValueSet item configurations from/to XML files.
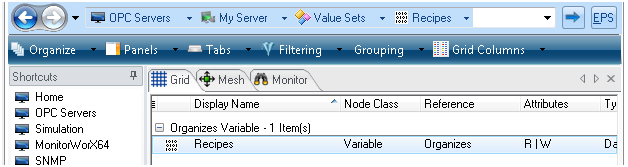
Each group of tags is represented by a Value Set data tag. ValueSet data tags are organized in a tree structure of folders and Value Set items. Any write to a ValueSet data tag distributes written values to all data tags included in the Value Set; all included data tags will have the same value as the Value Set data tag. ValueSet data tags are organized in a tree structure of folders and Value Set items. Once you have configured Value Sets, they can be accessed from many applications via the appropriate tab in the Unified Data Browser.
To create a new value set:
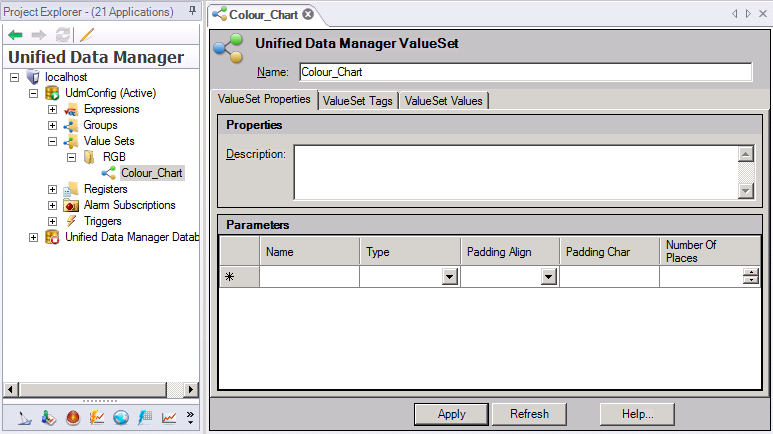
In the Unified Data Manager, right-click the Value Sets node and select Value Set from the menu.
Enter a unique name In the Name field.
Enter a description in the Description field (optional).
Value Set Properties
Enter any parameters desired assigning them a name, type (number or string), padding alignment (none, left or right), the characters used to pad with (e.g. 0's), and the number of places that the parameter will be padded up to (optional). Parameters are explained in the section below.
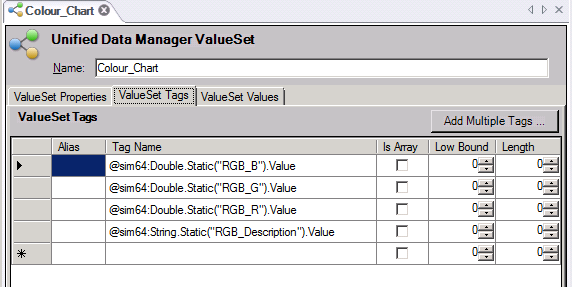
Go to the Value Set Tags tab (shown in the figure below) to assign a tag to a value set. A Value Set data tag can contain an unlimited number of data tags. Specify one or more tags that will be included in the Value Set data tag.
ValueSet Tags Tab
To add one tag at a time, click the ellipsis button [...] on the line where you are adding it. (Note that to enable the ellipsis button, you must first click in the Tag Name column.) Clicking the ellipsis button opens the Data Browser where you can select a tag and click OK; the tag gets added to the Group Tags tab.
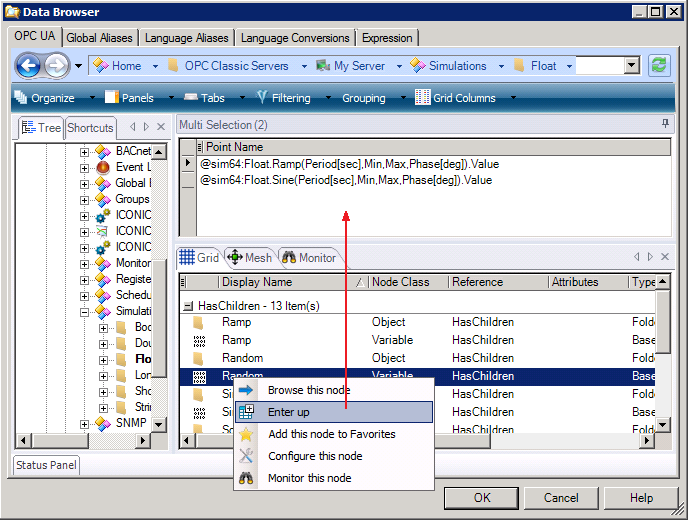
To add several tags at once, click the Add Multiple Tags button. This opens the Data Browser in the multi-selection mode illustrated below, where you can:
Right-click on a tag in the Data Browser and click Enter Up. The tag gets added to the Point Name box.
Continue to add tags. The Point Name box will accumulate the tags you add to it.
Click OK to close the Data Browser and return to the Group Tags tab. All of the accumulated tags will appear on the tab.
Using the Enter Up Option for Adding Multiple Tags
Back in the Value Set Tags tab, you can provide an Alias for each tag. The alias is really just a label for the tag, and is used as the tag's heading in the Value Set Values tab where you will be assigning values for the tag. It serves as a usability feature. If you don't provide an alias, the value in the Tag Name column will be used as the tag's heading in the Value Set Values tab.
Also for each tag, define whether the tag is an array of values, limit the low value, and set the length of the value returned (optional).
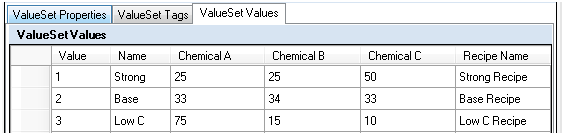
Go to the Value Set Values tab to associate a data tag with each Value Set value in the list you create. Note the columns on this tab (as shown below). There is a Value column, and then a Name column. Then there is one additional column for each value set tag. In the example below, these columns are labeled using the tag name; however, if you provided aliases on the Value Set Tags tab, the aliases appear as the column headings instead of the tag names.
ValueSet Values Tab

On the Value Set Values tab, enter the values that are part of the value set that are part of each tag, which is represented by the columns in the grid.
Enter the first Value. By default, the value is used as the Name, too, but you can change the name if you like.
For each value line, specify the corresponding value to be assigned to each data tag.
Click the Apply button to enforce your settings.
Parameters are client-driven, and they do not change the number of requested data tags in runtime. Parameters can replace parts of data tag names by values passed in the Value Set data tag name. Each parameter can be an integer or a string data type with optional formatting. Click the Add button to select add a parameter to the list. Once the parameter tag is added to the list, you can click the Remove button to delete the parameter from the list, or you can click the Move Up and Move Down buttons to change the order of the parameter in the list.
Each data tag may support parameters that could modify names of the data tags. Each parameter can be integer or string data type with optional formatting. The table below shows possible formatting for each supported data type. The client application passes configured parameter values as a part of the full data tag name. Parameters are client driven, and they do not change the number of requested data tags in runtime. Parameters can be integer or string values. These values are then formatted using pre configured format data, and then they replace specific parts of a data tag name by values passed in the data tag name. Parameters are delimited with specific characters (e.g. ICONICS .Simulator.1\SimulatePLC\Ramp<<Parameter1>>) in the data tag name.
Below are examples for working with value sets.
Adding a new Value Set

NOTE: You do not have to use aliases, but as you will see in the next step, they will help you identify the tags under when on the ValueSet Values tab.
Example ValueSet Tags configuration

Example ValueSet Values configuration
Selecting a Value Set
See also: