An alarm subscription defines a connection to an alarm server. It is possible for a server to have more than one subscription. In fact, it is a very effective way to achieve filtering. The Alarm Subscriptions tree control in the Unified Data Manager enables you to set up subscriptions to OPC UA AE and legacy Alarm & Events servers. Within the Unified Data Manager you can manage the following aspects of alarm subscriptions:
Create and edit alarm subscriptions.
Create folders for alarm subscriptions.
Provides global management of alarm subscriptions.
Choose between local or global alarm subscriptions.
To create a new alarm subscription using the UDM:
Click Start > All Programs > ICONICS > Tools > Unified Data Manager.
Expand the folder for the host, then expand the Unified Data Manager configuration database.
Right-click on the Alarm Subscriptions node and select the New Alarm Subscription command from the context menu.
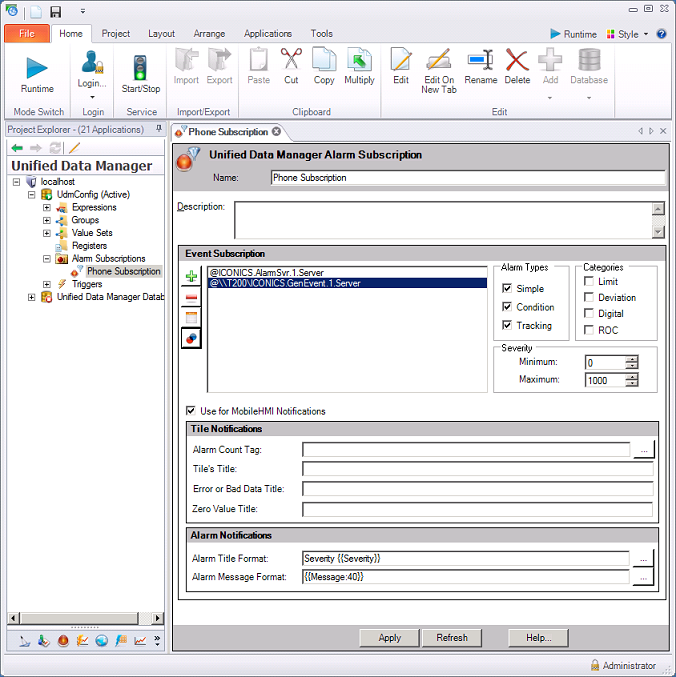
In the Name field, type a name for the new folder, as shown in the Event Subscription form below.
Enter a description of the subscription in the Description text box (optional).
Event Subscription Form
An event point is the alarm data from the data source. Click on the Plus icon ![]() to add an Event Point to your subscription. (Clicking the Minus button
to add an Event Point to your subscription. (Clicking the Minus button ![]() deletes the currently selected event point.)
deletes the currently selected event point.)
The Uniform Data Browser appears, allowing you to select the alarm tag that is part of the alarm subscription. Double-click the tag of interest, or highlight the tag and click the OK button to return to the Unified Data Manager.
|
|
Note. You must use either all global subscriptions or all local subscriptions; global and local subscriptions cannot be mixed. |
To set the alarm server properties use the fields on the right: Alarm Types, Categories, and Severity. Set the alarm types and severity of the events that are monitored as well as the categories of alarms (Limit, Deviation, Digital, and/or ROC [Rate of Change]). For help understanding and using these fields, refer to the Limiting Alarms by Event Type and Category topic.
Add/Remove Fields From the Subscription Dialog Box

At the left of the subscriptions box, click the ![]() button and use the Aggregate Fields dialog box (shown below) to edit column sequence for fields by selecting a number from the Column Map column. It is important to note that the sequence of the subscribed attributes does matter. Their sequence determines the order in which they are be selected from the alarm server, and it also determines the viewer attribute column they are associated with. Click OK when you are done.
button and use the Aggregate Fields dialog box (shown below) to edit column sequence for fields by selecting a number from the Column Map column. It is important to note that the sequence of the subscribed attributes does matter. Their sequence determines the order in which they are be selected from the alarm server, and it also determines the viewer attribute column they are associated with. Click OK when you are done.
Add/Remove Fields From the Subscription Dialog Box

If the subscription will be used for a MobileHMI notifications, put a check mark in the Use for MobileHMI Notifications check box; as a result, a number of MobileHMI options appear on the tab. Enter the Tile Notifications and the Alarm Notifications.
Click the Apply button to complete your alarm subscription definition.
|
|
Warning. In order for the alarm subscriptions to be active the AlarmWorX64 Server must be running. You should check the status of the traffic light icon to ensure that the light is green; if not, click the Start/Stop icon on the Home ribbon to turn the service on. |
See also: