Fault Definitions Tab
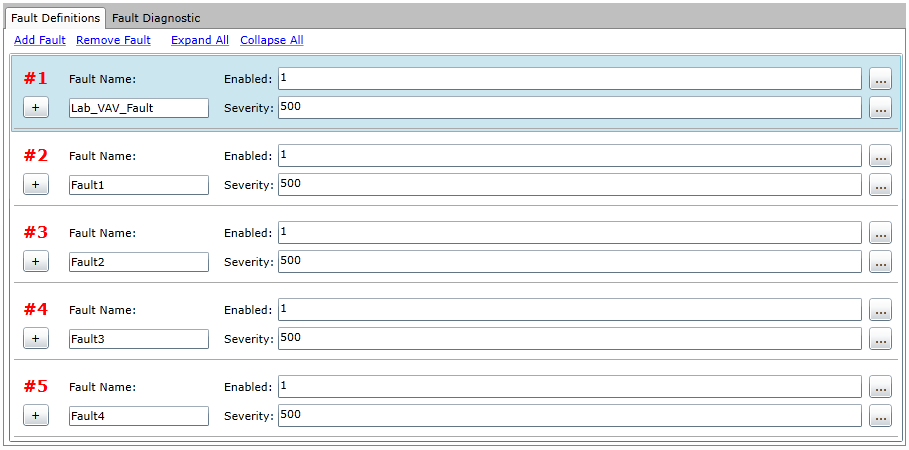
Once you have added the FDDWorX tab to the asset's Equipment form in the AssetWorX provider in the Workbench, you'll be able to add (and then eventually select) from a list of added Faults. The image below shows the initial state of the Fault Definitions tab within the FDDWorX tab in the selected asset's properties.
|

|
Note: This tab is also available for equipment classes. All equipment classes are defined within the AnalytiX Catalog in the Equipment Classes node. In AssetWorX, you can define and use equipment classes as templates for creating nodes in the asset tree. You can also use aliases in your equipment classes; these aliases will prompt you for actual properties of equipment as you use the equipment classes to define nodes in the asset tree. For more information, refer to the Introduction to Equipment Classes (Templates) and Creating Equipment Classes for Use as Templates topics.
|
To Set a Fault
-
Click on Add Fault. You'll see a single fault section appear. At any point, if you click on Add Fault again, it will add a second fault beneath the first, then a third, etc. You can remove any individual fault by first selecting it, then clicking Remove Fault. You can collapse multiple faults, using Collapse All, to make a fault list easier to view or you can expand them, via Expand All.
-
In a newly added fault, the Name field, enter a name for the fault.
|
|
Note: The fault name can be any description attributed to any state of operation for the asset to which the user wishes to be alerted. It does not necessarily have to correlate to specific alarms or conditions. In our example, we have set a fault for "Machine 1 Malfunction" that does not specify any cause or symptom.
|
You may need to click on the fault name again in order to further edit the fault's details in the right side of the window, as shown below:
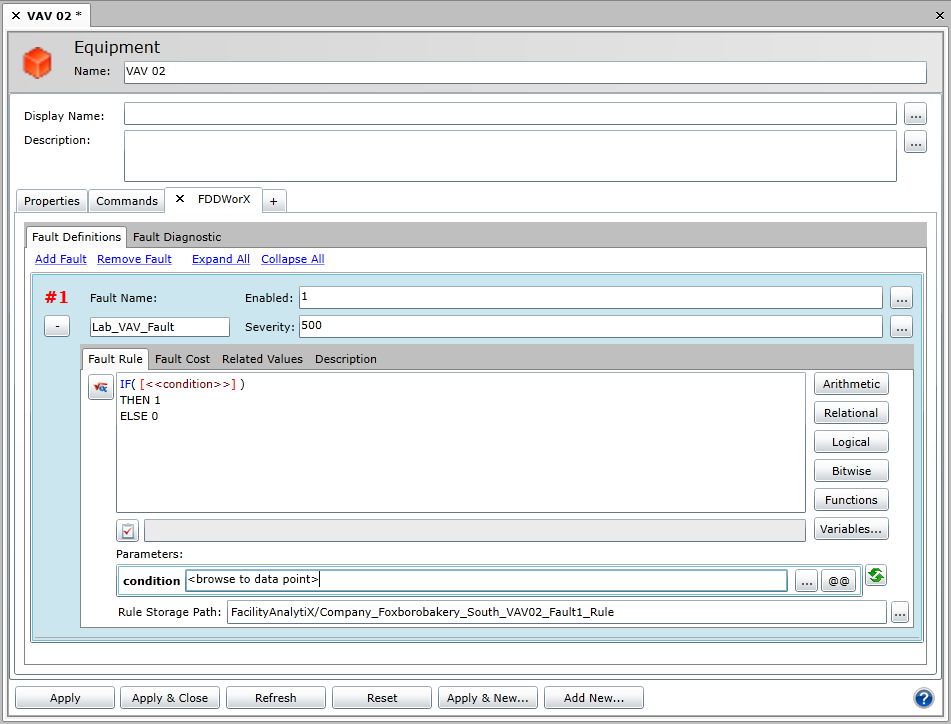
Fault Definitions Tab - Fault Rule Subtab
-
You can now make changes to the Enabled and Severity options. By selecting the ellipsis [...] button next to either option, the ICONICS Expression Editor appears (with options for Arithmetic, Relational, Logical, Bitwise, Functions or Variables in your expression).
-
The Fault Definitions tab contains four sub-tabs: Fault Rule, Fault Cost, Related Values and Description.
-
In the Fault Rule subtab, shown above, you can enter the rule to associate with the fault. You have the option of creating a new rule, editing an existing rule, importing a rule, or setting additional rule parameters. If you would like more screen space to type a complex fault rule expression, you can select the Pop Up Fault Rules Editor button [ ] to open a pop-up window with an expanded fault rule editing area. Any changes that you make to the fault rule expression in the pop-up window are reflected in the original Fault Definitions Tab, and vice versa.
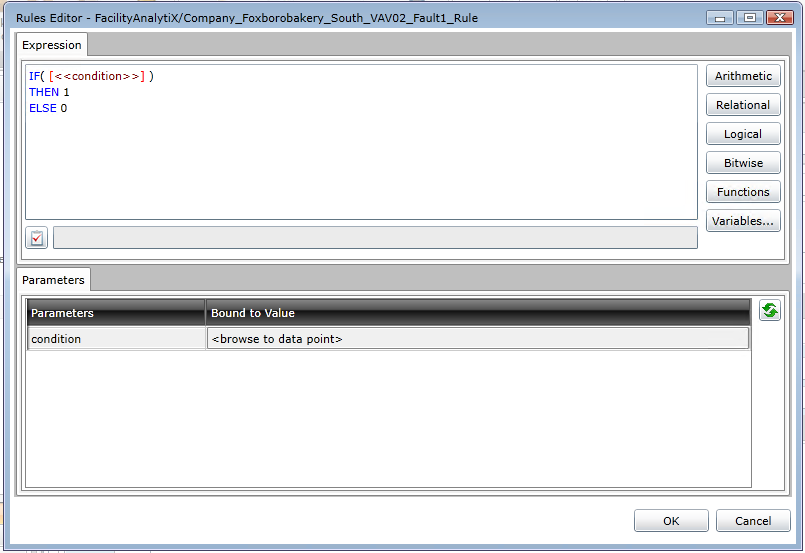
Similar to the Expression Editor, the Rules Editor allows you to use Arithmetic, Relational, Logical or Bitwise expressions, as well as Functions or Variables. Clicking on the Variables button opens the Data Browser, allowing you to search for the data source related to your Fault.
You can then set the Fault Rule's Parameters vis the context-sensitive text entry field. Some selections within the Fault Rule will activate certain options in the Parameters section in order to set related options. Click on the Refresh Parameters [ ] button to ensure you select from the most updated options.
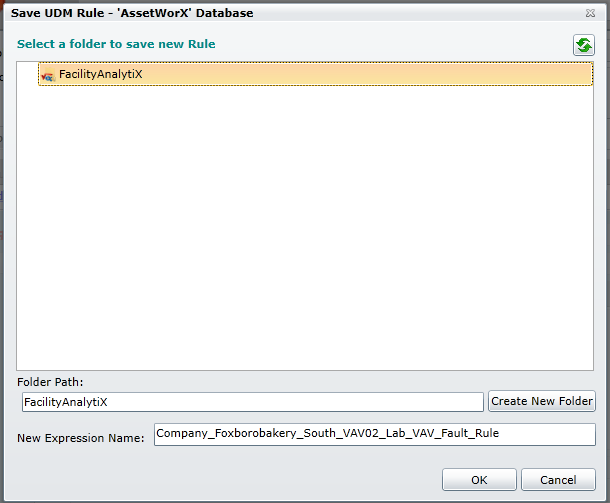
Next, you can set the Rule Storage Path by entering it in the text entry field or by clicking the ellipsis button [...] and using the Save UDM Rule window to select a folder location. You can select the default folder or click the Create New Folder button. You can also change the expression name at this time, if you prefer. Click OK again to save the fault rule in the selected location and return to the Fault Definitions tab.
Once you return to the Fault Definitions tab, you'll notice that the Fault Rule section of the Fault Definitions tab has been updated.
Click Apply to save your settings.
-
In the Fault Cost subtab, shown below, you can enter the cost to associate with the fault. You have the option of creating a new cost, editing an existing cost, importing a cost, or setting additional cost parameters.
Fault Cost Subtab
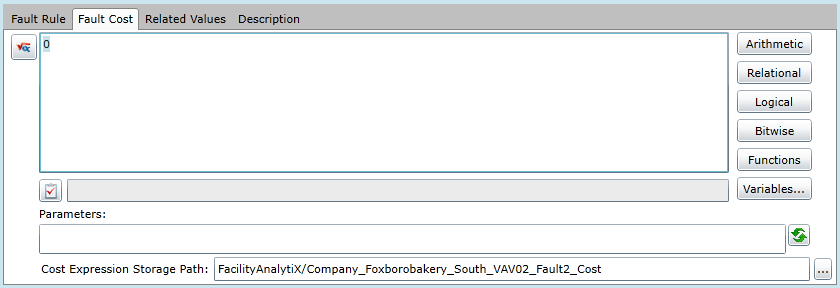
If you would like more screen space to type a complex fault cost expression, you can select the Pop Up Cost Rules Editor button [] to open a pop-up window with an expanded fault cost editing area. Any changes that you make to the fault cost expression in the pop-up window are reflected in the original Fault Definitions Tab, and vice versa.
Similar to the Expression Editor, the Cost Editor allows you to use Arithmetic, Relational, Logical or Bitwise expressions, as well as Functions or Variables. Clicking on the Variables button opens the Data Browser, allowing you to search for the data source related to your Fault.
You can then set the Fault Cost's Parameters vis the context-sensitive text entry field. Some selections within the Fault Cost will activate certain options in the Parameters section in order to set related options. Click on the Refresh Parameters [] button to ensure you select from the most updated options.
Next, you can set the Cost Expression Storage Path by entering it in the text entry field or by clicking the ellipsis button [...] and using the Save UDM Rule window to select a folder location. You can select the default folder or click the Create New Folder button. You can also change the expression name at this time, if you prefer. Click OK again to save the fault cost in the selected location and return to the Fault Definitions tab.
Once you return to the Fault Definitions tab, you'll notice that the Fault Cost section of the Fault Definitions tab has been updated.
Click Apply to save your settings.
-
In the Related Values subtab, shown below, for each Related Value (or FaultCost) that you wish to create, either type in a static value in the provided text box or click on the ellipsis [...] button to browse for an OPC tag.
Related Values Subtab
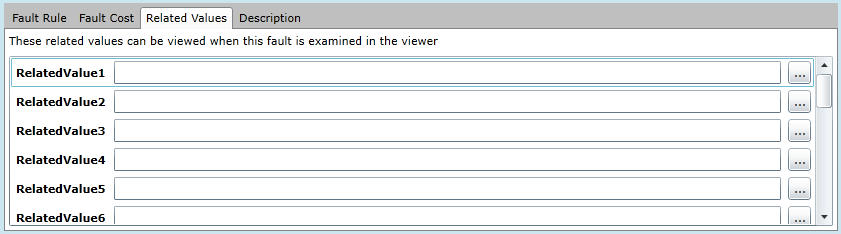
You can add up to 20 values that you wish to capture as part of the fault whenever the fault condition occurs. You can view these related values when you examine faults in the FDDWorX Viewer.
-
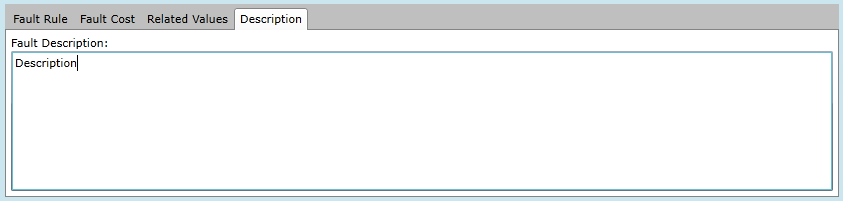
In the Description subtab, shown below, you can enter a description in the Fault Description text entry field to help differentiate each individual fault.
Description Subtab
-
In order to save the changed status of the Fault Definitions Tab (with the newly added Fault Rule), you must either click on the Apply button at the bottom of the tab window within the Project Explorer (and can then proceed to make additional changes to the same Fault Definition) OR click on Apply & Close to save your settings and then return to the main Project Explorer by closing the tab OR click on Refresh to update the Fault Definitions tab itself OR click on Reset to return the state of the Fault Definitions tab to the last saved settings OR click on Apply & New to save the current settings while creating a new fault definition OR click on Add New... to change the settings for an additional asset.
See Also
Define a Fault
Fault Diagnostic Tab
Add a FDDWorX Diagnostic Model to a Selected Asset
Using Diagnostic Matrices in the AssetWorX Provider