![]()
![]()
GENESIS64/the Workbench enable you to connect to several different types of open databases. Once you have connected to a database, you need to specify which data will be retrieved from the database and be displayed in the report template. The Database Connection screen lets you create reusable connections to different types of databases.
You can establish a connection to an existing database or create a new database.
You can connect to the following database types:
Generic OLEDB Connections [Generic OLEDB, Oracle OLEDB, SQL Server OLEDB]
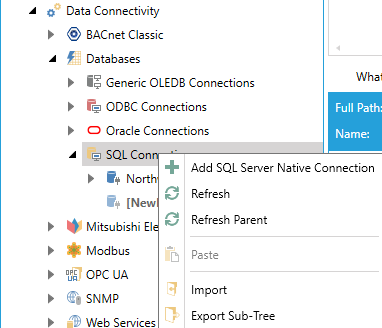
Open the Workbench. Expand your project folder, then the Data Connectivity node, then the Databases node. Expand the folder of your selected database connection and then click on your desired connected database (see the bulleted list above for options). For instance, in the following image, we've expanded the SQL Connections folder to select the Northwind database. Once selected, you can view/edit the database connection's settings, as shown below.
Selecting a Database Connection
To Create a New Database Connection
Open the Workbench. Expand your project folder, then the Data Connectivity node, then the Databases node.
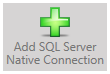
Right-click one of the listed connections folders (Generic OLEDB Connections, ODBC Connections, Oracle Connections, or SQL Connections), then select Add [SQL Server Native Connection]. In this example, we will create a new database connection within the SQL Connections folder. You could perform this same action for an Oracle connection, etc.
Add SQL Server Native Connection in Project Explorer
-OR-
Select one of the listed connections folder, then click on the Add [SQL Server Native Connection] button, shown below, from the Edit section of the Home ribbon in the Workbench.
Add SQL Server Native Connection Button
This opens the Database Connection properties, shown below, in the right side of the Workbench.
Database Connection Properties
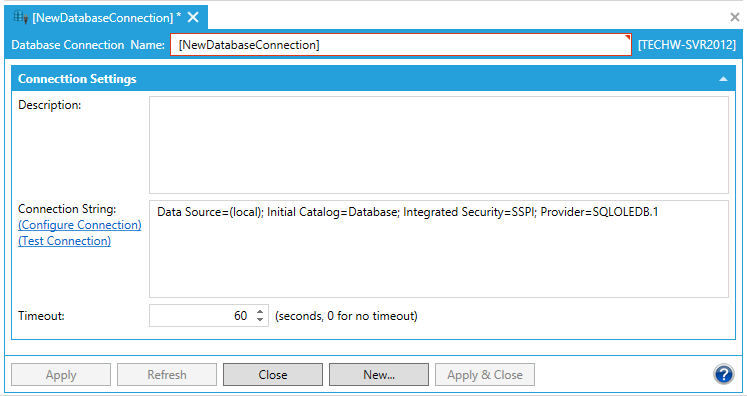
Enter a Description in the text entry field.
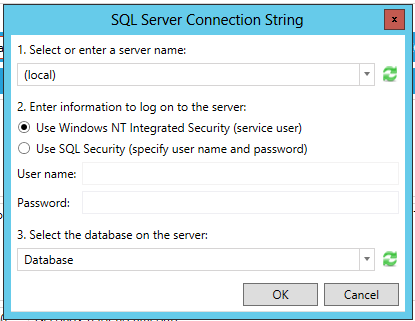
Connection String - Click on the Configure Connection link. This opens the SQL Server Connection String window, as shown below. Follow the numbered steps in the window to select a server, enter log in information for that server and then select the database. Click OK to return to the Data Connection properties. The selected information from the window will now populate the text entry field to the right.
SQL Server Connection String Window
Click on the Test Connection link to verify your connection configuration. You will see the following window if your configuration is working properly.
Success Window
Click OK to return to the Data Connection properties.
Timeout - Enter a time, in seconds, for a timeout in connecting to the entered database. '0' means no timeout.
Click Apply to save your settings. Click Close to close the Database Connection properties.
See Also: