|
|
The features on this page require an add-on to work with GENESIS64 Basic SCADA. |

![]()
|
|
The features on this page require an add-on to work with GENESIS64 Basic SCADA. |
![]()
Please Note: Due to a recent acquisition of Nexmo by Vonage you may see Nexmo and Vonage used interchangeably in the product as well as online.
Go to https://dashboard.nexmo.com/sign-up and sign up for a Vonage account.
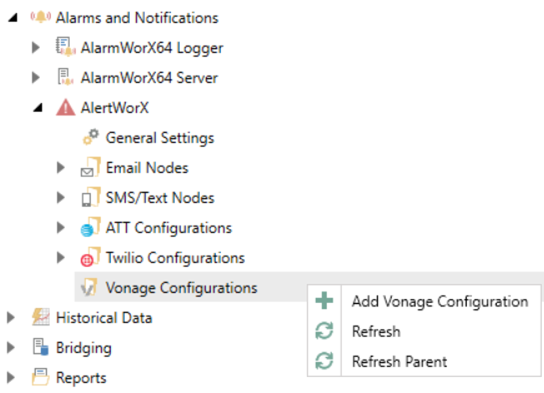
Go to Alarms and Notifications>AlertWorX>Vonage Configurations. Right-click and select Add Vonage Configuration, as shown below.
Add Vonage Configuration
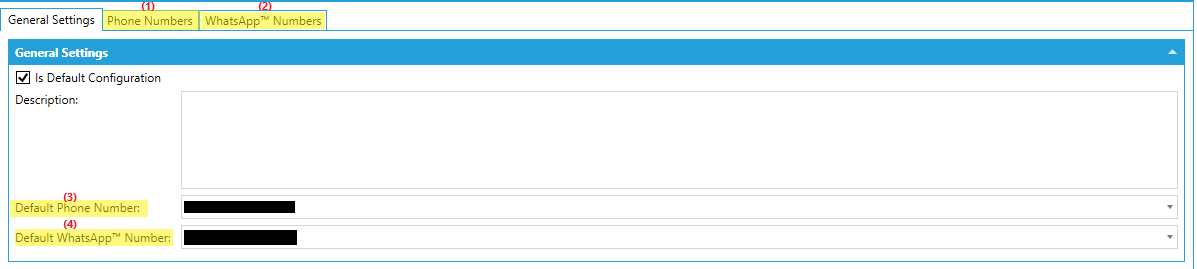
Check the “Is Default Configuration” box at the top to set the configuration as default.
Set up the Phone Number and WhatsApp Number with it’s token in the highlighted tabs (1, 2 respectively in the image below). Select the ones that you want to use as default ones under Default Phone Number (3 in the image below) and Default WhatsApp Number (4 in the image below). If the default Phone number is not selected, SMS and voice messages will not be sent. And if default WhatsApp number is not set, WhatsApp message cannot be sent.
General Settings, Phone Numbers, and WhatsApp Numbers Tabs
Set up the API Key and API Secret under the Credentials Tab. You can find these here https://dashboard.nexmo.com/settings.
Credentials Section

You will need to have a WhatsApp business account set up with Vonage to use WhatsApp and the template should be an extension of MsgID: {{1}} Msg: {{2}} You can read more about WhatsApp Templates here: Click HERE for more info on WhatsApp Templating.
Following the above steps sets up SMS and WhatsApp. Below steps will additionally set up voice.
Go to https://dashboard.nexmo.com/applications. Create an Application and give it a name.
Enable voice.
Generate the Public and private key and store the downloaded private key as Nexmo.key to C:\ProgramData\ICONICS\pki\own\private or the OEM equivalent of this location.
Copy the Application ID to the Workbench.
Link the Vonage number to this newly created application in the Vonage dashboard online.
Once you Link the number to the above application, save the private key in correct location and provide the Application ID, you should be able use text to talk.
For localizing voice calls, go to https://developer.vonage.com/voice/voice-api/guides/text-to-speech#supported-languages.
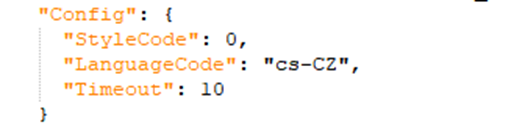
Find the language and copy the Code and the style of the language that you require to the Language Code and Style Code of WB form respectively. Language Code determines the language and Style Code determines the style/accent/tone. You can see that a sample audio is provided in Vonage link above.

If using IcoWebAPI for acknowledge purpose,
1. You need to add the same settings under Config in "C:\Program Files\ICONICS\GENESIS64\WebSites\IcoWebAPIService\IcoNexmo.json" to have it picked up.
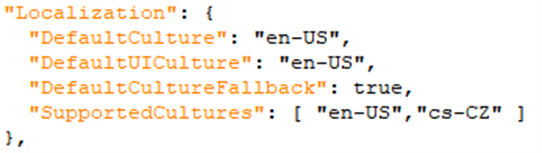
2. In "C:\Program Files\ICONICS\GENESIS64\WebSites\IcoWebAPIService\appsettings.json”, add the language code to supported cultures.
3. Additionally, for localizing instruction for acknowledge, you will need to add the localized string like those in "C:\Program Files\ICONICS\GENESIS64\WebSites\IcoWebAPIService\IcoNexmo.en-US.json" to get those strings to be localized to a new file ending in your language code.
For example, to have the cs-CZ played for Acknowledge texts, you will need to add "IcoNexmo.cs-CZ.json" with the same keywords, but with a translated text as values.
Once these are set up you can test this configuration in the Test this Configuration section.
Test this Configuration Section

Ensure that the configuration is set to default and AlertRest service is running.
Enter a number to which you want to send message (format 15555555555) in the ‘To Number’ field.
Use ‘Test Sms’, ‘Test WhatsApp’ or ‘Test Voice’ buttons to test that it is working.
Apply all your changes.
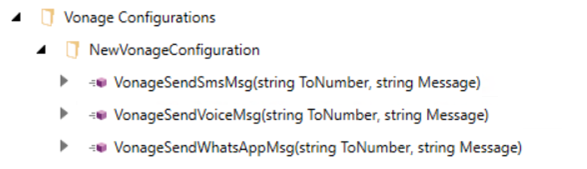
Note: Once a Default configuration is set, you can see that the methods show up under the Data browser.
Vonage Configurations
See Also:
Setting up Vonage Plugin in IcoWebAPIService