|
|
The features on this page require an add-on to work with GENESIS64 Basic SCADA. |

![]()
|
|
The features on this page require an add-on to work with GENESIS64 Basic SCADA. |
![]()
AlertWorX allows you to configure Email notifications within the Workbench.
To Configure Email Notifications:
1. Start the Workbench, then expand your project. Next, expand the Alarms and Notifications node to show the AlertWorX node. Expand the AlertWorX node to show the Configurations node. Expand the Configurations node to show the Email node.
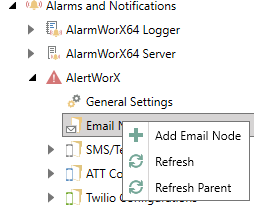
2. Right-click the Email node in the navigation tree and select Add Email Node, as shown in the figure below.
Add Email Node from the Project Explorer
-OR-
Select the Email node in the Project Explorer, then click on the Add Email Node button, shown below, in the Edit section of the Home ribbon in the Workbench.
Add Email Node Button

3. This opens the Email Node properties window, shown below, beneath the Project Details section in the Workbench. Enter a unique name in the Name text entry field.
Email Node Properties

4. You can enter the Node name of the Alert Email Service in the text entry field. Next, enter the Mail Server to connect to. Provide the Username and Password for the mail server, as well as the Port number (typically 587).
Note: If you are using Office365 email, multi-factor authentication must be disabled for the email account. In case you have authentication issues, find more information here. When using Gmail, create an App Password for your Google account and enter these credentials as the username and password, or use a Google OAuth2 authorization. See more details here.
Select the Enable SSL Security checkbox if the mail server requires an SSL/TLS security connection.
Select the Use UA Points checkbox when Notification Message Fields are loaded as data points.
If you select the Receive commands on this node, this node will receive commands from the client.
5. If you have checked the Use UA Points checkbox, the Send and Status fields will be activated. In the Send text entry field, you can enter a data source that will transition from False to True to cause a message to be sent or click on the  button to open the Data Browser and select that data source.
6. The Status field is also active only when the Use UA Points checkbox is checked. This field can be used to enter the status of the Sent message. You can also click on the button to open the Data Browser and select a data source to populate the Status field.
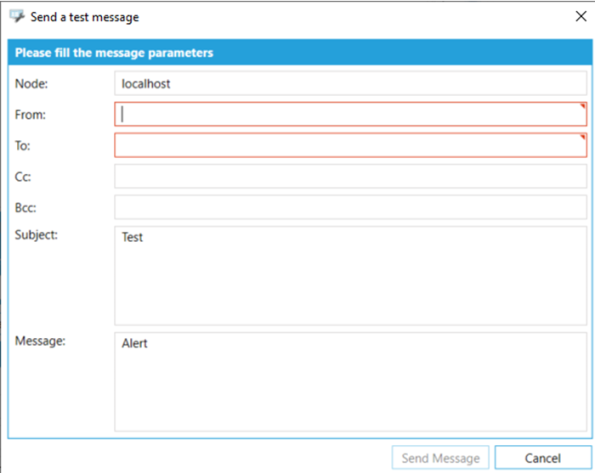
7. You can also click on the Test Email link on Email Settings tab to test the settings. Note that the Node, Subject, Message and To Address fields must be set correctly in order for the test message to work.
Send a test message Tab
Email Node - Message Settings Tab
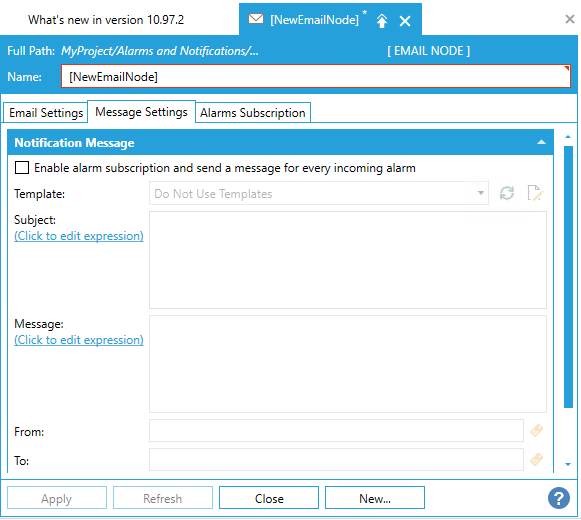
Template can be configured when "Enable alarm subscription and send a message for every incoming alarm" option is checked.
8. In the Notification Message settings, click on the Template pulldown menu to select from existing templates or Do Not Use Templates.
NOTE: Any string/string block containing the colon character ':' or beginning with the @ character will be treated as a data point if the 'Use UA Points' option is enabled. To ensure correct AlertWorX template behavior:
Check if the template exists.
If the template exists, use template values for all entries != NULL
If the entry for the template == NULL, use the base default value for those entries.
In cases where:
the template contains a data point, and
the 'Use UA Points' option is checked, and
the point resolves to NULL (bad point)...
...the system will use the base default value for that entry.
With the following configuration:
Use UA points = 1. Template Message: @Some:BadPoint
...the Base Template string for Message will be used instead of the Template string.
9. Enter a Subject in the text entry field or click on the "Click to edit expression" button to open the Expression Editor. You can then configure an expression that can populate the Subject field. You can configure an expression with the value from the alarm that triggered the message.
10. Enter a Message in the text entry field. Similar to the Subject field, you can click on the "Click to edit expression" button link to open and configure that can populate the Message field.
Set up the From and To addresses along with optional fields Cc, Bcc. You may enter the text entry field or click on the button to open the Data Browser. You can then select a data source that can populate a field.
AlertWorX allows you to configure Message template within the Workbench.
To Configure Message Templates:
Start the Workbench, then expand your project. Next, expand the Alarms and Notifications node to show the AlertWorX node. Expand the AlertWorX node to show the Message Templates node. Right-click on it and select Edit.
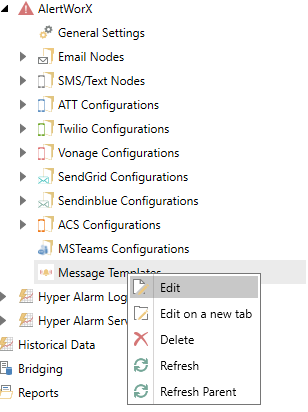
Right-click the Message Template node in the navigation tree and select Edit, as shown in the figure below.
Message Template Node - Edit dialog
This opens the Message Templates Node properties window, shown below.
Message Templates Node Properties window
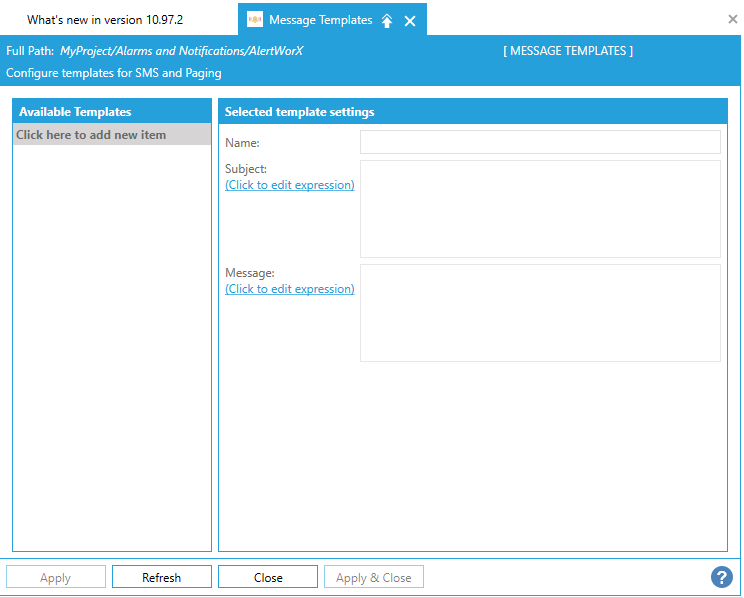
Click on Click here to add new item and enter a unique Name, Subject and the text of a message:
Message Template Node Properties window - Adding New Template Settings
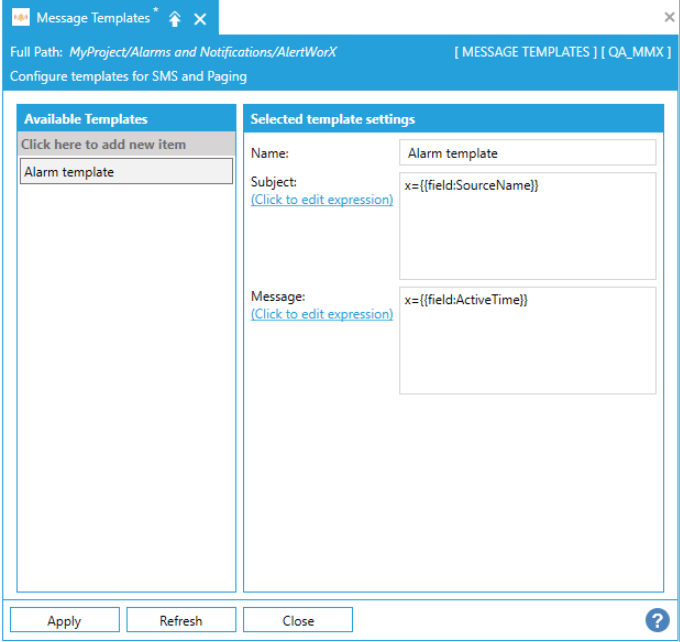
Alarm Template
Name - The unique name of the template. It can be used to identify the template.
Subject - Enter a subject in the text entry field. "Click to edit expression" link opens the Expression Editor window, which can help in constructing required expressions.
Message - Enter a message in the text entry field. "Click to edit expression" link opens the Expression Editor window, which can help in constructing required expressions.
Email Node - Alarms Subscription Tab
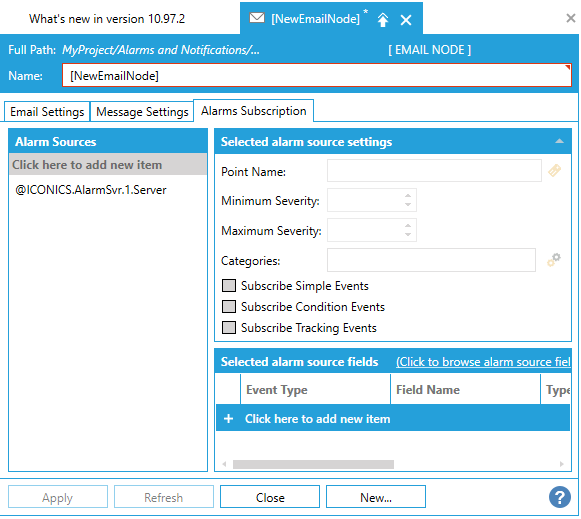
11. In the Alarm Subscriptions tab, click on + Click here to add new item. This allows you to enter a Tag name in the text entry field or click on the to open the Data Browser and navigate to your selected tag. You can then enter Min. Severity and Max. Severity in the next fields. Click on the field under the Alarm Type column and it will turn into a pulldown menu, where you can select from None, Simple, Tracking, Condition, Simple & Tracking, Simple & Condition, Tracking & Condition or All.
12. Once you have completed the setting of the Email Node properties, click on the Apply button. The new Email Node will now appear in the Project Explorer.
13. For the configuration changes to reflect, the ICONICS Alert Email Service needs to be restarted.
See Also: