![]()
![]()
The Properties panes for Process Point and Data Entry objects are nearly identical. Both let you control how the object is formatted and appears on the screen. In most instances the properties exposed in the Standard configuration mode are sufficient for nearly all displays you might create; however, in 3D views you will typically be working in the Advanced configuration mode, so you may find that these two objects have a lot of properties that you won’t want to change. To find out what node or to change modes go to the GraphworX64 View ribbon. In the Misc section click the Application Mode arrow to display available modes. The one with the check mark is the mode you are currently in. The fundamental properties that you will need to work with are:
Data source assignments
Whether Data Entry is allowed (True) or not (False).
Whether these labels are selected or displayed as a set or collection of states.
The Properties pane contains Common settings for the object name and a description, line and fill settings, the text displayed at runtime (Content Text property), measurements, and font characteristics. Advanced configuration mode adds settings for tab order position, locked, visible, focusable, enabled, and other properties. The Property pane settings are important, but the settings that make Process Point and Data Entry objects functional are on the Dynamics tab.
In Advanced configuration mode many more properties are displayed. But for the vast majority of Process Point objects you only need to set the values in this mode. This is one area where knowing too much can also get you into trouble. In Advanced mode there is a setting that defines the way data is handled from the source: the ShowDataTypeAs, which has a default type of Object (Native Type). If you know that the OPC tag is set as an 8-bit value (for example) you might be tempted to go and change the ShowDataTypeAs to something else, perhaps 8 bit Integer. However, in 99% of the cases leaving the default value as Object (Native Type) works correctly and should not be changed.
|
|
Warning: Do not change the ShowDataTypeAs property in the Dynamics pane for a Process Point or Data Entry object from Object (Native Type) unless you are certain that this assignment will work correctly. |
Leave the Process Point’s DataSource properties on the Dynamics pane blank.
Type text in the Text property of the Contents section of the Properties pane. The Process Point object displays the text you typed both in Configuration and Runtime modes.
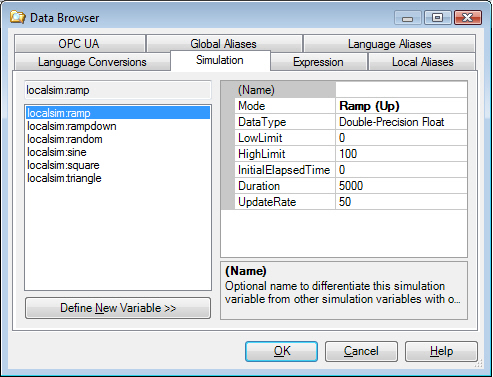
To set a Process Point to an OPC data tag, alias, or other variable value, click the ellipsis button ![]() in the DataSource property of the Dynamics pane to display the Data Browser. Select or type the tag, alias, simulation, or expression from the Data Browser. The Data Browser formats the variable correctly for you.
in the DataSource property of the Dynamics pane to display the Data Browser. Select or type the tag, alias, simulation, or expression from the Data Browser. The Data Browser formats the variable correctly for you.
Example:
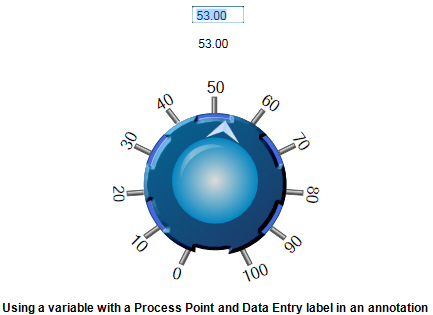
To get a sense for how a variable is handled, let's say the data source value for each of three objects is localsim::var1. The circular knob's indicator has a rotation dynamic so that it can rotate from 1 to 100; set its rotation dynamic's data source to localsim::var1. (The local simulator for var1 declares a variable that can be written to or read from.)
Runtime users can drag the knob’s indicator around to set a value; as they do so, the values in both the Process Point and Data Entry objects change simultaneously. A value of 22 on the knob shows up as 22.00 (which is the default number format) in the Process Point and Data Entry objects.
Runtime users can type a value in the Data Entry object but not in the Process Point object. When a runtime user clicks in the Data Entry object and changes the value to 53, the Process Point and the indicator on the circular knob simultaneously change to reflect the var1 value of 53. Click to see an example.
More examples of static and variable assignment for data sources as well as State selection and display.
Defining a Collection of States for a Rotating Dial
Restricting the Rotation to Values in the Collection
For related information, refer to Object Properties.
See also: