|
|
Available with GENESIS64 Basic SCADA. |

![]()
|
|
Available with GENESIS64 Basic SCADA. |
![]()
1. Setup IcoWebAPIService. The server running IcoWebAPIService must be configured to be accessible from the outside over HTTPS and setup by the IT department. See IcoWebAPIService (update link)for details.
2. Create an Azure AD app for use in secure event delivery from event grid. For this, In Azure portal, register an application. Please note that Azure dialogs may change over time. Please consult Azure documentation if you have trouble finding any settings.
Follow these steps to create the app registration:
§ Sign into the Azure portal.
§ If you have access to multiple tenants, use the Directories + subscriptions filter in the top menu to switch to the tenant in which you want to register the application.
§ Search for and select Azure Active Directory.
§ Under Manage, select App registrations > New registration.
§ Enter a display Name for your application. Users of your application might see the display name when they use the app, for example during sign-in. You can change the display name at any time and multiple app registrations can share the same name. The app registration's automatically generated Application (client) ID, not its display name, uniquely identifies your app within the identity platform.
§ Specify who can use the application, sometimes called its sign-in audience. (Use single tenant unless required)
§ Leave redirect API as is.
§ Select Register to complete the initial app registration.
The basic steps for registering an application mentioned above are provided in reference with ref: https://docs.microsoft.com/en-us/azure/active-directory/develop/quickstart-register-app#register-an-application.
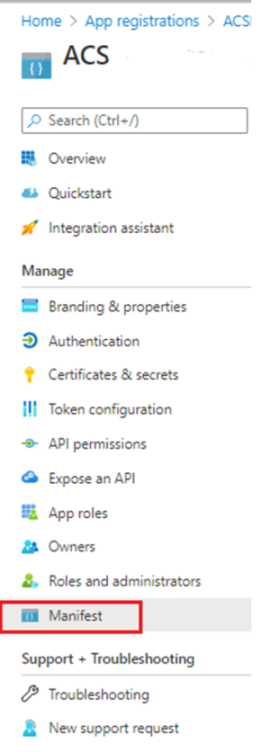
3. Open the Azure Apps Manifest. Go to the apps main page and click on the Manifest tab on left side to access it.
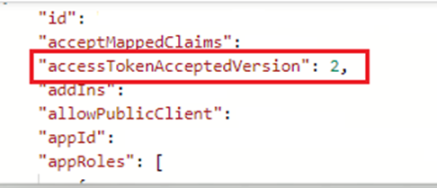
4. Make sure that the ‘accessTokenAcceptedVersion’ in the Azure App’s manifest json is set to 2. Ref: https://docs.microsoft.com/en-us/azure/active-directory/develop/scenario-protected-web-api-overview https://docs.microsoft.com/en-us/azure/active-directory/develop/reference-app-manifest#accesstokenacceptedversion-attribute
5. We will need to Secure WebHook delivery with Azure AD User in Azure Event Grid. For this, you will need to run the scripts mentioned in the link below with the above created App’s details. https://docs.microsoft.com/en-us/azure/event-grid/secure-webhook-delivery#configure-the-event-subscription-by-using-azure-ad-user.
Tips on variables used in script:
$webhookAppObjectId = "[REPLACE_WITH_YOUR_ID]"
$eventSubscriptionWriterUserPrincipalName = "[REPLACE_WITH_USER_PRINCIPAL_NAME_OF_THE_USER_WHO_WILL_CREATE_THE_SUBSCRIPTION]"
For above two variables, the webhookAppObjectId can be found as the Object Id in your Azure App registration details page and your eventSubscriptionWriterUserPrincipalName is usually the email used in azure ad to sign in. See more on userprincipalname: https://docs.microsoft.com/en-us/azure/active-directory/hybrid/plan-connect-userprincipalname#upn-in-azure-ad
Once above script is run successfully, we can create event grid subscription as mentioned in the document after step 6.
Please note: You must be a member of the Azure AD Application Administrator role or be an owner of the service principal of Webhook app in Azure AD to execute the script. You will also incur charges for storage account subscription and other services that you use. Please refer to pricing calculator to view or calculate approximate different pricing details.
6. Before adding the event subscription as mentioned in above doc, Go to the appsettings.json file found in C:\Program Files\ICONICS\GENESIS64\WebSites\IcoWebAPIService folder.
a. Add the Application Id/Client Id and TenantId of the Azure app created under “AzureAD” ClientId and TenantId respectively.
b. Make sure ‘Enabled’ field is set to true.
c. Copy the Application ID of the Azure App and add it as value in “ValidAudiences”.
"ValidAudiences": [ "Application ID" ]
d. Make sure that the AppRoles in IcoAcs.json has the Role name mentioned in the script we execute in step 5. Below is the part of script where this is mentioned
$eventGridRoleName = "AzureEventGridSecureWebhookSubscriber" # You don't need to modify this role name
Make sure that the IcoACS.json has the role mentioned in script. It is defaulted to the role mentioned in the script as of this document’s creation date.

Then, make sure to Start/Restart IcoWebAPIService. This is important since there is a handshake that needs to happen when the event subscription is being created and the webservice should be running for this.
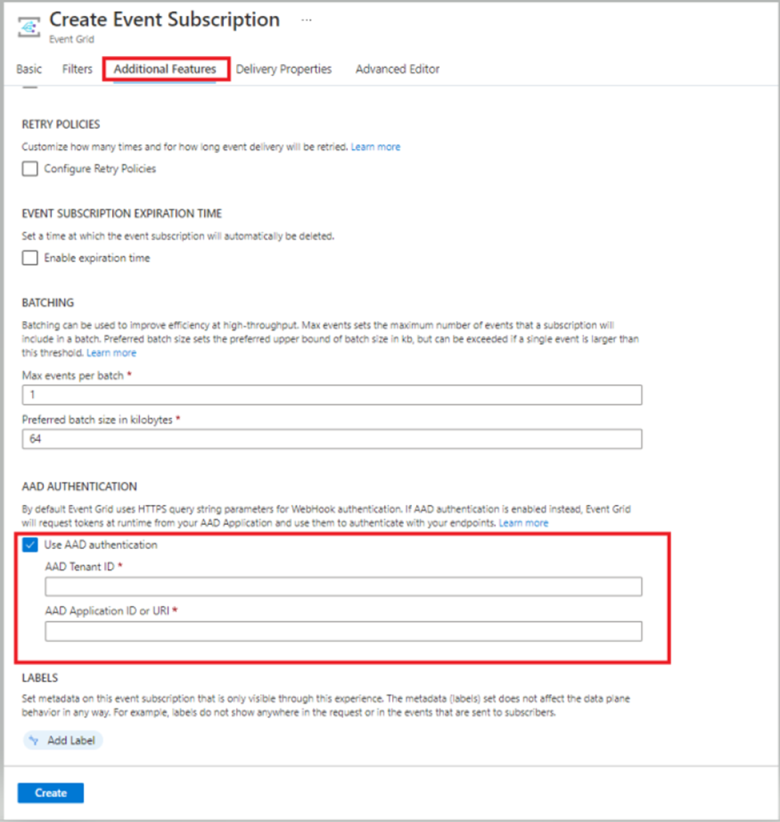
7. Follow instructions under ‘Configure the event subscription by using Azure AD User’. Choose the ‘SMS Received’ and ‘SMS Delivery Report Received’ events under ‘Filter to Event Types., End point Type as ‘Webhook’ and ‘Subscriber Endpoint’ as Yourdomainname/fwxapi/acs/sms’. On the ‘Additional Features tab,
Check the ‘Use AAD authentication’ check box and fill in the AAD Tenant ID and Application ID we created above and used in PowerShell.
Ref:https://docs.microsoft.com/en-us/azure/communication-services/quickstarts/sms/handle-sms-events
8. If the event deployment succeeds it will be shown in the azure portal.
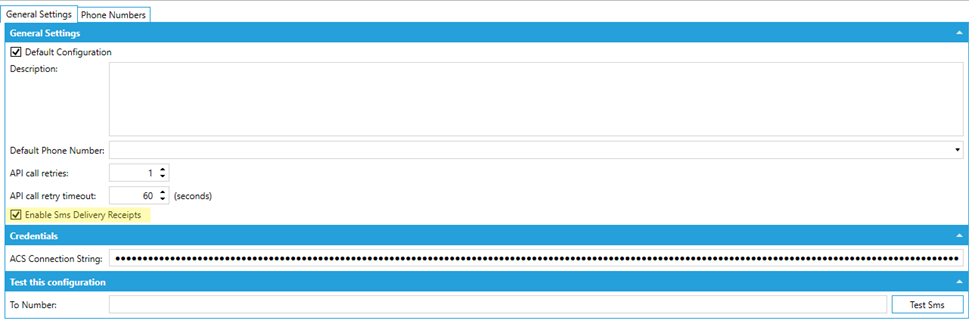
9. Check ‘Enable Sms Delivery Receipts’ to enable delivery receipts for outgoing messages.
See Also: