Security is created by adding user accounts and groups. Users can be added to groups as members. These are described in this topic. When implementing GENESIS security, define your global settings, and then your account policies. Only after you have done these two tasks should you then proceed to:
Define your user groups (described below in Groups) where you establish the security privileges that the members of the group will share.
Define your users (described below in User Accounts), then add them to the groups to which they are members.
A group is the same as a role, or a collection of users who share a set of privileges. Initially there are no groups so you need to create one. Users can be added to one or more groups, but groups cannot be added to other groups. However you can duplicate a group and make appropriate changes to it. Groups must have a unique name.
During runtime, if more than one group is in effect, the least restrictive is used. For this reason, the privileges and restrictions set in the default group must be the most restrictive. Individual users can be made less restrictive than the default, but never more restrictive.
To add a new group:
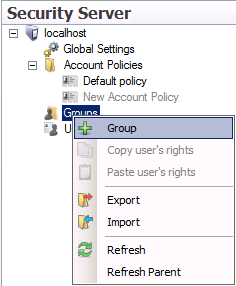
Right-click Groups to show the context menu (as shown below), then click the Group menu option. This reveals the Security Server User forms on a New Group tab.
New Group Command
|
|
Note: If you have role definitions that are saved in a file, you can click Import to import them from a file. Note also that you can export role definitions, too, by clicking Export. |
On the Properties tab, enter the name of the role, making sure it is descriptive enough to identify exactly what its security encompasses.
Use any or all of the remaining tabs to complete the security definitions for the group: tabs are Application Actions, Points, Alarms, Files, Stations, and Custom. These tabs are described in detail in Security Privileges for Users and Groups. Keep in mind that all users who become members of this group will share these privileges.
Click Apply to save the new role.
A user is an account associated with a name, password, and certain privileges either allowed or denied them. When a user is added to a group, that user gets the additional privileges of that group. However, should there be a denied access right, that always take precedence over an allowed privilege in setting access. Users can be added to one or more groups, but groups cannot be added to other groups. However you can duplicate a user and make appropriate changes to the account. Users must have a unique name.
To add a new user:
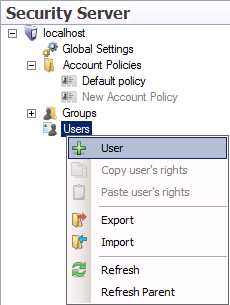
Right-click Users to show the context menu (as shown below), then click the User menu option. This reveals the Security Server User forms on a New User tab.
New User Command
|
|
Note: If user accounts are saved in a file, you can click Import to import them from that file. Note also that you can export user account information, too, by clicking Export. |
On the Properties tab, define the user account name and password. Select the account policy to be used for the user. The user's account policy may restrict the password that can be used; for more information, refer to Account Policies. You can also set a Root Asset and/or Default Asset by clicking the ellipsis [...] to the right of their respective text entry fields. This will open a data browser allowing you to navigate to a specific asset. Setting the Root Asset will enable the security properties you have set for assets contained within that asset branch. A Default Asset will enable the security properties for that specific asset.
Defining a New User Account
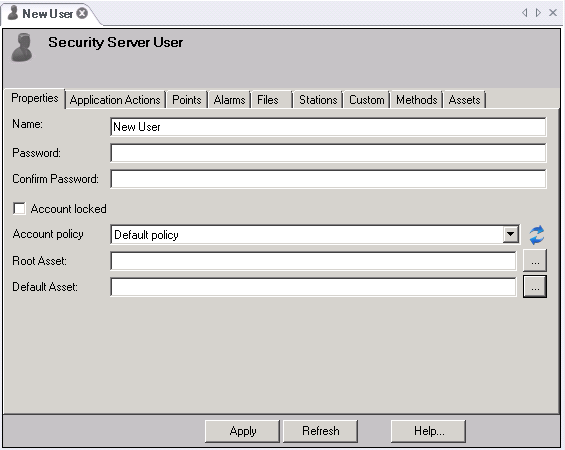
Use any or all of the remaining tabs to complete the user account definitions: tabs are Application Actions, Points, Alarms, Files, Stations, Custom, Methods and Assets. These tabs are described in details in Security Privileges for Users and Groups. Keep in mind any groups you will be adding the user to; you don't have to define security privileges for the user if those same privileges are defined for a group that the user will belong to.
Add the user to one or more groups. To assign a user to a group, you extend membership by group or by user.
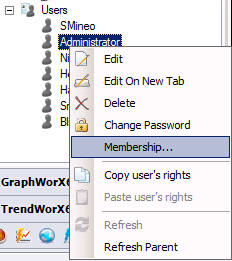
To add the user to one or more groups, right-click the user account in the Project Explorer, then select Membership; alternatively, you can add multiple users to a group by right-clicking the group and selection Membership. Both methods are shown below.
Membership by User (left) and Group (right)
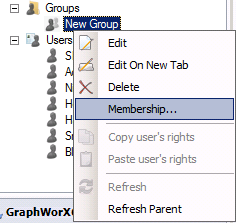
Selecting Membership for a user opens the User Properties dialog box to which you add groups; selecting Membership for a group opens the Group Properties dialog box (shown below) to which you add users.
Group Properties Dialog Box, Where You Add Users
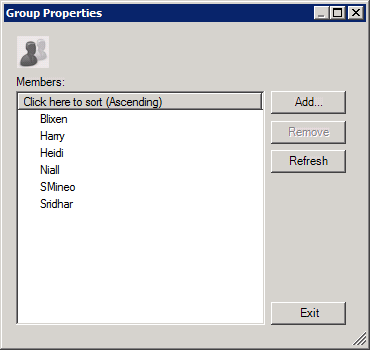
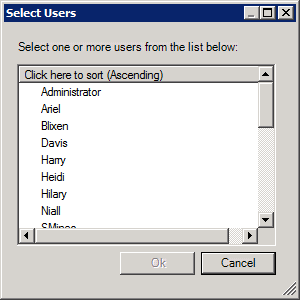
Click the Add button. A dialog box opens (like the one shown below) where you can select the groups to add to the user account, or the users to add to the group.
Make your selections. To select more than one, hold down the Ctrl key which you click on each selection.
When you are done, click OK. Your selections are added.
Click Exit when you are done.
Select Users to be Added to a Group
See also:
Security Privileges for Users and Groups