
To Add a Report:
Open the Workbench and expand the Reports node and then the Configurations node. Right-click on a configuration, then click on Add Report, as shown below.
Add Report from Project Explorer in the Workbench
-OR-
Select a configuration then click on the Add Report button, shown below, in the Edit section of the Home ribbon in the Workbench.
Add Report Button

This opens the New Report Properties, shown below.
New Report Properties
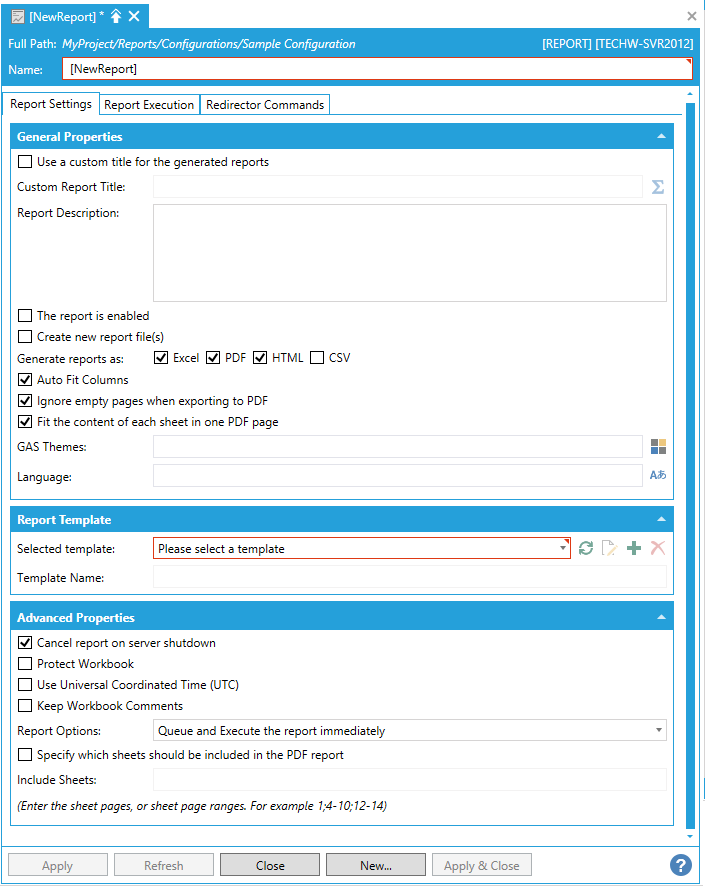
Enter a name in the Report Name text entry field.
The Report Properties contains three separate tabs:
Use a custom title for the generated reports - Click this checkbox if you wish to use a specific title for your generated report(s). If checked, this activates the Custom Report Title and Report Description text entry field.
Custom Report Title - When activated, enter a title in the text entry field or click on the  button to open the Expression Editor to generate a report title.
Report Description - When activated, enter a description of the report to differentiate it from others.
The report is enabled - Before a report can be executed, you must activate it by checking this checkbox.
Create new report file(s) - When this box is checked, a new report file will be created each time the report is executed. By default, a report ID and a time stamp will be appended to the file name of each report. You can override this default by using standard .NET format strings with a parameter in the Report Name field. For example, you might create a parameter called @executeDate that captures the report’s execution date, then enter a report name of “Alarm Distribution {{@executeDate}}”. To format the name so that it shows only the year, month, and day, you would append your preferred format string to the parameter, like this: “Alarm Distribution {{@executeDate:yy MM dd}}”.
Note: Information about standard .NET format strings is available on Microsoft support sites as well as other informational web sites.
Alternatively, when this checkbox is unchecked, and there is a parameter in the report’s name, a new report file will be created when the report’s name changes – that is, when the value of the parameter changes.
If this checkbox is unchecked, and there is no parameter in the report’s name, the report will be continuously overwritten.
Generate reports as - Click on the checkbox next to your preferred report output: Excel, PDF, HTML or CSV. You may select more than one output format but you must select at least one.
Auto Fit Columns - When this is checked, each column in the report's workbook/spreadsheet will be automatically expanded so that all report data will fit within the column.
Ignore empty pages when exporting to PDF - Clicking this box allows the report PDF to be generated without any pre-existing blank report pages.
Fit the content of each sheet in one PDF page - Clicking this box matches each single report sheet to each single PDF output page.
Gas Themes - Enter a Global Alias Theme (using proper syntax) in the text entry field or click on the  button, which opens the Set Global Themes and Aliases window, where you can navigate to your selected Global Theme or Alias.
Language - You can set a language in the text entry field or lick on the  button to open the Language Selector. This is the language to be used in creating the report. All language-aliased entries within the report will be translated, and OPC values will be scaled using the language configuration default settings. The default language properties set for an individual report override those set in a configuration.
Selected Template - Use the pulldown menu to select a template from the Reports provider's Templates. Once you have selected a template from the pulldown menu, the following buttons are activated:
 - Click this button to Edit the selected report template. The selected template properties will open in a separate window within the Workbench.
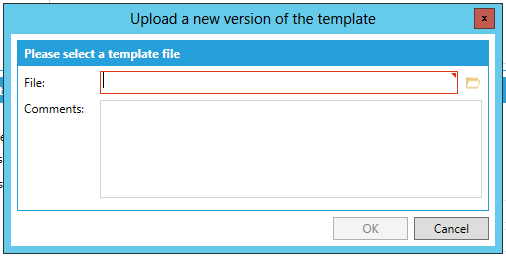
 - Click this button to Add a report template. The Upload a new version of the template window, shown below, will appear. Enter the location of your selected template file in the File text entry field or click on the
  button to open a file explorer to navigate to your selected template file. You can also add Comments about the file to upload. Once you have completed your selection, click OK to return to the Reports properties in the Workbench.
Upload a new version of the template Window
 - Click this button to Delete the selected report template.
Template Name - Enter a name for your selected template in the text entry field.
Cancel report on server shutdown - Terminates report execution if the server fails or loses power.
Protect Workbook - When checked, the report's workbook/worksheet(s) will be read-only (i.e. no one will be able to modify it/them). Specifically, the Workbook itself will be protected (sheets cannot added/removed/renamed), the Worksheets will be protected (the content of a sheet/sheets cannot be modified), and the PDF will be protected (the PDF cannot be modified).
Use Universal Coordinated Time (UTC) - When checked, all time stamps stored in the report will be stored as UTC time stamps. This is to accommodate automatic daylight savings time switching in Windows when the report is executing.
Keep Workbook Comments - When checked, the generated file will display comment ToolTips for each data cell.
Report Options - Use the pulldown menu to select from Queue and Execute the report immediately, Queue the report but execute it only if there aren't similar reports in execution, or Queue the report only if there aren't similar reports in the queue.
Specify which sheets should be included in the PDF report - Clicking this checkbox allows you to then select which specific report sheets should be included in the PDF report.
Include Sheets: - When activated, you can enter the sheets you intend to include in the PDF report in the text entry field here. Note that you can enter the sheet pages or the sheet page ranges. For example, 1; 4-10; 12-14, etc.
Redirector Commands Tab of New Report Properties in the Workbench
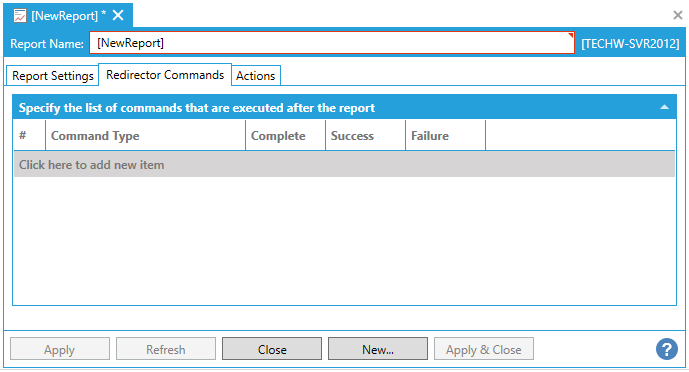
This tab allows you to set a list of commands that will be executed after running your configured report.
Click on the Click here to add new item link to add a new command.
# - Each newly added command will be assigned a sequential number, listed in the # column.
Command Type - Use the pulldown menu to select from Send Message, Send Alert Email or Print.
Once you have selected a Command Type, you can select the action(s) to trigger that command, including Complete, Success or Failure. Click the appropriate checkboxes for your selections.
Your selected Command Type will also pop up additional properties, depending on your selection:
Send Message
Body - Enter the message body in the text entry field or click on the  button to navigate to your selected file.
To - Enter the intended recipient for the message in the text entry field or click on the click on the button to navigate to your selected file.
Sent Alert Email
Destination - Enter the intended recipient/destination in the text entry field or click on the button to navigate to your selected file.
Subject - Enter the email subject in the text entry field or click on the button to navigate to your selected file.
Message - Enter the message in the text entry field or click on the button to navigate to your selected file.
Target - Enter a target for the printed report or click on the button to navigate to your selected file.
Area - Use the pulldown menu to select from either the Entire Control or the Current View.
WhiteBackground - Click this checkbox if you wish to maintain a white background in the printing of the report.
ShowPrintDialog - Click this checkbox if you wish to see the print dialog window/box during report printing.
PrinterName - Enter your preferred printer name in the text entry field or click on the button to navigate to your selected file.
Actions Tab in the New Report Properties in the Workbench
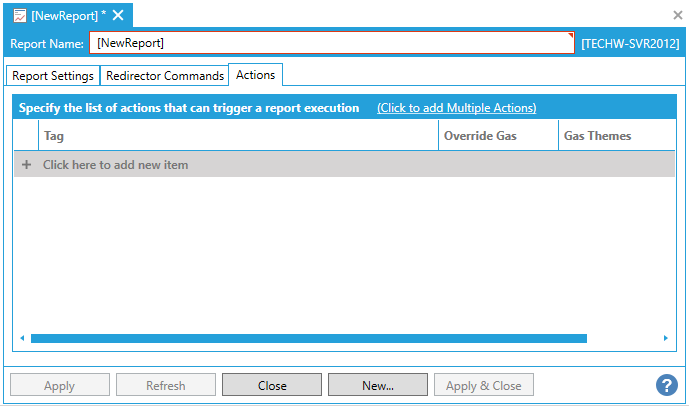
This tab allows you to set a list of actions that can trigger report execution.
You can choose to click on the Click to add Multiple Actions link for multiple tags or + Click here to add new item for individual tags.
Tag - Enter a tag location in the text entry field or click on the  to navigate to your selected tag.
Override Gas - Click this checkbox if you wish to override any pre-existing Global Alias setting.
Gas Themes - If you selected to Override Gas, you can enter a new Global Alias Theme in the text entry field or click on the button and navigate to your selected Global Alias/Theme.
Click Apply to save your settings and Close to return to the Workbench. Your newly created Report will now appear in the Project Explorer.
See Also:
About Reports in the Workbench