
NOTE: It is assumed that anyone that uses AlertRest to send messages (WhatsApp/regular messages) or calls to external numbers has received previous explicit consent from any intended recipient.
To get a Twilio account, you can go to https://www.twilio.com/try-twilio and sign up for a trial account and then upgrade to a paid account.
Go to Alarms and Notifications>AlertWorX>Twilio Configurations. Right-click and select Add Twilio Configuration, as shown below.
Add Twilio Configuration
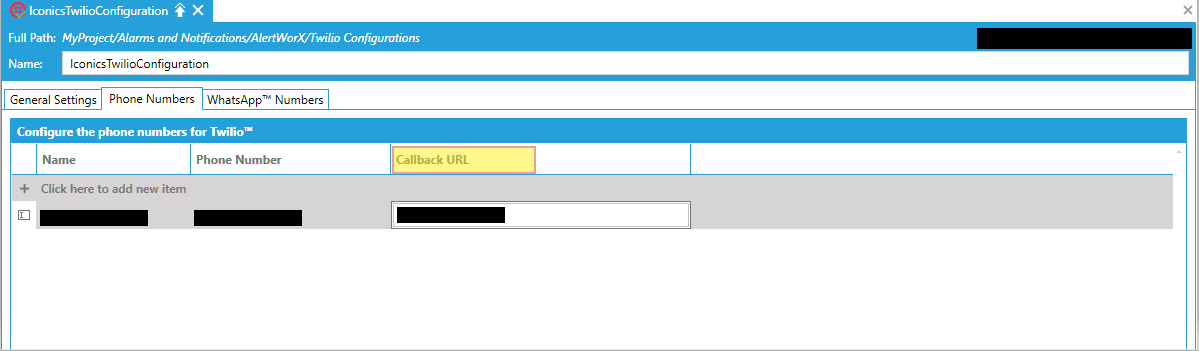
Set up the Phone Number and WhatsApp Number in the highlighted tabs (1 and 2 in the image shown below) and select the ones that you want to use as default ones under Default Phone Number (3 in the image shown below) and Default WhatsApp Number (4 in the image shown below). If the Default Phone Number is not selected, the SMS/voice message will not be sent. If the Default WhatsApp Number is not set, a WhatsApp message cannot be sent.
Phone Numbers and WhatsApp Numbers Settings

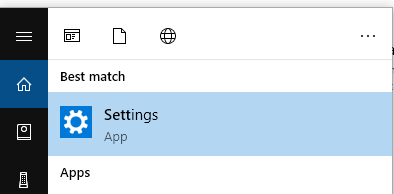
Set up Environment Variables. For this, open Settings, as shown below.
Selecting Settings
In the search box, type ‘environment variables’, as shown below and choose the highlighted one.
Selecting Environment Variables

Set up the below environment variables in the dialogue under ‘User Variables ‘.
Note: These Environment Variables are case-sensitive, so make sure that they are spelled correctly.
Setting Environment Variables
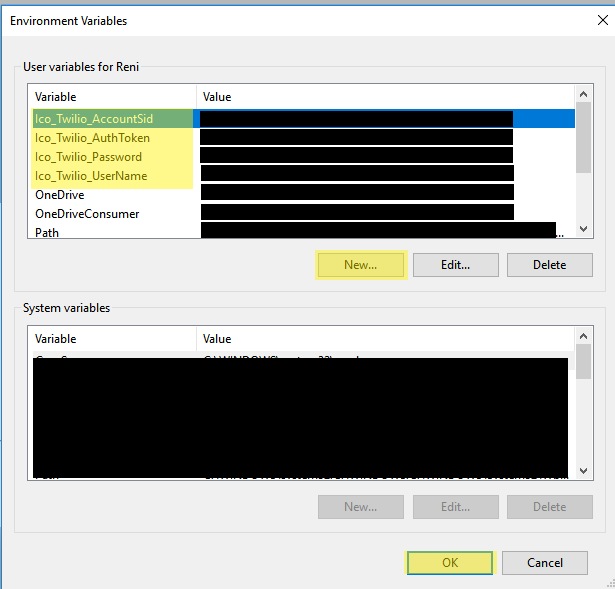
Ico_Twilio_AccountSid: This is the account sid associated with your Twilio account. You can find it in your Twilio account console if you have a Twilio account.
Ico_Twilio_AuthToken: This is the Auth token associated with your Twilio account. You can find it in your Twilio account console if you have a Twilio account.
Ico_Twilio_UserName: This is any identifier; this is basically used for us to recognize that Twilio is in fact sending you the updates. It is important that you do not use special characters in this. (See link below where Twilio specifies this). E.g.: ICONICS
Ico_Twilio_Password: This is any identifier; this is basically used for us to recognize that Twilio is infact sending you the updates. It is important that you do not use special characters in this. (See link below where Twilio specifies this). E.g.: Gen64
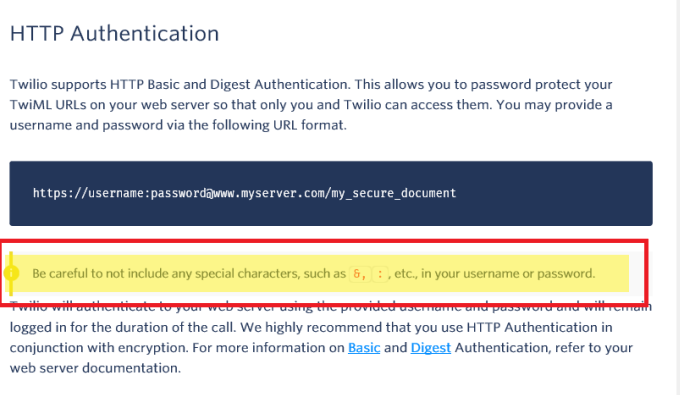
Note: It is very important that the environment variables and the services are under the same user, if not they will not be read by the service correctly. Please also donot include any special characters in your username and password.
See https://www.twilio.com/docs/usage/security for below excerpt:
HTTP Authentication
Create a new user in Workbench -> Security.
The user must use the Ico_Twilio_UserName as the Username and Ico_Twilio_Password as the Password for this new user’s login. This is mandatory if you want to get status updates of SMS and receive incoming messages.
Now, restart the IcoWebAPIService and AlertRest Service.
Note: Ensure that the environment variables are configured under the same user as that of the service, If the services are on different machines, ensure that both have environment variables set up and are in sync. If you use the methods to send messages, they will be logged in the runtime database. If IcoWebAPIService is running and the Callback URL (see below) is specified in the Workbench, the status update will also be updated in the database. The time stamp for the latest status is recorded as AlertTimeStampFinal in the runtime database.
Set the Callback URL
The following section describes how to use the AlertRest Point Manager’s methods within the GENESIS64 system. For instructions on setting up a button in GraphWorX64 to call these methods, see To Use a Method below.
TwilioSendSmsMessage
This has the following parameters.
new MethodArgument(BuiltInTypes.String, "Destination"), //The destination phone number
new MethodArgument(BuiltInTypes.String, "Message"), //The message that needs to be sent
Using method in GraphWorX64 using a button.
The first parameter is a destination number. You can have multiple destinations with same message. For this use the delimiter ‘;’. Example: 1-555-555-5555;1-444-444-444 will send same message to both numbers.
Note: Please note that you provide proper country code. Incorrect country code will result in either message not being sent or worse, international messaging charges. Ex: 5555555555 if not provided with ‘1’ prefixed (1 being US country code, gets converted to +5555555555, and +55 is country code for Brazil. You may end up calling or texting wrong people and being charged for the same)
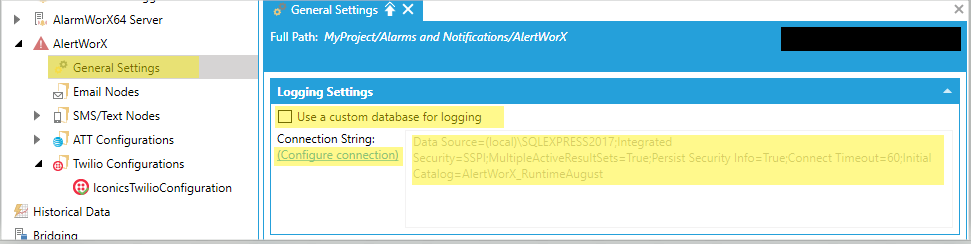
This should log the message (with default/empty values for the rest of parameters) in the Alert runtime log which can be set up under General settings in the AlertRest provider. This Log table is named as Alert_RestCallLogs and will be under the AlertWorX database, unless a specific location is mentioned to be created under the General Settings.
General Settings
The initial status in the log should be queued, which should update to sent, delivered, etc with the timestamp recorded in the AlertTimeStampFinal column of the AlertLog table if the below conditions are met:
The server running IcoWebAPIService must be configured to be accessible from the outside over HTTPS by the IT department. See IcoWebAPIService for details. Test your setup by entering https://<yourdomainname>/fwxapi/echo into the web browser of your choice and you should see “OK”. Once this is done, follow additional steps for the Twilio Reply/Status feature.
AlertRest Service is running.
Environment variables, as mentioned in the set up section above, is configured correctly. (Requires restart of services on change of environment variables)
The callback status url is set in the Workbench. (The method adds fwxapi\twilio\sms\status internally to the callback URL so please do not specify that part in the Workbench.) An alternative is to provide it in the Twilio console. If not mentioned in the Workbench, Twilio will consider what is set in its console.
Twilio services are working fine (you can always look into possible issues in the Twilio native console: https://www.twilio.com/console/debugger.
Sql service is running.
Ensure that the environment variables are configured under the same user as that of the service.
It is important that if the IcoWebAPIService and AlertRest Service are running in different machines, the environment variables be set up in both the machines and are in sync.
Note: In testing, there have been several instances where Twilio posts a message as delivered and it does not reach the intended recipient. This channel is hence considered as a "best effort" channel of communication.
A number gets blacklisted if it responds with stop or unsubscribe keywords (single words with no special characters) when below conditions are met:
The server running IcoWebAPIService must be configured to be accessible from the outside over HTTPS by the IT department. See IcoWebAPIService for details. Test your setup by entering https://<yourdomainname>/fwxapi/echo into the web browser of your choice and you should see “OK”. Once this is done, follow additional steps for the Twilio Reply/Status feature.
AlertRest Service is running.
Environment variables, as mentioned in the set up section above, is configured correctly. (requires restart of services on change of environment variables).
For any incoming messages to Twilio (including those for blacklisting, re-subscribing, or Acknowledge when used in conjunction with CFSWorX), you need to set up a Webhook for ‘A MESSAGE COMES IN’ field as Http Post in Twilio. Please see the Note below for further details.
Twilio services are working fine (you can always investigate possible issues in the Twilio native console: https://www.twilio.com/console/debugger.
Sql service is running
If you try to send a message to a blacklisted number (number can be seen under the ALERT_BlackListedNumbers table and configured in General settings in Alert provider), it won’t go out. (Blacklisting is only currently available for Twilio Providers. There is no way to blacklist ATT, unless you reply to the current default Twilio number with stop or do it manually in the Database (See Notes). This way, you blacklist that number).
A number gets removed from the blacklist if it responds with the ‘start’ keyword (single word with no special characters) when the below conditions are met:
The server running IcoWebAPIService must be configured to be accessible from the outside over HTTPS by the IT department. See IcoWebAPIService for details. Test your setup by entering https://<yourdomainname>/fwxapi/echo into the web browser of your choice and you should see “OK”. Once this is done, follow additional steps for the Twilio Reply/Status feature.
AlertRest Service is running.
Environment variables, as mentioned in the set up section above, is configured correctly. (Requires restart of services on change of environment variables)
For any incoming messages to Twilio (including those for blacklisting, re-subscribing, or Acknowledge when used in conjunction with CFSWorX), you need to set up a Webhook for ‘A MESSAGE COMES IN’ field as Http Post in Twilio. Please see the Note below for further details.
Twilio services are working fine (you can always look into possible issues in the Twilio native console: https://www.twilio.com/console/debugger.
Sql service is running.
Ensure that the environment variables are configured under the same user as that of the service.
It is important that if the IcoWebAPIService and AlertRest Service are running in different machines, the environment variables be set up in both the machines and are in sync.
Note: The Twilio console should have the Webhook setup to point to the Web API Service. For this, go to https://www.twilio.com/console/phone-numbers/ and select your number.
Twilio Console Webhook Setup

Under Messaging, set up the Webhook for ‘A MESSAGE COMES IN’ field as HTTP POST.
The format of the Webhook is:
https://yourusername:yourpassword@yourdomain.com/fwxapi/twilio/sms
...where ‘yourusername’ and ‘yourpassword’ is the Ico_Twilio_UserName and Ico_Twilio_Password environment variables respectively that you set up initially. These are used by the Web API Service to authenticate the origin of incoming messages. ‘yourdomain.com’ is the domain set up while setting up the Web API Service. The rest of the link remains 'as is'. This works when the Web API Service is set up as required.
TwilioSendVoiceMsg
Same, except the following details get changed:
The initial status in the log should be queued, which should update to answered, completed, etc., with the timestamp recorded in AlertTimeStampFinal. Further info: https://support.twilio.com/hc/en-us/articles/223132547-What-are-the-Possible-Call-Statuses-and-What-do-They-Mean-
Calls also gets blacklisted if they reply to the number with stop or unsubscribe (not case sensitive).
TwilioSendWhatsAppMsg
Note: For WhatsApp, if using a verified business account, you may have to define a template, which matches with the default AlertWorX message so that it confirms with the template of ICONICS. Otherwise, the message may not get sent. Click HERE for more info on WhatsApp Templating.
Same, except following details get changed:
Twilio WhatsApp is in beta. To send messages without sandbox, you will need a verified business account.
Else, you need to join their sandbox by sending a keyword to them. You can find this under https://www.twilio.com/console/sms/whatsapp/sandbox.
You need to set up a WhatsApp number in the Workbench and ensure that it is chosen as default in the default configuration.
Set up the WhatsApp’s status callback url under the status callback url in their page: https://www.twilio.com/console/sms/whatsapp/sandbox.
Twilio Sandbox for WhatsApp

It is assumed that the responses for acknowledging alarms will have, at a minimum, the Msg Id followed by the Ackid. The comment part is accepted as anything that follows Msg id and Ack Id, but it can be empty.
An example is: 12 45 Acknowledging Alarm from phone.
Here '12' is MsgID, '45' is AckId, and 'Acknowledging Alarm from phone.' is comment. If comment is not supplied, a default comment is added.
AttSendSmsMsg
Set Up: Get a production account after signing up for developer account from here: https://developer.att.com/developer/flow/apiPlaygroundFlow.do?execution=e1s1
Configure the Client ID and Client Secret you obtain from ATT in the Workbench under New ATT Configuration.
ATT Configuration

Once this is set, you can use the method in GraphWorX64. For ATT messaging, keep in mind that messages can only be sent to an ATT number. Others would get errored out and logged as an error in the database.
The ATT provider does not have built-in status update/acknowledge supported currently.
Note: The MsgID can have a minimum limit of 9999 and a maximum of 2,147,483,647 and can be configured under Tools > Platform Services Configuration > Point Managers > Alert REST Point Manager.
Alert REST Point Manager Example

To blacklist a number from being able to receive messages, you can add them to the Database manually. You can add the number under the BlackListedNumber column.
This Database location is configured under General Settings in AlertWorX. The Table name is ALERT_BlackListedNumbers.
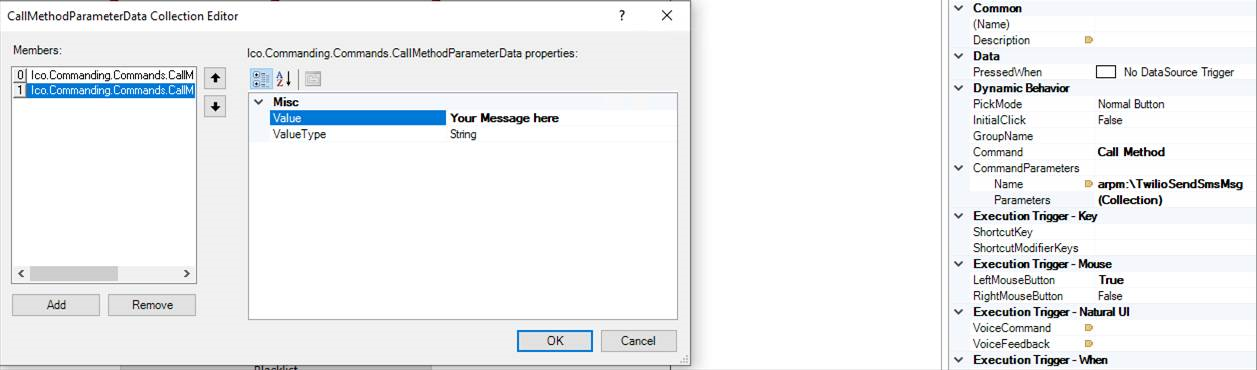
Open GraphWorX64 and add a button. Add a Pick Action to the button. Under Command, choose Call Method.
In the CommandParameters field, type in the method name in the field Name. For example: arpm:\TwilioSendSmsMessage. The other methods supported are TwilioSendVoiceMsg, TwilioSendWhatsAppMsg, and AttSendSmsMsg.
Enter the command parameters within the Parameters field. For this particular method, the first parameter will be the destination number and the second parameter will be the message. Both parameters should be String ValueType.
Setting the Command Parameters
Go into Runtime and click on the button you've created. Verify that you have received the message at the set destination.
To use a different method, change the method name and provide the parameters, like in the above example.
See Also: