Using the Symbols Library
The Symbols Library provides a way for users to quickly build GraphWorX64 displays. Within the Symbols Library, you will find smart symbols. They contain built-in dynamics that you can add any combination of OPC Tags, local aliases, expressions, global aliases, or shapes. The symbols can be anything from a simple switch that turns green on true and red on false, to a complicated panel full of switches, dials, and sensors representing a control device on your manufacturing floor.
This topic describes how to use the library by opening a category of symbols, creating new categories, and password-protecting categories of symbols.
Opening a Category
- Start by opening a new GraphWorX64 display from Start > All Programs > ICONICS > GENESIS64 > GraphWorX64 > GraphWorX64.
- Click on the Symbols tab. If you do not see the Symbols tab, go to the 2D ribbon's View tab and check the box next to Symbols to show the Symbols Library.
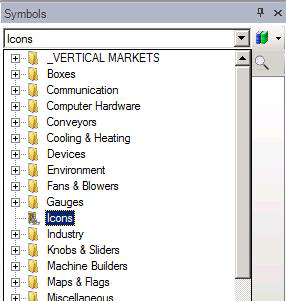
- From the Symbols drop-down list, there are already several folders (called "categories") of pre-made symbols.
Included Symbols Categories
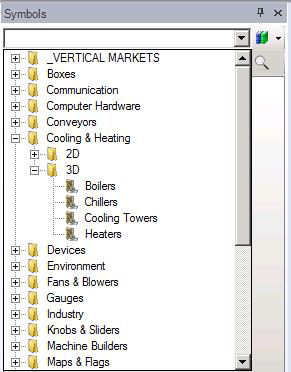
- For example, you can select Gauges, the 2D, and then Circular Gauges. This will reveal more than 30 gauges for you to drag and drop onto your display.
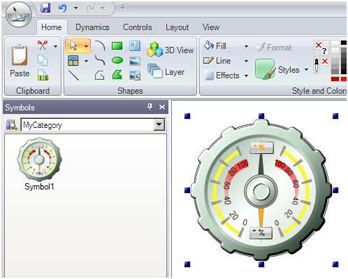
- Click and drag a gauge symbol on to your display. With the newly placed gauge selected you can view its Smart Properties from the Properties toolbar on the right.
Adding a Symbol to your display

- The Smart Properties allow you to change the colors of each component in the gauge, as well as its data source.
NOTE: For more information about Smart Symbols and their properties, refer to the Smart Symbol Basics topic.
Creating a New Category for Symbols
- Start by opening a new GraphWorX64 display from Start > All Programs > ICONICS > GENESIS64 > GraphWorX64 > GraphWorX64.
- Select the Symbols tab. If you don't see it, go to the 2D ribbon's View tab and make sure there is a check mark in the Symbols check box.

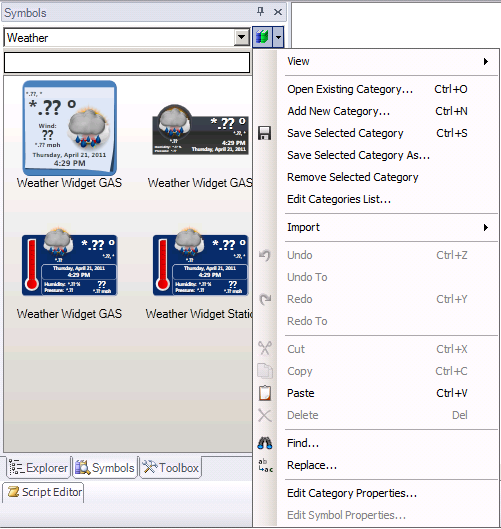
- Click the Symbol Menu icon
 to show a drop-down menu.
- Select Add New Category from the list. The Category Properties dialog will appear.
Category Properties Dialog for a New Category
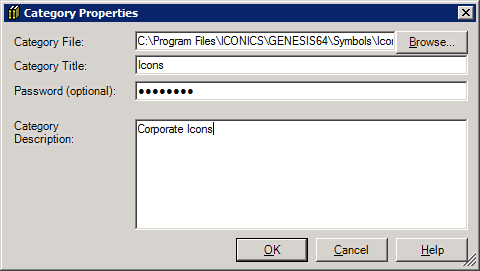
NOTE: By default, the ICONICS Symbol Library is located in the following folder: C:\Program Files\ICONICS\GENESIS64\Symbols\.
- Click Browse… and navigate to the folder you would like to save the new Category. Enter a name for the new category and choose an extension for the file of .sdfx or .sdfxz.
- Enter the Category Title and an optional Category Description if desired.
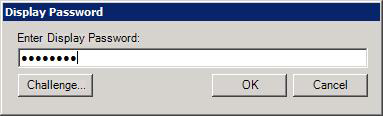
- To password protect the file, specify a password. Passwords are case-sensitive. If you password-protect the category, anyone who selects the symbol category will be prompted to enter the password using the following dialog box:
- Click OK.
- The new category opens automatically in the Symbols tab.
Symbols Library with new Category
- After you have created your own Smart Symbols or edited existing Symbols, you can copy and paste them into your new Category. Alternatively, you can hold down the Ctrl key and then drag and drop the symbol from the work area into the library.
Adding a New Symbol to a Category
- The symbol is automatically saved to your Category after it has been pasted. From this point on, whenever you want to use the category's symbol again, you can drag it out from your symbols library onto your display and reuse it.
Password Protecting a Symbols Category
You may have a symbols or smart symbols that you don't want people changing, or for which you want to protect intellectual property. You can protect them by password-protecting categories in the Symbols Library. Giving a category a password encrypts the symbols and prompts you for the password each time the category is opened.
You can password-protect a category at the time you create it (as described in Creating a New Category for Symbols) but you can also password-protect any category at any time. Follow these steps to password-protect a category:
- Open the category in the Symbols Library in GraphWorX64. To do this, click on the Symbols tab. (If you do not see the Symbols tab, go to the 2D ribbon's View tab and check the box next to Symbols to show the Symbols Library.) Then, from the Symbols drop-down list, navigate to the category and click it to open it.
- With the category open, click the Symbol Menu icon to open the Symbol Library menu (to see what it looks like, click here) and select Edit Category Properties. This opens the Category Properties dialog box.
Category Properties Dialog Box
- In the Password field, type the password that must be used in order to open the category, and click OK. The category is now password protected.
- To test the password, open a different symbol category, the reopen the category you have password protected. You will be prompted to enter the password. If you cannot remember the correct password, you can click the Challenge button to open the Challenge Password dialog box; then call ICONICS Technical Support to receive the challenge answer.
- At any time, you can remove the password protection by opening the category and removing the password from the Category Properties dialog box.
See also:
Smart Symbol Basics
Symbol Library
Smart Symbols Quick Start