GridWorX provides a SQL Command Designer to help you create an advanced query for your selected database.
To run an advanced query on an open database:
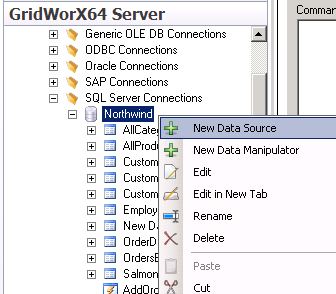
New Data Source Selection
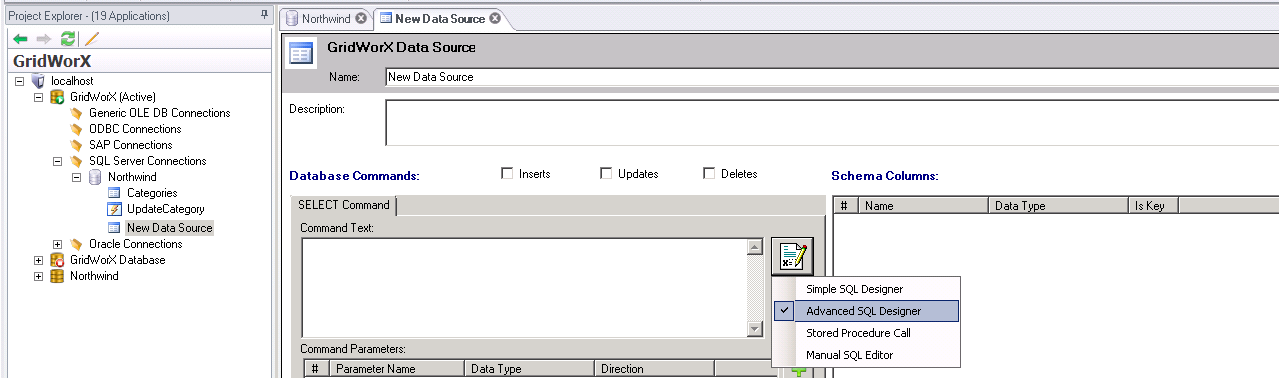
Advanced SQL Designer Selection
SQL Command Designer with MultiSelect Tables Dialog Box

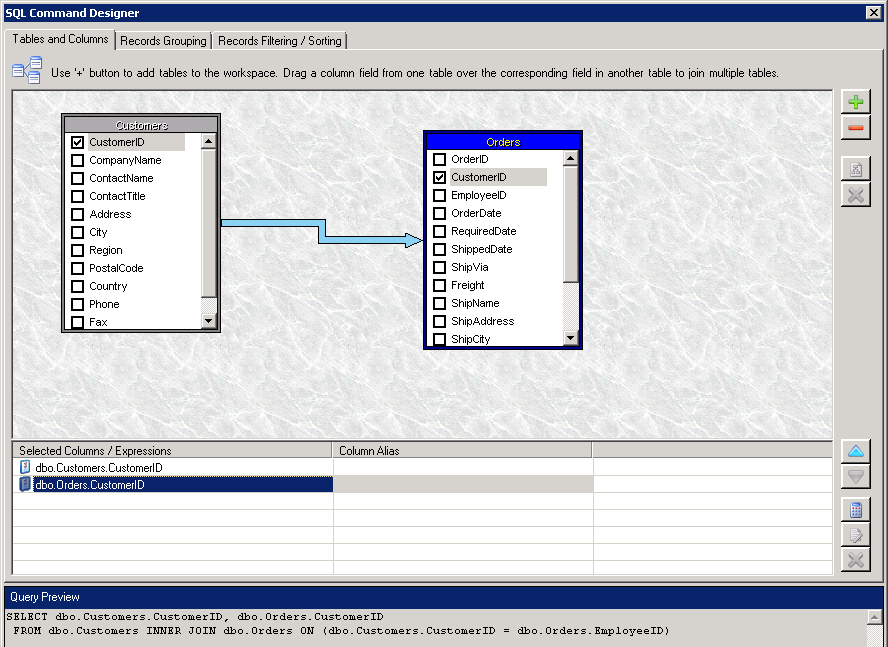
The Tables and Columns tab appears. The wizard displays all columns from all the tables you selected. For each table you chose, select which data columns to include in the database query by checking the box next to the name of each column, as shown in the figure below. For this example database query, the Orders and Customers tables are selected.
If you select multiple tables, you can join the tables together by simply dragging a data column from one table over to the corresponding field in another table. An arrow appears, indicating that a join between the two tables exists, as shown in the figure below. In this example, the CustomerID column in the Customers table is linked to the CustomerID column in the Orders table.
SQL Command Designer with Tables and Columns Tab
|
|
Note: Refer to your SQL language documentation for details about SQL Joins. |
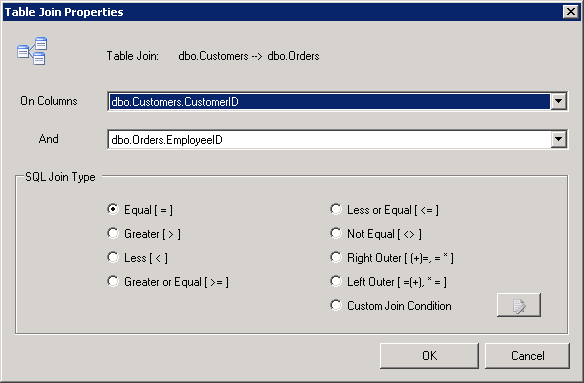
Table Join Properties Dialog Box
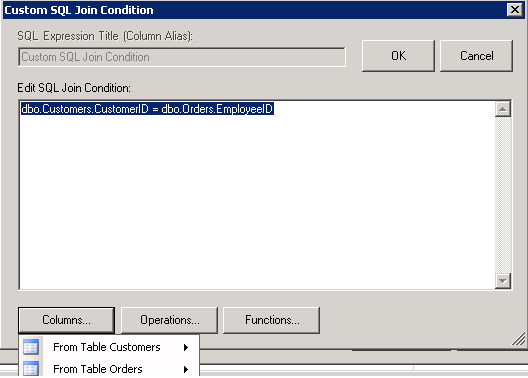
Custom SQL Join Condition Dialog Box
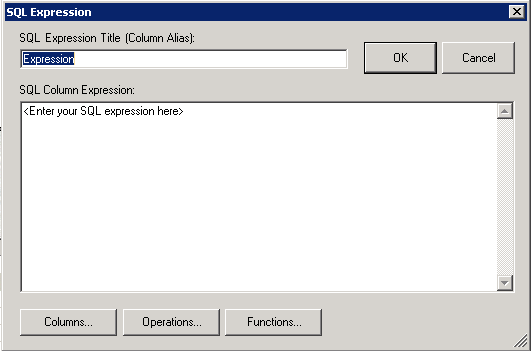
SQL Expression Dialog Box
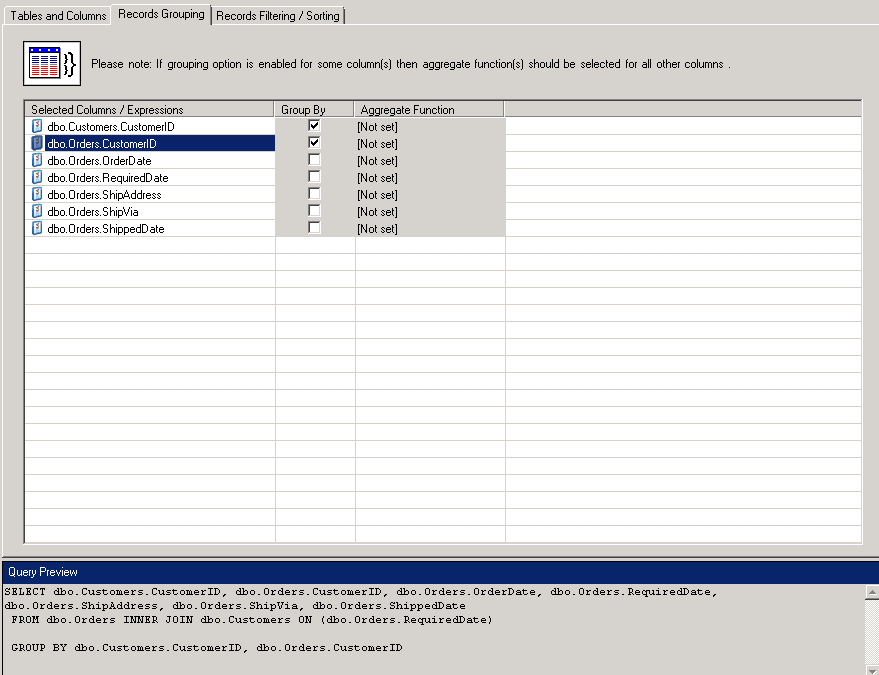
As appropriate, assign an Aggregate Function (such as a Count, Average, Maximum, Minimum, Sum, Standard Deviation, etc.) to each of the columns you did not include in the grouping list. To set an Aggregate Function, click on the column or expression name; this enables the Aggregate Function’s drop-down list for the column or expression. The records of columns that are assigned the same aggregate function will be grouped together in the query result.
Records Grouping Tab
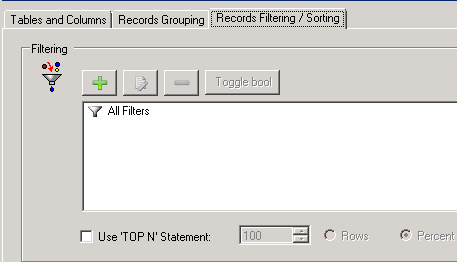
Records Filtering/Sorting Tab
|
|
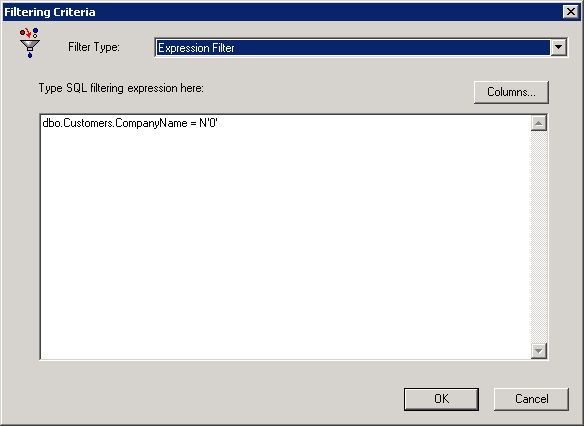
Note: Refer to your SQL language documentation for details about SQL expressions. |
Expression Filter Dialog Box
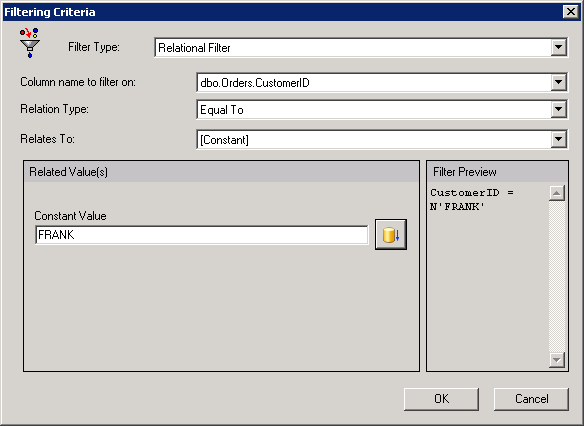
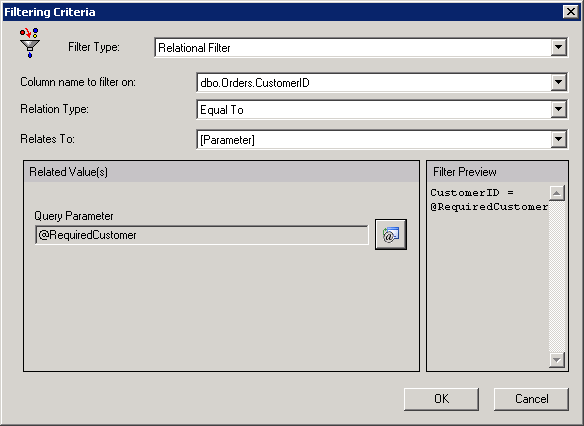
If you choose Relational Filter as your filter type, complete the following fields:
Relates To - select the item for comparison. You can choose one of the following:
Constant Value - Click the button with the database icon on it to select a value from the database.
Relational Filter with Constant Value selected
Parameter - Click the button with the @ icon on it to select a parameter from the Parameter browser. The parameter appears in the Query Parameter field, as shown here.
Relational Filter with Parameter selected
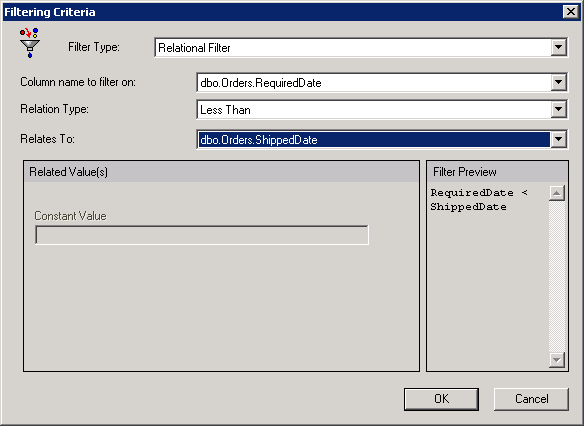
You can also choose a data table value directly from the Relates to field as shown in the following figure.
Relational Filter with Parameter selected
You can create additional filters by repeating the prior two steps.
Once you have created all of your filters, you can drag and drop them from one tree node to another, or if you create a new filter while some other filter is selected on the tree, the newly created one will be shown as a child tree node. The tree-like structure for filters displays how they are combined, using AND/OR Boolean operators and parentheses. The rule is simple; each filter node is first combined with its “children,” and then the resulting expression is combined with the “siblings.” Try dragging and dropping several filters onto one another and watch how the SQL preview changes to get an idea of how this works. Click the Toggle Bool button to switch between the AND/OR boolean operators.
Records Filtering/Sorting Tab
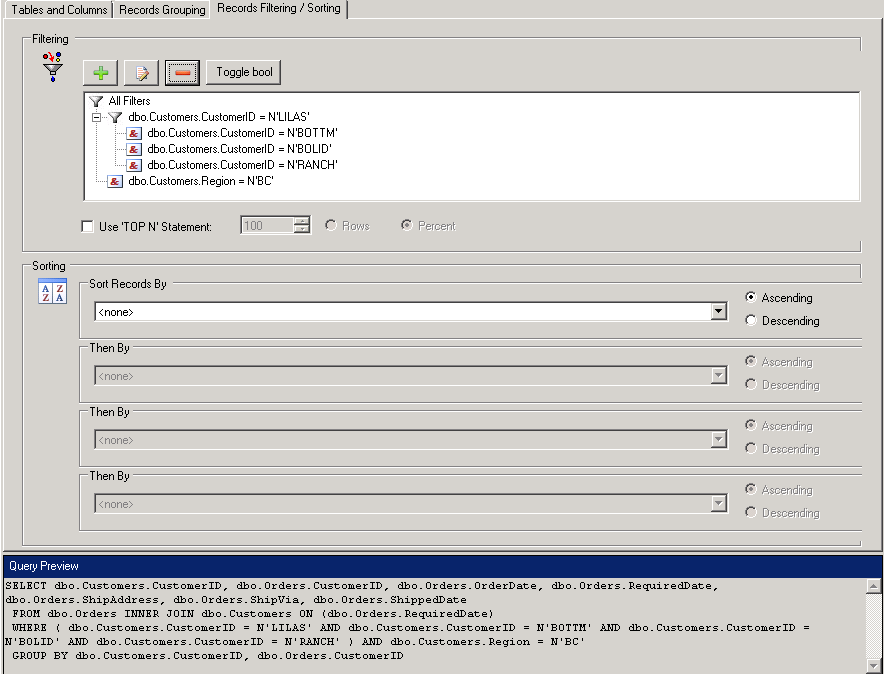
Use the bottom half of the Records Filtering / Sorting tab, shown above, to sort the database records. Now that you have defined parameters for filtering or restricting data from columns you can specify the priority by which the columns and the records in each column are sorted. You can choose to sort on any of the selected columns, as shown in the figure above, or leave them unsorted.
To determine the order in which the data will be displayed within in each column, select that column from the drop-down list and select one of the following sorting options:
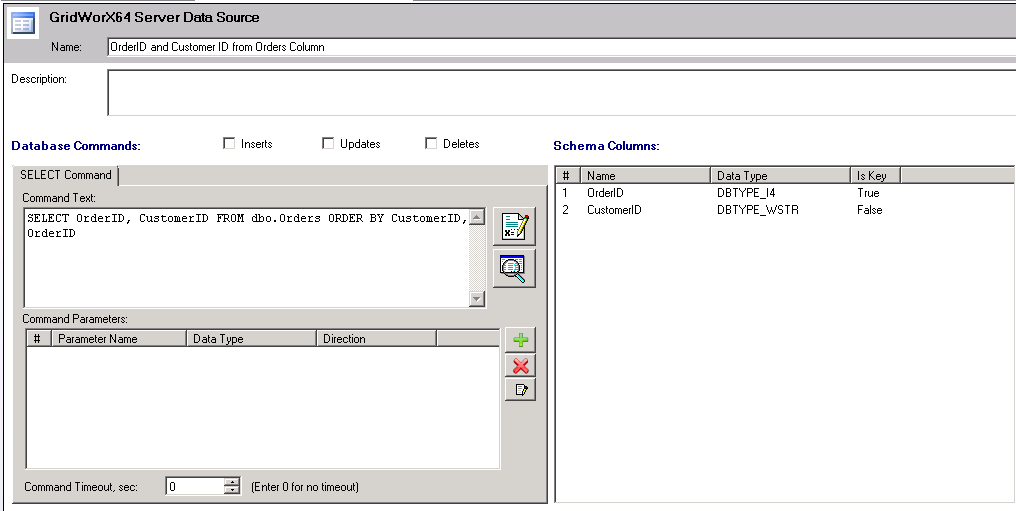
GridWorX64 Server Data Source Name with Select Command
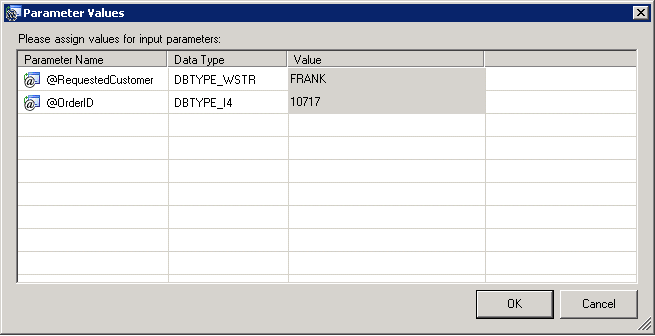
Parameter Values Dialog Box with Requested Values
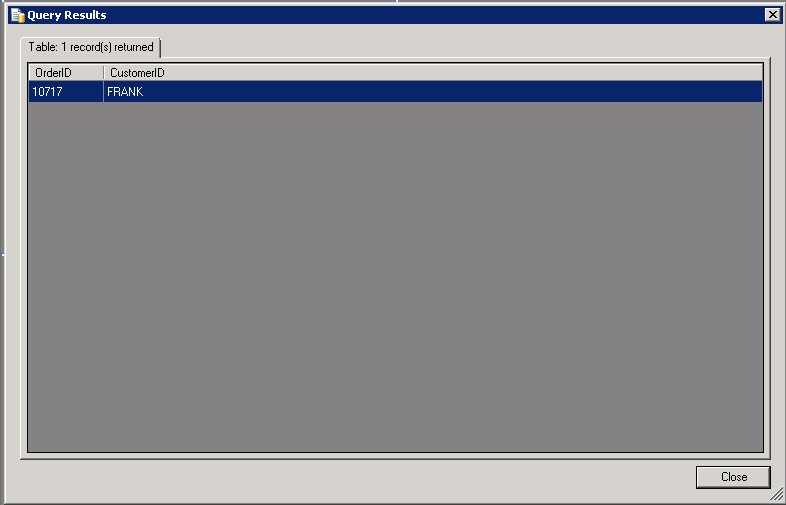
The Query Results dialog box appears and lists valid records retrieved using the parameter values you provided for the query. You may need to test of change your query if you do not see the results you expected. Click Close to close this dialog box.
Query Results
See also: