A Data Source is a handle provided for Unified Data Browser that is used to connect to a database table. The Data Source stores SQL commands to select, insert, update, and delete entries in the database table. SELECT configuration is required. Insert, Update, and Delete configurations are optional. Follow these instructions to create a Data Source.
To Add a Data Source:
Open the Workbench. Expand your project folder, then the Data Connectivity node, then the Databases node.
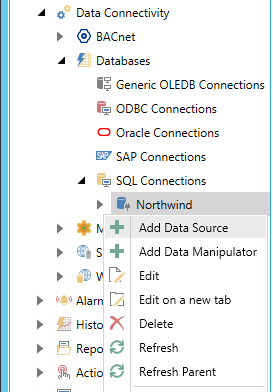
Expand your selected data connection. For instance, in the example below, we are adding a data source to the Northwind database found within the SQL Connection node. Right-click the database node, then select Add Data Source, as shown below.
New Data Source Selection
-OR-
Select your desired database connection then click on the Add Data Source button in the Edit section of the Home ribbon, as shown below.
Add Data Source Button

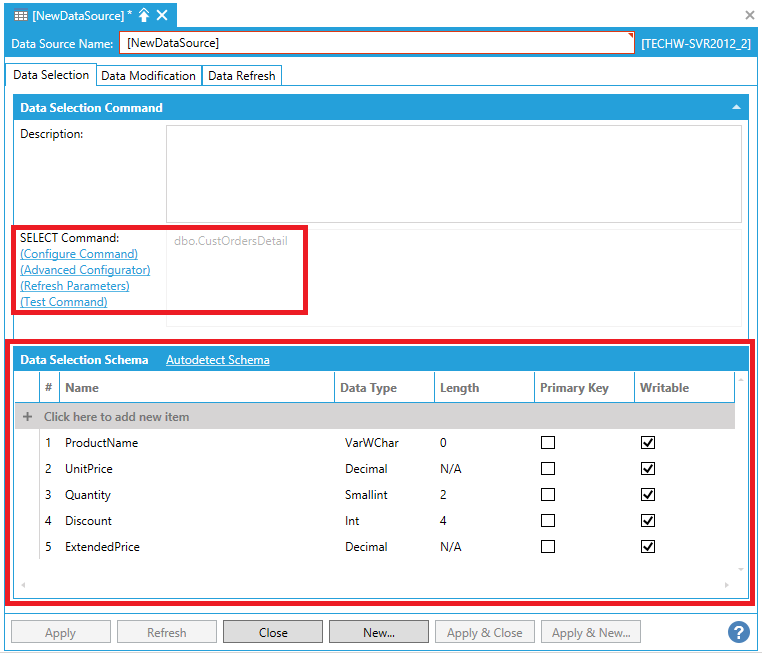
This opens the Data Source properties window, as shown below. Enter a name for your Data Source in the text entry field.
New Data Source
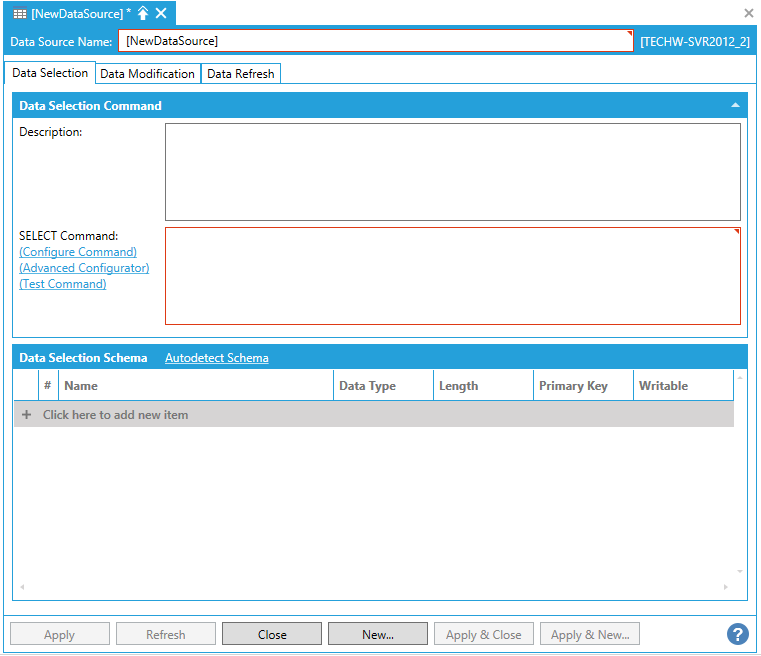
The Data Source properties are comprised of three tabs:
Enter a Description of the Data Source in the text entry field.
In the Select Command entry, you can opt to use the Configure Command, Advanced Configurator or Test Command links.
Clicking the Configure Command link opens the Configure SELECT Command window, shown below.
Configure SELECT Command Window - Table Query Command Type Selected
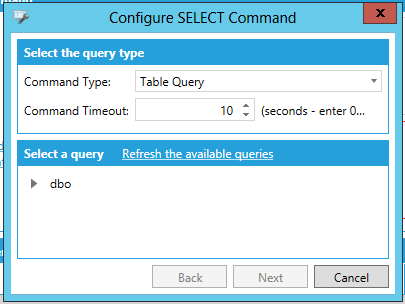
Select the query type
Command Type - Use the pulldown menu to select from Table Query, Custom Query or Stored Procedure. The selection will determine what the following additional settings will be.
Command Timeout - Enter a length of timeout for the SELECT command (in seconds) in the text entry field (or use the up/down arrows). Enter 0 for no timeout.
Select a query
Refresh the available queries - Click this link in order to refresh available queries for the SELECT command.
You can then expand the database schemas in order to select desired items (e.g. Tables, Views, etc.) for the query.
Click the Next button once you have completed editing these settings. The window will advance to the next panel, shown below.
Second Panel of Selected Table Query Command Type
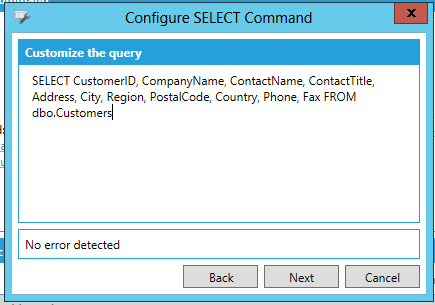
Customize the query
Customize the query - Once you have set your query in the preceding panel, you can customize the query further in this text entry field. You can also click the 'Back' button in order to reconfigure the original query.
Click the Next button once you have completed editing these settings. The window will advance to the next panel, shown below.
Third Panel of Selected Table Query Command Type
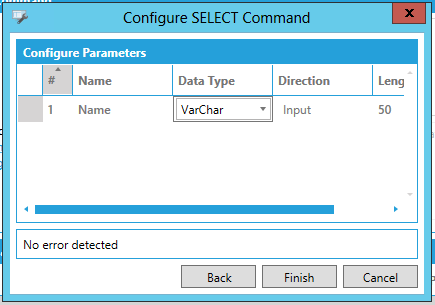
Configure Parameters
Configure Parameters - You can opt to configure parameters for the command configuration. Click on the "+ Click here to add new item" link in order to add a new entry, where you can then provide a #, Name, Data Type, Direction, and Length. You can also opt to not include parameters and proceed to the next step.
Click the Finish button to proceed. You will see the following Warning message.
Table Query Command Type Selection Warning
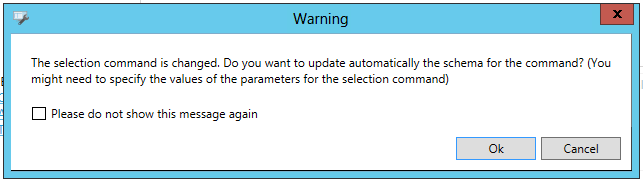
Please do not show this message again - Click this checkbox if you wish to skip this warning step during creation of Command Types.
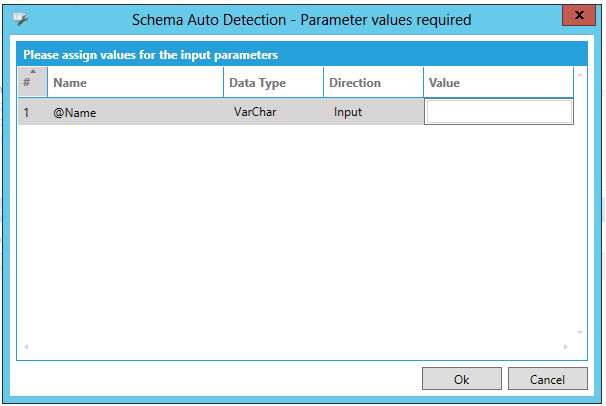
Click the Ok button to proceed. If the provided settings require additional parameters, you will be able to enter them in the Schema Auto Detection - Parameter values required window.
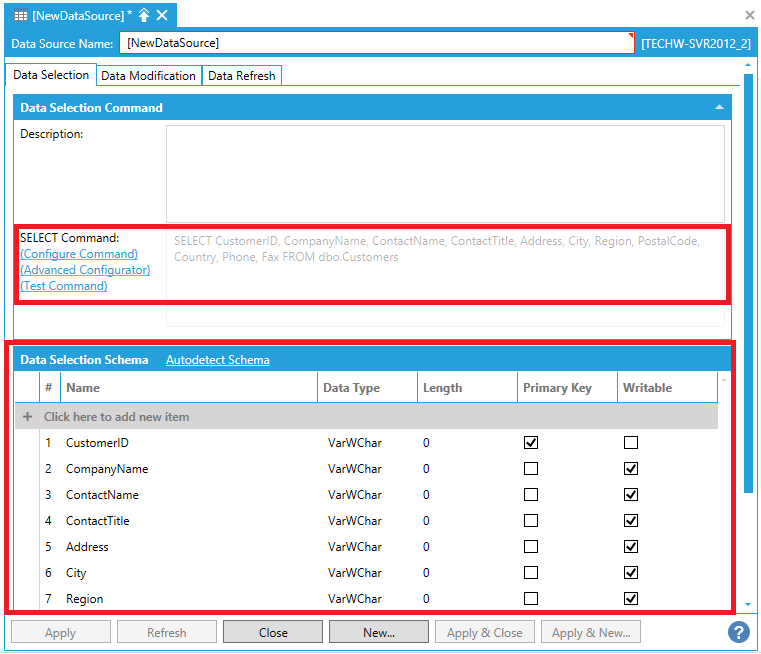
If the provided settings did not require any additional parameters, the Data Selection Schema section of the Data Source properties will then be automatically filled according to the SELECT Command settings (as shown below).
Data Selection Schema Filled from SELECT Command Settings
Configure SELECT Command Window - Custom Query Command Type Selected
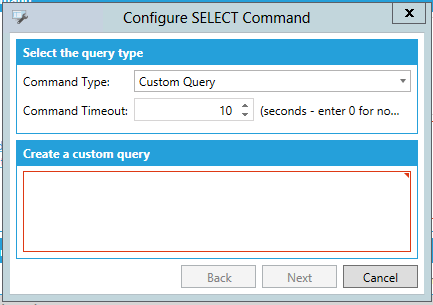
Command Timeout - Enter a length of timeout for the SELECT command (in seconds) in the text entry field (or use the up/down arrows). Enter 0 for no timeout.
Create a custom query
Create a custom query - Use the text entry field to construct a custom query for the configured SELECT command.
Click the Next button once you have completed editing these settings. The window will advance through additional panels, similar to the Custom_Query settings described above.
Configure SELECT Command - Stored Procedure Command Type Selected
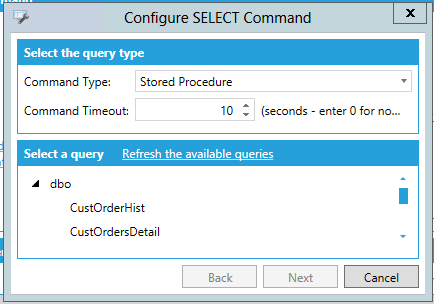
Command Timeout - Enter a length of timeout for the SELECT command (in seconds) in the text entry field (or use the up/down arrows). Enter 0 for no timeout.
Select a query
Refresh the available queries - Click this link in order to refresh available queries for the SELECT command.
You can then expand the database schemas in order to select desired items for the query.
Click the Next button once you have completed editing these settings. The window will advance to the next panel, shown below.
Second Panel of Selected Stored Procedure Command Type
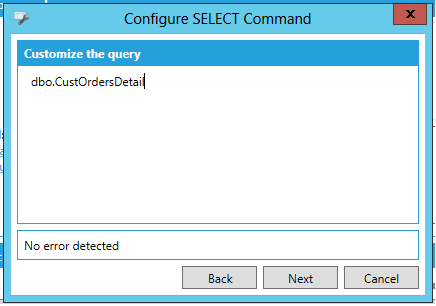
Customize the query
Customize the query - Once you have set your query in the preceding panel, you can customize the query further in this text entry field. You can also click the 'Back' button in order to reconfigure the original query.
Click the Next button once you have completed editing these settings. The window will advance to the next panel, shown below.
Third Panel of Selected Table Query Command Type
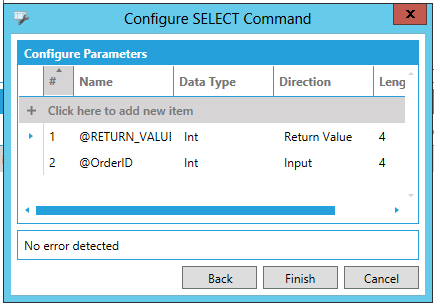
Configure Parameters
Configure Parameters - You can opt to configure parameters for the command configuration. Click on the "+ Click here to add new item" link in order to add a new entry, where you can then provide a #, Name, Data Type, Direction, and Length. You can also opt to not include parameters and proceed to the next step.
Click the Finish button to proceed. If the provided settings require additional parameters, you will be able to enter them in the Schema Auto Detection - Parameter values required window.
If the provided settings did not require any additional parameters, the Data Selection Schema section of the Data Source properties will then be automatically filled according to the SELECT Command settings (as shown below).
Data Selection Schema Filled from SELECT Command Settings
Clicking the Advanced Configurator link opens the SQL Command Designer window, shown below.
SQL Command Designer Window
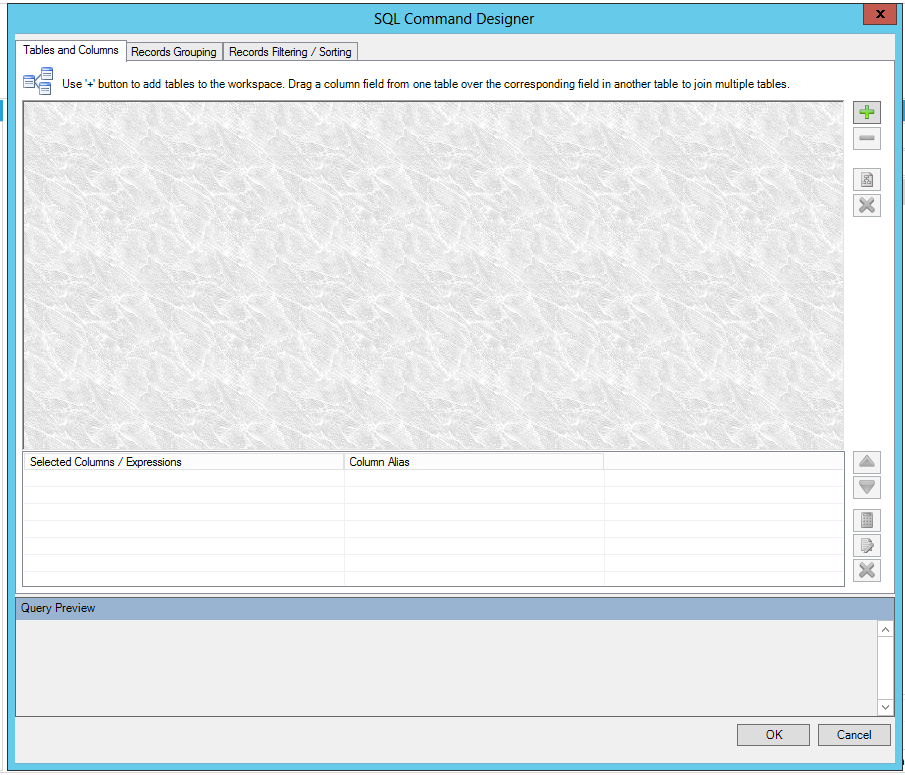
The SQL Command Designer window provides options to add Tables and Columns, Records Grouping, and Records Filtering/Sorting.
Click OK once you have completed constructing your command. The Data Selection Schema section of the Data Source properties will then be automatically filled.
The Test Command link can be used once a Data Selection Command has been set (either via Table Query, Custom Query, Stored Procedure or via the Advanced Configurator). Clicking the Test Command link at that point opens the "Test the data source configuration Window", shown below.
Test the data source configuration Window
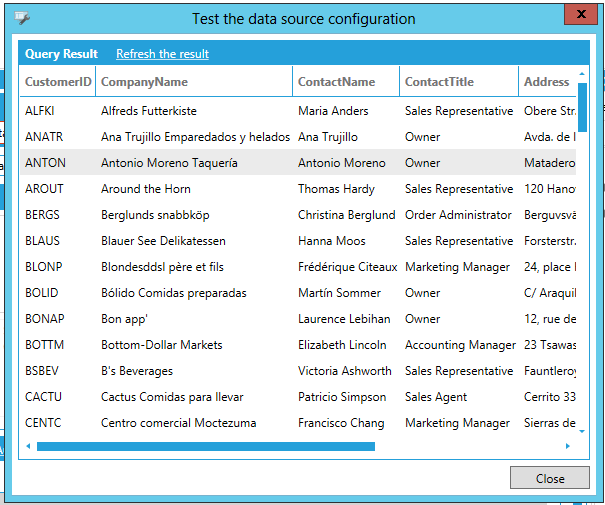
Query Result - This section will display the results of the query set through the Data_Selection_Command and Data_Selection_Schema sections of the Data Source properties. Click on the 'Refresh the result" link in order to display the most current items.
Click the Close button to return to the Data Source properties.
This section can be autofilled based on the settings made in the Data Selection Command section above.
You can opt to click the "Autodetect Schema" link, which will fill the section below with existing found data selection schema.
You can also configure your own schema by clicking on the "+ Click here to add new item" link. This will create a new data selection schema entry where you can edit the #, Name, Data Type, Length, Primary Key (status) and Writable (status).
The Data Modification Tab allows users to configure INSERT, DELETE and UPDATE commands, in addition to the SELECT command configured on the Data Selection tab of the Data Source properties.
Data Modification Tab
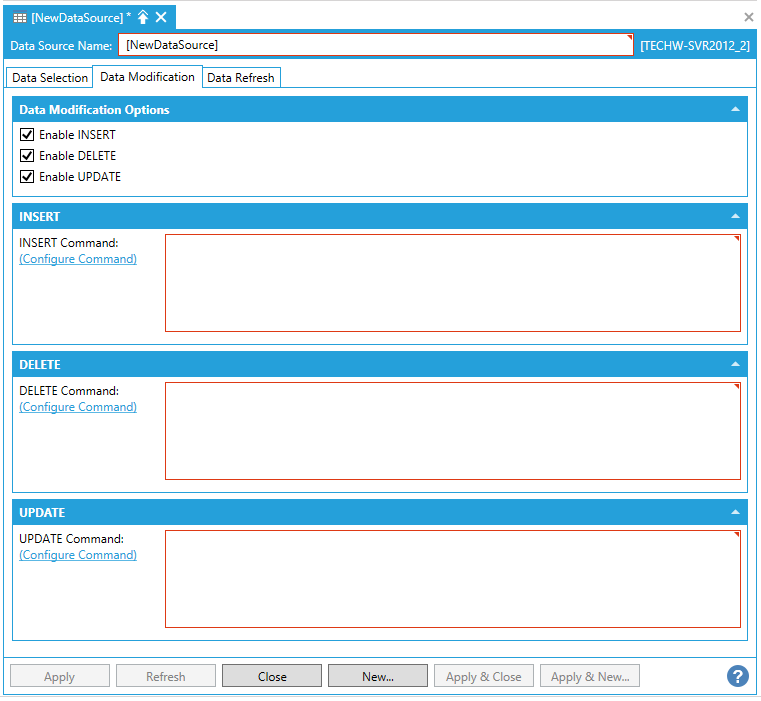
Enable INSERT - Click this checkbox in order to add the INSERT Command properties to the Data Modifications tab.
Enable DELETE - Click this checkbox in order to add the DELETE Command properties to the Data Modifications tab.
Enable UPDATE - Click this checkbox in order to add the UPDATE Command properties to the Data Modifications tab.
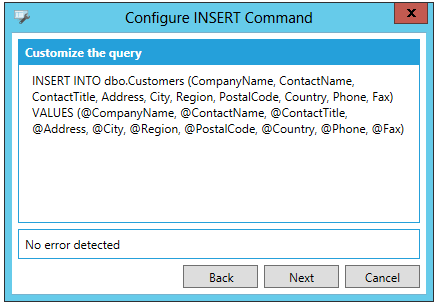
INSERT Command/Configure Command - Click on the Configure Command link to edit the INSERT Command. If you have already created a SELECT command on the Data_Selection_Tab, you will be able to continue from/edit those settings in order to use the INSERT Command. If you have not already created a SELECT command on the Data Selection Tab, then you will configure the command from the beginning.
Configure INSERT Command Window - Partially Completed with Prior Settings from the SELECT Command
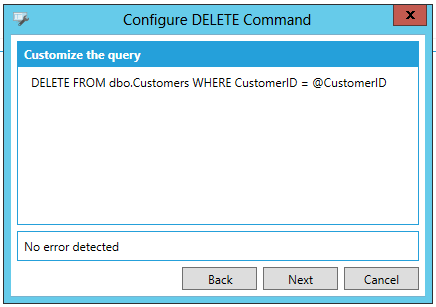
DELETE Command/Configure Command - Click on the Configure Command link to edit the DELETE Command. If you have already created a SELECT command on the Data_Selection_Tab, you will be able to continue from/edit those settings in order to use the DELETE Command. If you have not already created a SELECT command on the Data Selection Tab, then you will configure the command from the beginning.
Configure DELETE Command Window - Partially Completed with Prior Settings from the SELECT Command
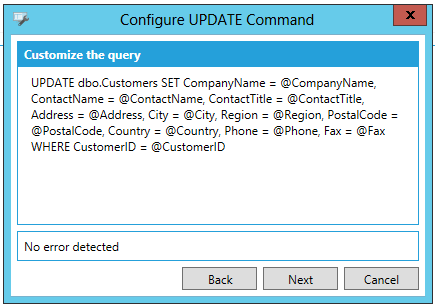
UPDATE Command/Configure Command - Click on the Configure Command link to edit the UPDATE Command. If you have already created a SELECT command on the Data_Selection_Tab, you will be able to continue from/edit those settings in order to use the UPDATE Command. If you have not already created a SELECT command on the Data Selection Tab, then you will configure the command from the beginning.
Configure UPDATE Command Window - Partially Completed with Prior Settings from the SELECT Command
The Data Refresh tab allows users to set the data refresh mechanism (time period or triggers) properties for the configured Data Source.
Data Refresh Tab
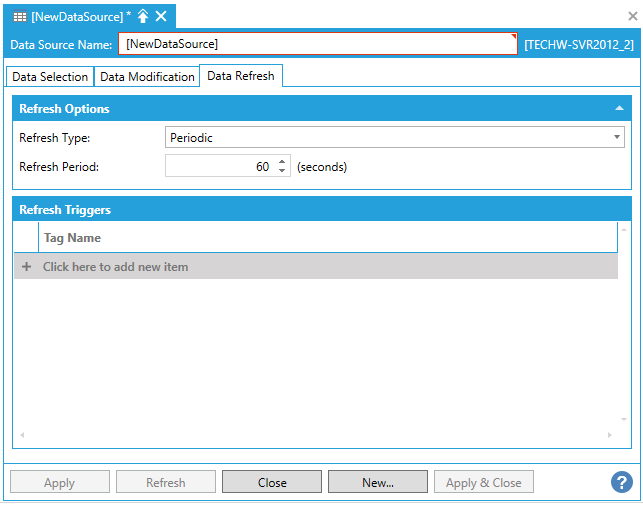
Refresh Type - Use the pulldown menu to select from No Refresh, Periodic or By Triggers.
Refresh Period - Selecting 'Periodic' as a Refresh Type activates this setting, where you can enter a refresh period (in seconds) in the text entry field (or by using the up/down arrows).
Selecting 'By Triggers' as a Refresh Type activates this section of the tab. Click on the "+ Click here to add new item" link in order to add a new trigger item, where you can enter a Tag Name in the text entry field or click on the  button in order to open the Data Browser and navigate to your selected Tag Name.
Click on Apply then Close to save your changes and return to the Tree Explorer, where your new Data Source will appear.
See Also: