|
|
The features on this page require an add-on to work with GENESIS64 Basic SCADA. |

![]()
|
|
The features on this page require an add-on to work with GENESIS64 Basic SCADA. |
![]()
In the Web Services Provider in the Workbench, you can create new Web Services, either a SOAP Service or a REST Service.
To Add a New SOAP Web Service
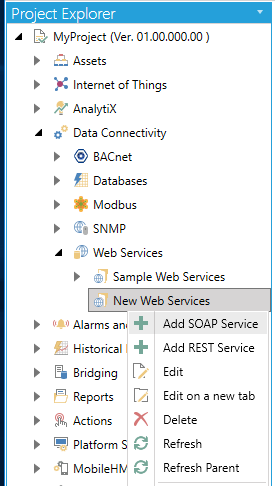
Expand the Web Services provider tree control, then My Web Services. Right-click on a Web Services folder, as shown below, and select Add SOAP Web Service.
Creating a New SOAP Web Service in the Web Services Provider
-OR-
Select a Web Services folder then click on the Add SOAP Service button in the Edit section of the Home ribbon in the Workbench.
Add SOAP Service Button

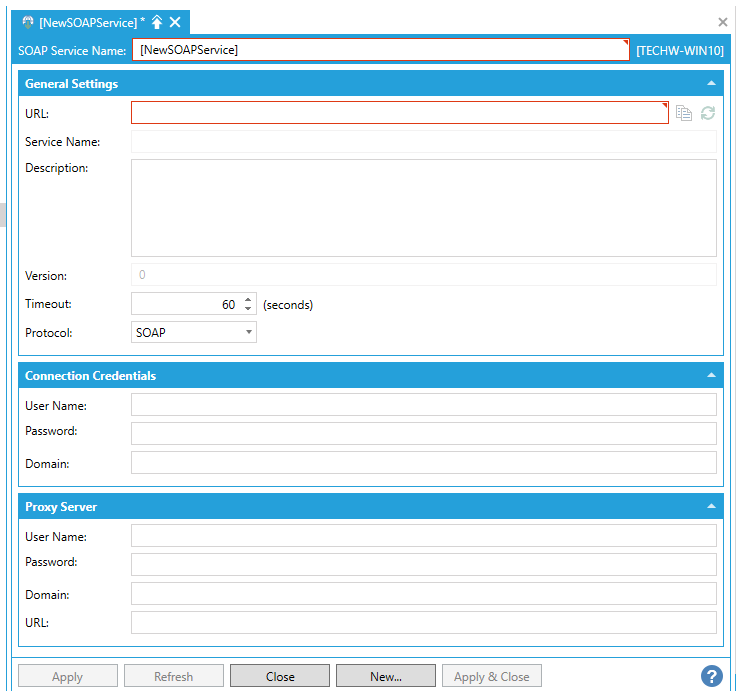
The SOAP Service Properties, shown below, then appear beneath the Project Details section in the middle of the Workbench. Enter a name in the SOAP Service Name text entry field.
SOAP Service Properties
General Settings
In the General Settings section, you can enter the URL for the SOAP service as well as provide a Service Name, Description, and Version. You can also set a Timeout (in seconds) after which, the attempt to connect to the URL will cease. You can select the Protocol as to how to connect (SOAP, HTTP Get or HTTP Post).
Connection Credentials
In the Connection Credentials section, you can enter a User Name, Password and specific Domain that might be required for the URL to which you intend to connect.
Proxy Server
In the Proxy Server section, you can enter a User Name, Password, Domain and URL for a Proxy Server (if the URL requires use of one or if you decide for any reason to use a proxy server) through which you intend to connect to the originally entered URL.
Once you have finished your settings, click Apply to save them and Close to return to the Workbench.
To connect to a SOAP Service, you have to enter the URL of its WSDL document and give a name to the service. Then click the Apply button and Workbench will automatically download the WSDL file and create Web Methods for all the methods exposed by the service. You may notice some additional sub-branches, representing the methods exposed by the service, added beneath newly added Web Service within the Project Explorer as shown below.
SOAP Service Configuration
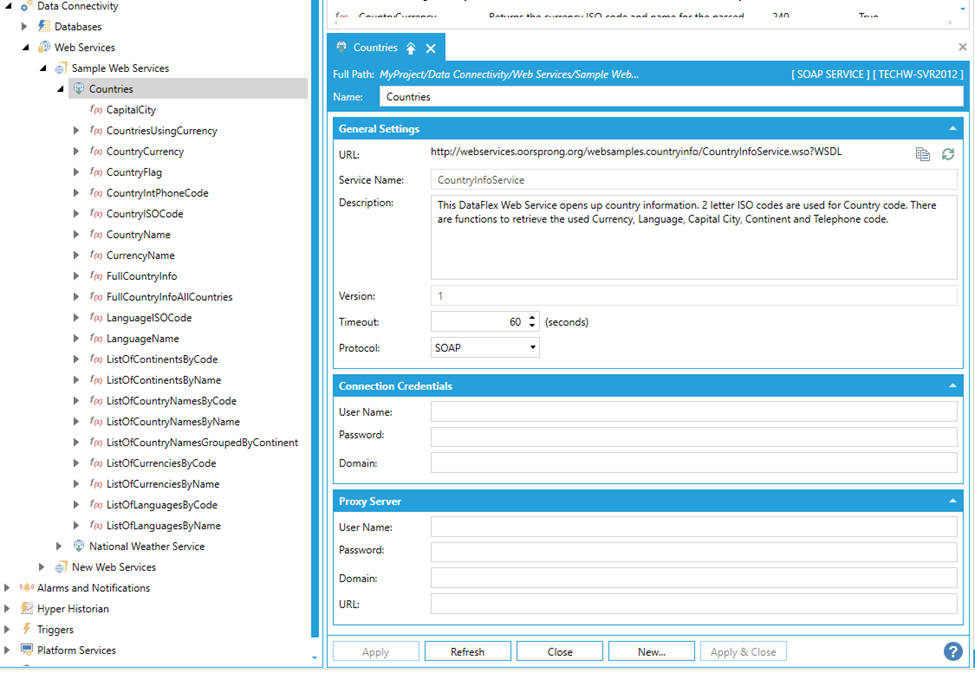
Workbench also fills in the Service Name field with the name of the service as defined in the WSDL, and the Description field with the service description received from the WSDL (if any).
Once the methods have been downloaded, the configuration is cached and assigned a Version number. If the SOAP service is modified, it is necessary to rebuild the configuration to pick up the changes. In order to do so, click on the Refresh icon button next to the URL, which will prompt a confirmation dialog:
Refreshing a SOAP Service Configuration
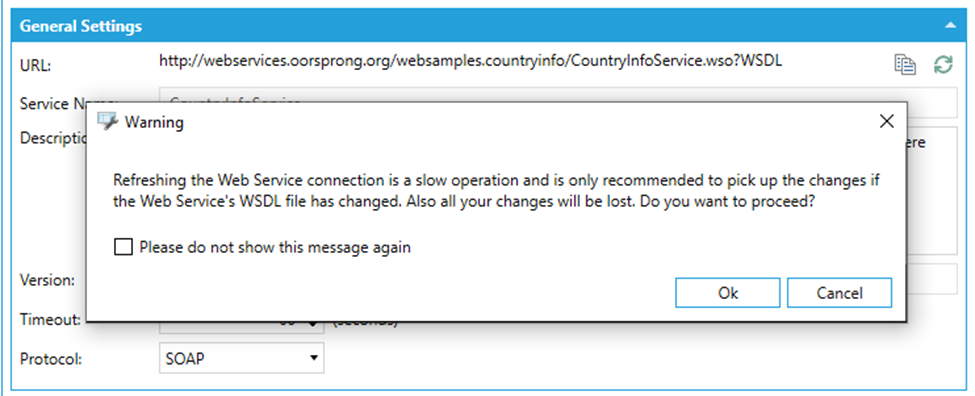
By pressing OK, the WSDL will be downloaded again and the configuration rebuilt. The Version number will be bumped up and all changes made to methods will be reset.
To Add a New REST Web Service
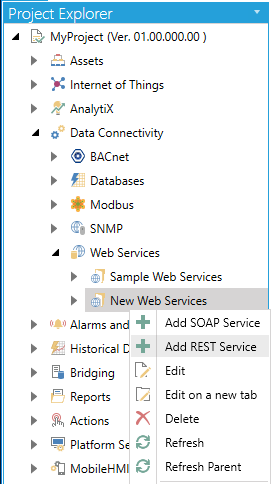
Expand the Web Services provider tree control, then My Web Services. Right-click on a Web Services folder, as shown below, and select Add REST Web Service.
Creating a New REST Web Service in the Web Services Provider
-OR-
Select a Web Services folder, then click on the Add REST Service button in the Edit section of the Home ribbon in the Workbench.
Add REST Service Button

REST Service Properties
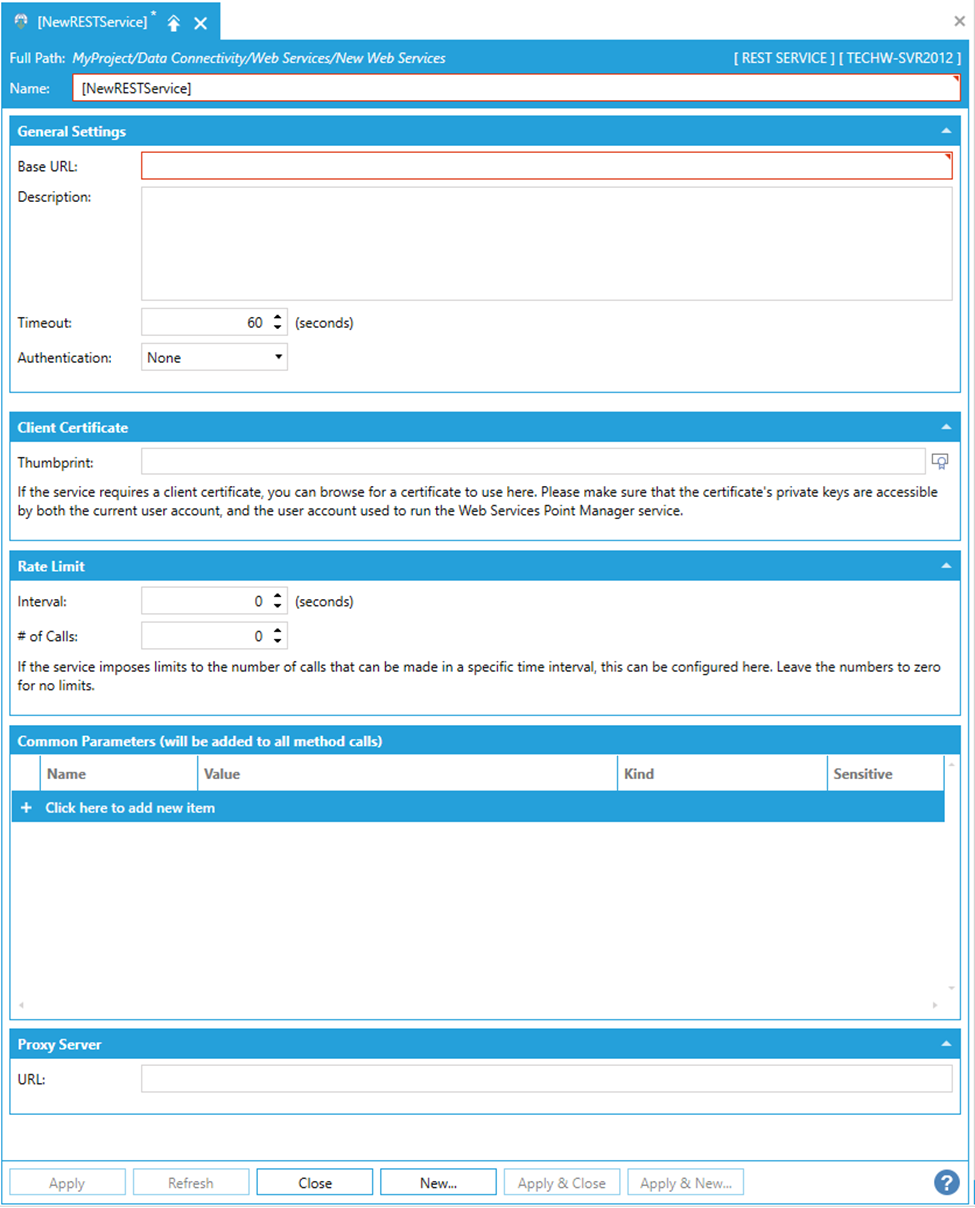
General Settings
In the General Settings section, you can enter the Base URL for the REST service as well as provide a Description. You can also set a Timeout (in seconds) after which the attempt to connect to the URL will cease. You can select the Authentication (None, Query String, Basic, OAuth 1.0 or 1.0a, OAuth 2.0, or NTLM) that is required to connect to the service.
Connection Credentials
If you select an Authentication method, the Connection Credentials section will appear. Here, you can enter the required info for the selected method:
Query String: User Name Key, User Name, Password Key, Password
Basic: User Name, Password
OAuth 1.0 or 1.0a: Consumer Key, Consumer Secret, Request Token URL, Authorize Token URL, Access Token URL
OAuth 2.0: Client Id, Consumer Secret, Scope, Callback Url, Authorize Token URL, Access Token Request Type
NTLM: User Name, Password, Domain
JSON Web Token: This special authentication type works in conjunction with Web Authentication Methods, where there is an already configured Web Authentication Method that authenticates with the service and returns an object containing a JSON Web Token representing the result of the authentication process.
Client Certificate
If the server requires a client certificate to be presented with each call, it can be configured in this section. Click the browse button to browse for a certificate installed on the machine:
Browsing for a certificate
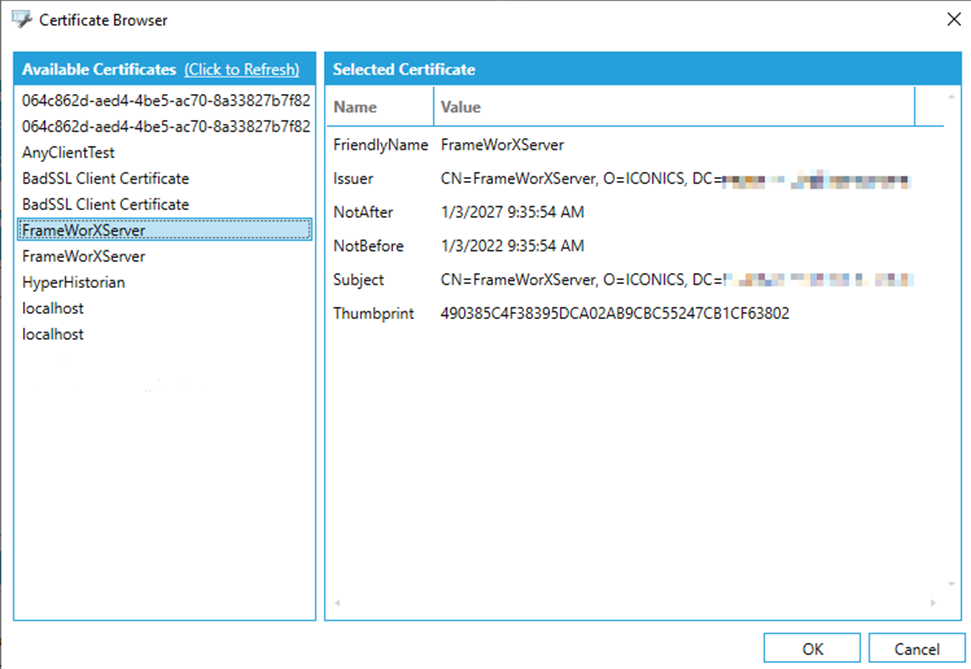
Once a certificate has been selected, its thumbprint will be displayed in Thumbprint textbox:
Certificate Thumbprint

Rate Limit
The Rate Limit allows you to set an Interval (in seconds) and a # of Calls. If the service imposes no limits to the number of calls, that can be made in a specific time interval, It can be configured in this section. Leaving the numbers as '0' means no limits.
Common Parameters (will be added to all method calls)
Click the "+ Click here to add new item" link to add a new default parameter. You can then enter a Name, Value, and Kind (using the pulldown menu, select from Query String or POST Body, Cookie, URL Segment, HTTP Header, Query String, or Request Body) and select whether the parameter will be Sensitive (by clicking the checkbox within that column).
Parameters configured at the Service level will be added to all calls made from methods configured under the service. This makes them ideal, for example, to configure an API key or a specific HTTP header so that they have not to be repeated in the configuration of all methods and can be modified in a central place. Moreover, parameters at the Service level are not added to the point name in runtime and cannot be overridden by a client.
If a parameter is marked as Sensitive, it will be obscured in the Workbench UI so that its value cannot be read. It will also be removed in runtime from the point name. For security reasons, unchecking the Sensitive checkbox will clear the parameter value.
As described above, the supported parameter types are:
Query String or POST Body. This selection allows to dynamically change how the parameter is sent to the service, depending on the HTTP method used for the call. If the call is made using HTTP GET, then the parameter will be sent in the query string. If the call is made using HTTP POST, then the parameter will be sent in the request body and the content-type of the request will be set to application/x-www-form-urlencoded. If the intent is to send a parameter in the query string, then using Query String is recommended.
Cookie. The parameter will be sent as a cookie with the specified name and containing the specified value.
URL Segment. This kind of parameter allows to dynamically replace a part of the request URL with the parameter’s value. For this to work, the URL must contain a placeholder in curly braces with the name of the parameter. For example, assume that the service’s URL is configured as:
https://myservice/{endpoint}/
Creating a parameter called endpoint of type URL Segment will allow to dynamically specify the endpoint used in the URL for the request. In runtime, the placeholder in the URL will be replaced with the value of the endpoint parameter.
HTTP Header. The parameter will be sent as a HTTP header with the specified name, containing the specified value.
Query String. The parameter will be added to the query string of the request with the specified name, containing the specified value.
Request Body. This parameter type only applies to HTTP POST, PUT or PATCH. The parameter will be sent in the request body as-is, and the request content type will be set to the parameter’s name. Only one Request Body parameter is allowed. This kind of parameter is typically used to POST JSON payloads to a service, using application/json as the parameter’s name.
Proxy Server
In the Proxy Server section, you can enter a URL for a Proxy Server (if the URL requires use of one or if you decide for any reason to use a proxy server) through which you intend to connect to the originally entered URL.
The sub-branches of a newly created SOAP Service (as mentioned in Create a New Web Service - SOAP) allow to edit and configure SOAP Web Methods. To edit a SOAP Web Method double-click on it in the Project Explorer or right-click on it and select Edit.
This tab is used to configure common properties related to the Web Method.
General Settings
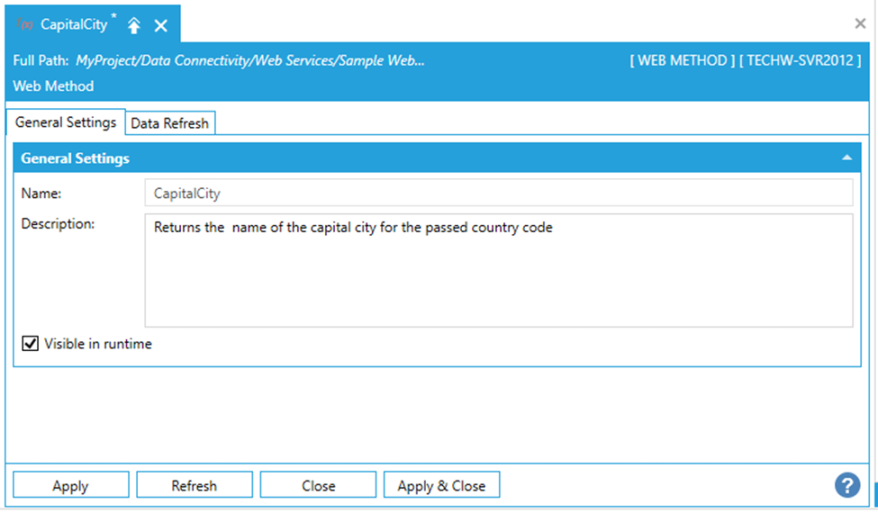
The Name of the method, as exposed by the SOAP service is pre-filled, along with a Description automatically downloaded from the WSDL file (if any).
The Visible in runtime checkbox, when unchecked, allows to completely hide and disable access to the Web Method from other applications. This means that the method will not be browsable from the Unified Data Browser and cannot be accessed via the Web Services runtime.
Data Refresh
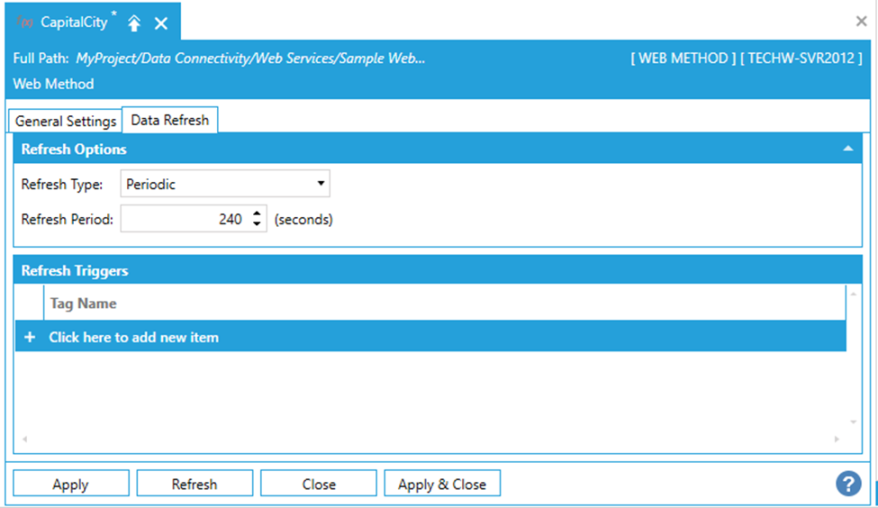
The Refresh Type combo-box allows to configure how the results received from the web method by the Web Services runtime are refreshed. The options are:
· No Refresh. Once the result of a SOAP Web Method call is received by the Web Services runtime it is cached, and not requested again* from the SOAP Web Method.
· Periodic. The result of a SOAP Web Method call is cached when received by the Web Services runtime, and it will stay cached for the amount of time configured by Refresh Period.
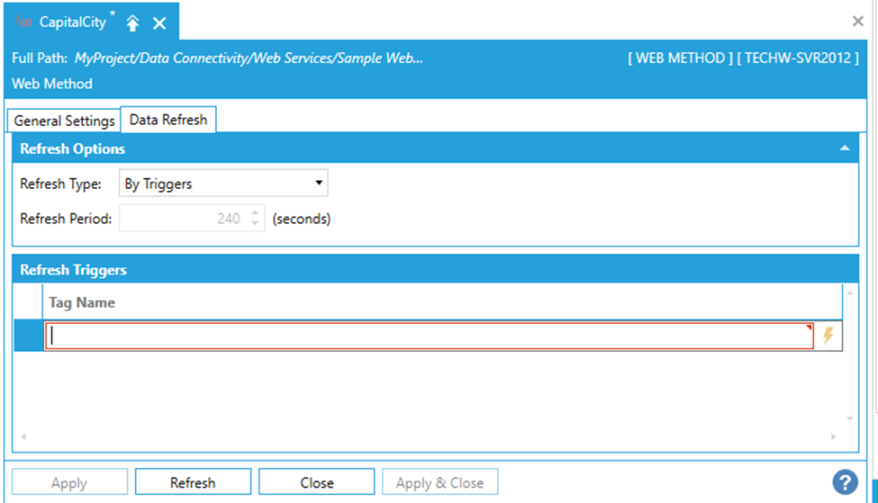
· By Triggers. The result of a SOAP Web Method call is cached when received by the Web Services runtime, and it will stay cached until one of the Refresh Triggers fires.
*See the How the Web Services Runtime caches and refreshes data section for more details on how caching and requesting data from web services works.
To configure a refresh trigger, select By Triggers in the Refresh Type combo-box, and then click on the Click here to add new item link under Refresh Triggers:
Refresh Triggers
If a Refresh Type of "By Triggers" is selected, you can click on the + Click here to add new item link to create a new Refresh Trigger. Once activated, you can enter a Tag Name in the text entry field or click on the ![]() button to open the Data Browser and navigate to your selected Tag Name.
button to open the Data Browser and navigate to your selected Tag Name.
Once you have completed making edits to the Web Method Instance, click Apply to save your settings and Close to exit.
Multiple triggers can be added to refresh the SOAP Web Method on different conditions.
Configured SOAP Web Methods usually accept parameters and return either simple, primitive, values or structured values (objects). In runtime it is possible to specify the parameter values to use in the point name, and also to drill into the result value, if it is a structured object.
Web Method Instances allow to configure an instance of the method for a specific set of parameter values, and a specific property of the result (if applicable). This is a convenient way to provide pre-configured instances for the most used parameter combos, so that they have not be specified explicitly in runtime.
For example, let’s examine the FullCountryInfo method for the CountryInfoService SOAP Web Service. This method accepts the ISO code of a country as a string, and returns an object containing information about the country, such as the capital city, the country’s international phone code, etc.
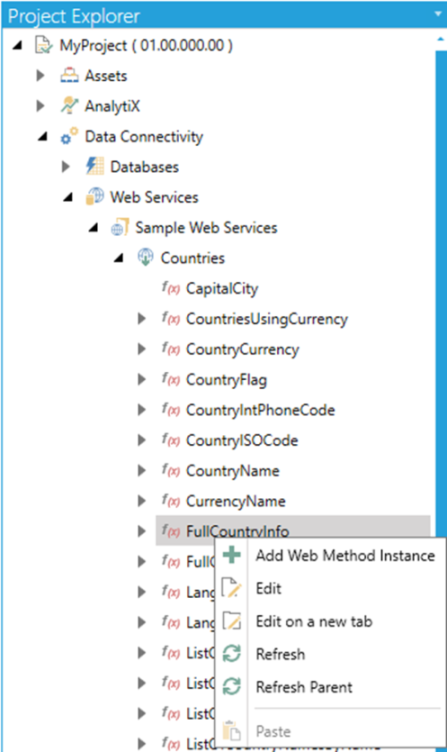
To Add a New Web Method Instance
1. Expand the Web Services provider tree control. Right-click on a SOAP Web method, as shown below, and select Add Web Method Instance.
Creating a New Web Method Instance in the Web Services Provider
-OR-
Select a SOAP Web method then click on the Add Web Method Instance button in the Edit section of the Home ribbon in the Workbench.
Add Web Method Instance button

2. The Web Method Instance Properties, shown below, then appear beneath the Project Details section in the middle of the Workbench. Enter a name in the Web Method Instance Name text entry field.
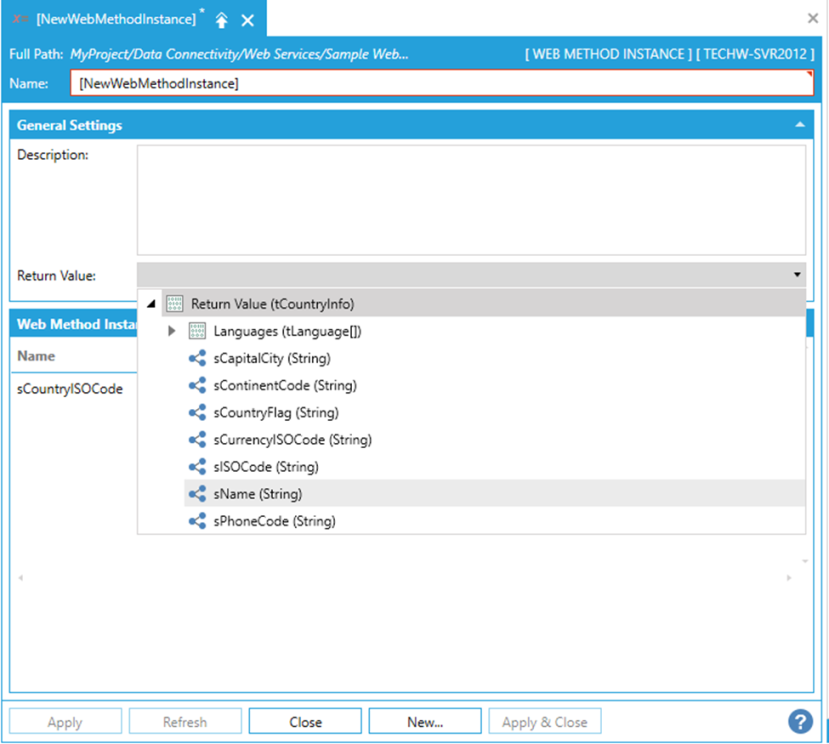
Web Method Instance Properties
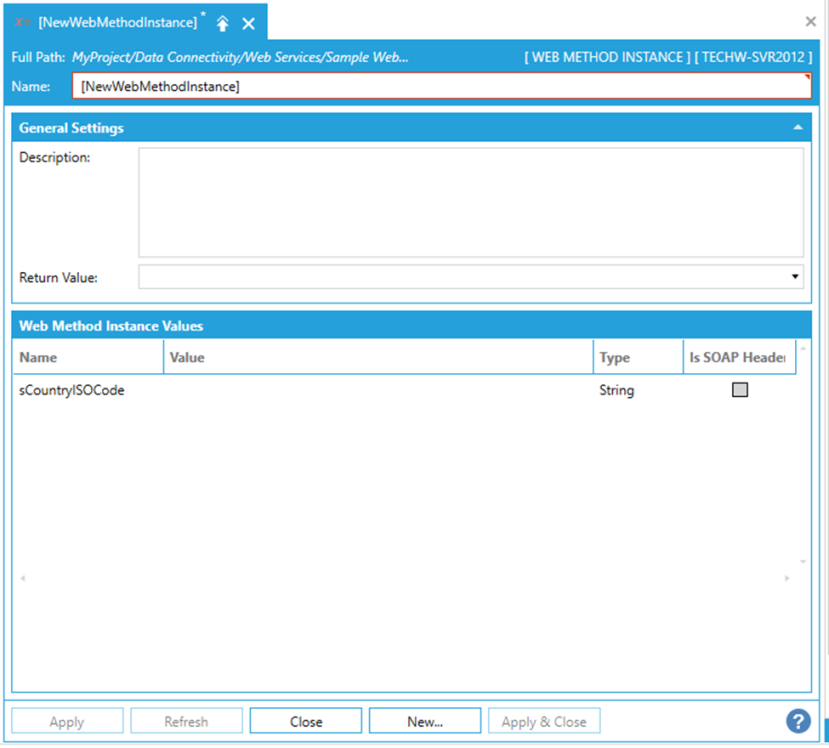
In the General Settings section, you can enter a Description for the Web Method Instance. You can also drill into the method’s result using the Return Value combo-box. Selecting a property from the Return Value combo-box will pin the result of the Web Method Instance to that property, and everything at a higher level will be inaccessible.
Selecting a Return Value
In the Web Method Instance Values section, you can enter values for the parameters that you want to associate with the current Web Method Instance. The Is SOAP Header checkbox cannot be modified, and specifies whether the parameter value is sent as a SOAP header or not.
Setting the Country ISO Code Parameter
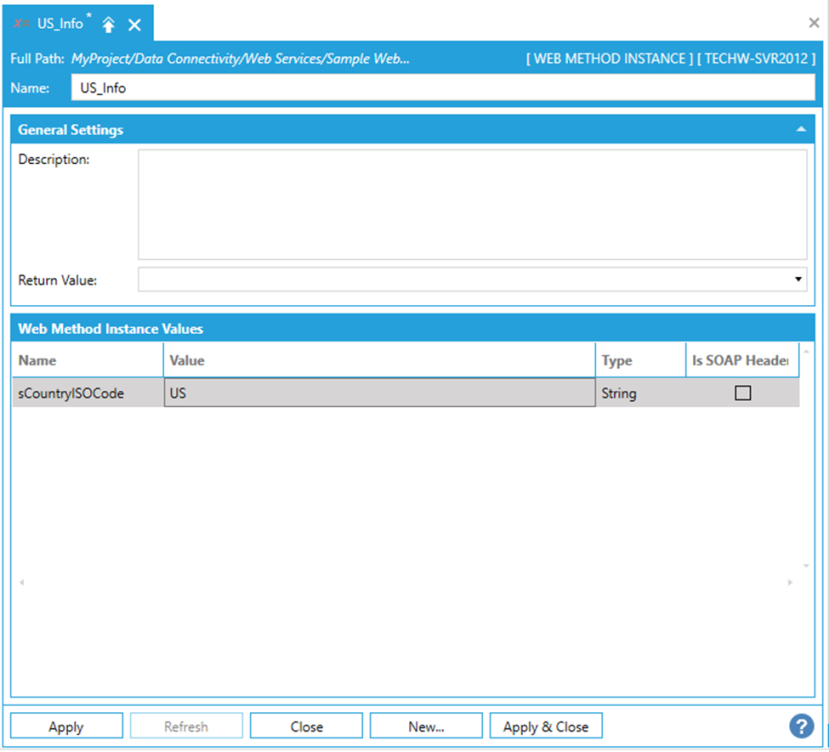
In this example, we are setting the ISO country code to US in order to retrieve data for the United States.
See Also:
Create a New REST Web Manipulator
Create a New Web Authentication Method