|
|
The features on this page require an add-on to work with GENESIS64 Basic SCADA. |

![]()
|
|
The features on this page require an add-on to work with GENESIS64 Basic SCADA. |
![]()
The BACnet Connector allows you to import data to your configuration database.
To Import Data:
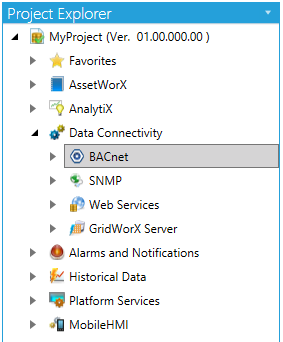
From the Workbench, expand your Project in the Project Explorer, then expand Data Connectivity.
You'll see the BACnet node of the Project Explorer, as shown below.
BACnet Provider in the Workbench
Expand the BACnet node. Right-click on whichever node into which you wish to import. This can be the database, network, Device, Port or Object level of the BACnet provider. Select Import from the pulldown menu, as shown below.
Import within the Project Explorer

-OR-
Select the node into which you wish to import, in the project explorer, then click on the Import button in the Import/Export section of the Home ribbon in the Workbench.
Import Button

The Import Options window appears.
Import a file into the database Dialog

General Settings
You can provide an optional Description in the text entry field of the items that you are importing into the BACnet provider in the Workbench.
Import Settings
You can select the Import Mode via the pulldown menu, selecting either Only Create new items, Create and Update, or Only Update old items.
Only Create new items - When the import file contains items that are not yet in the configuration database, then it creates them. Otherwise it skips these items.
Only Update old items - When the import file contains items that are in the configuration database, then it updates them using data from the import file. Otherwise it skips these items.
Create and Update - A combination of creating new items and updating old items.
Next, near the File text entry field, click on the  button to open a file browser to navigate to your export file.
You can also set the Delimiter (a comma, tab or other set character) to separate imported data items.
Your newly imported item(s) should now appear in your selected location(s) in the Project Explorer.
See also: