For Teams integration, you need to have an Azure account with an active subscription. In Azure portal, register an application. Please note that Azure dialogs may change over time. Please consult Azure documentation if you have trouble finding any settings.
Follow these steps to create the app registration:
1. Sign in to the Azure portal.
2. If you have access to multiple tenants, use the Directories + subscriptions filter in the top menu to switch to the tenant in which you want to register the application.
3. Search for and select Azure Active Directory.
4. Under Manage, select App registrations > New registration.
5. Enter a display Name for your application. Users of your application might see the display name when they use the app, for example during sign-in. You can change the display name at any time and multiple app registrations can share the same name.
The app registration's automatically generated Application (client) ID, not its display name, uniquely identifies your app within the identity platform.
6. Specify who can use the application, sometimes called its sign-in audience. (Use single tenant unless required otherwise )
7. Leave redirect API blank.
8. Select Register to complete the initial app registration.
The basic steps for registering an application mentioned above are provided in reference with ref:
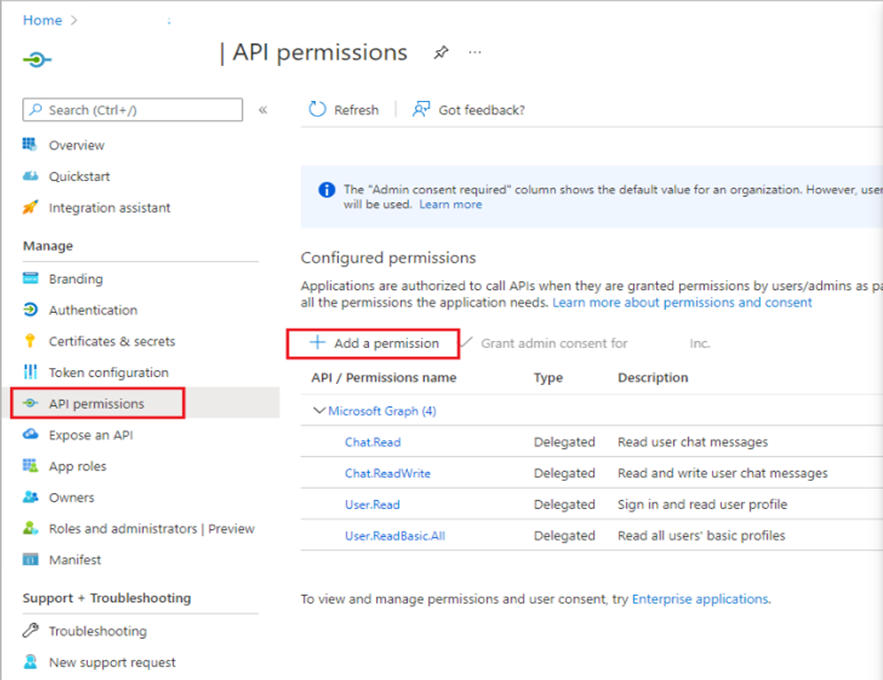
Additionally, we need to tweak a little more of the settings for the new App. After creating the app, go to the API Permissions, Click on Add Permissions.
API Permissions
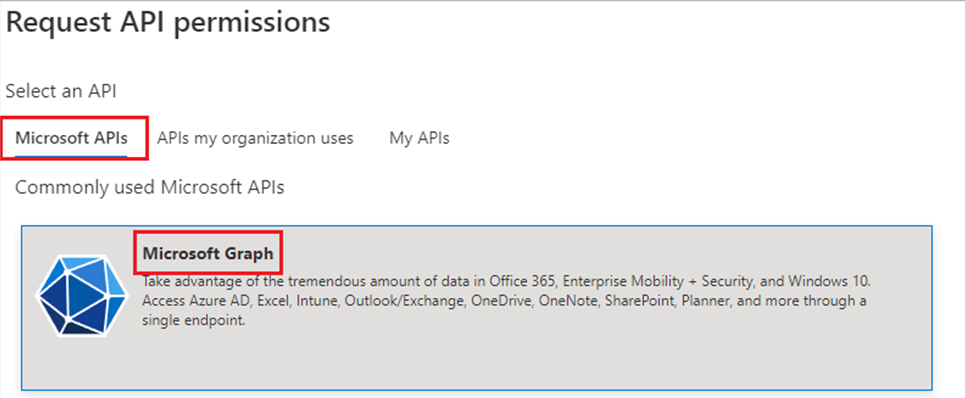
In Request API Permissions, select Microsoft Graph API under Microsoft APIs
Request API permissions
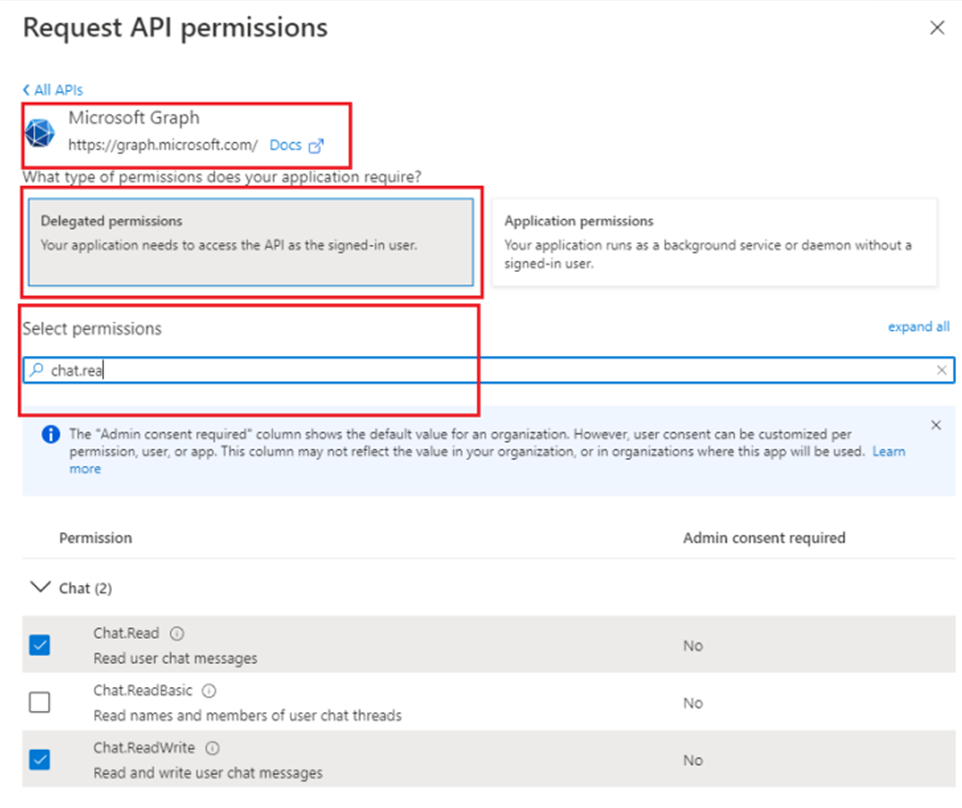
Under Microsoft Graph API, choose Delegated Permissions and add Chat.Read, Chat.ReadWrite, User.ReadBasic.All. Have an Admin consent to these permissions.
Delegated Permissions
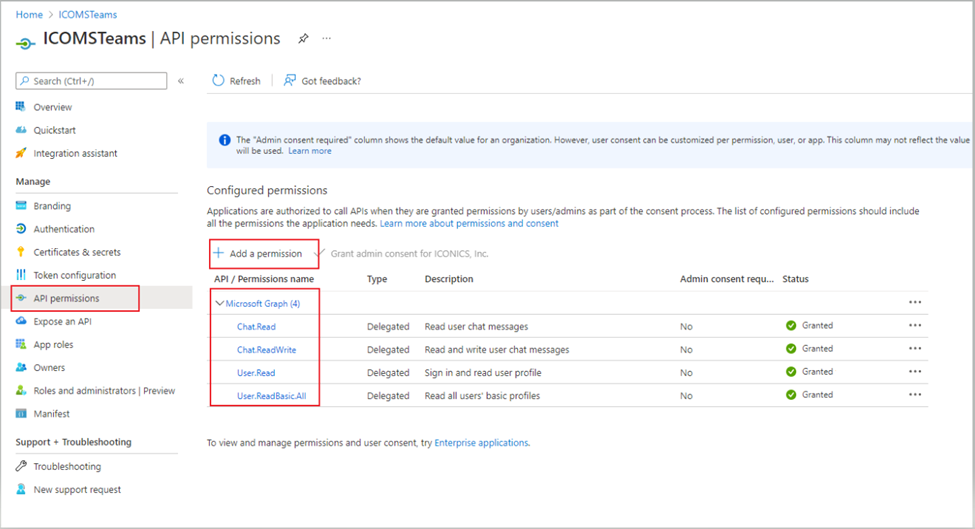
You will see the Status as Granted once Admin grants consent.
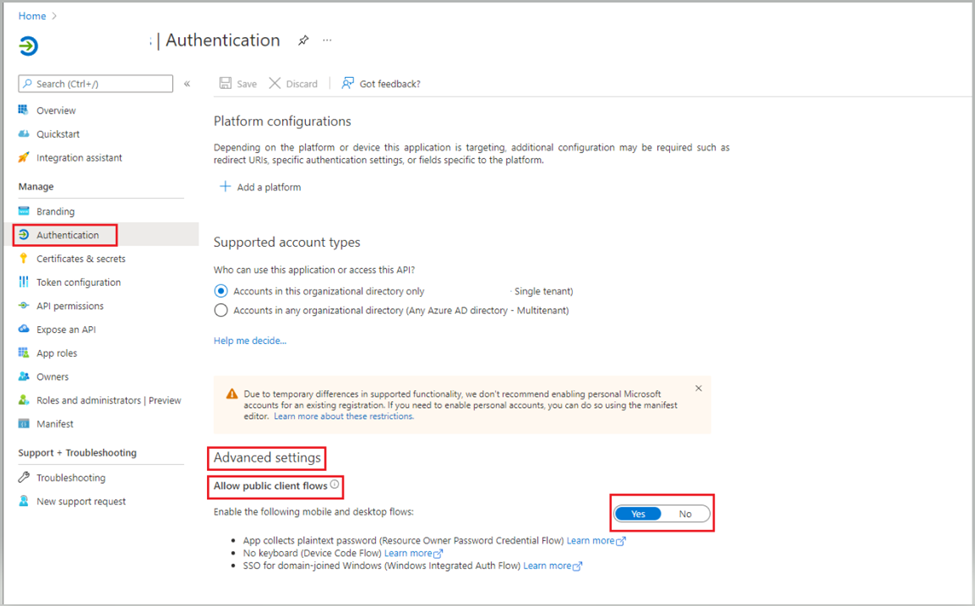
Under Authentication tab, choose to allow public client flows
Allow public clients flows
Copy the Directory(tenant) ID, and Application(client) ID from the app overview page for use in Workbench.

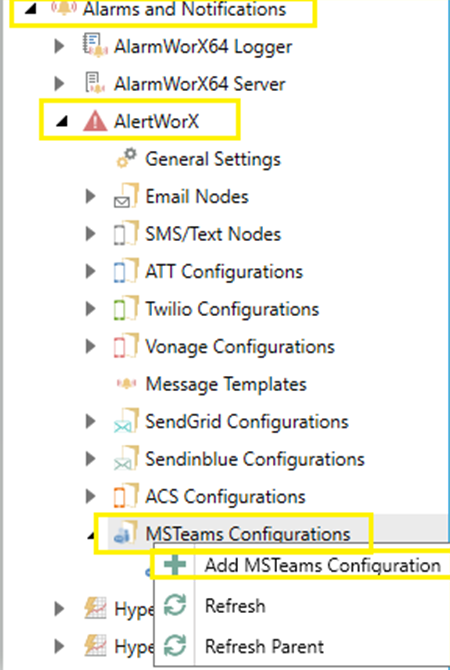
Open Workbench, under AlertWorX > MSTeams Configurations, right click and choose ‘Add MSTeams Configuration’.
Add MSTeams Configurations
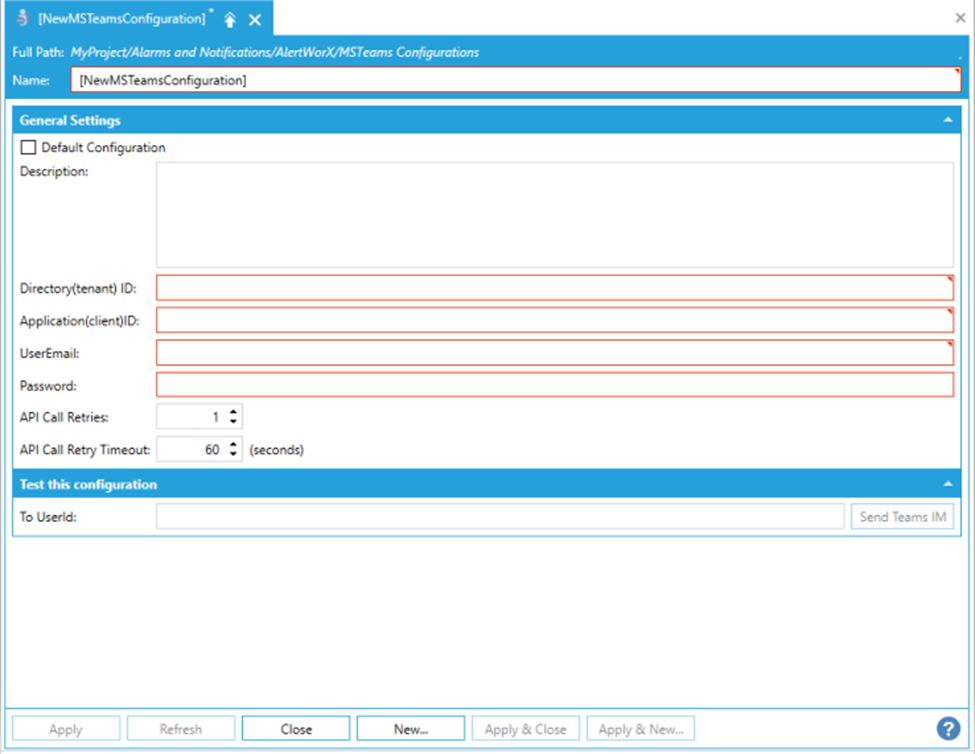
Check the “Is Default Configuration” box at the top to set the configuration as default.
Add a Description(Optional)
Add the Directory(tenant) ID, and Application(client)ID that we copied from the application we created in Azure Portal and paste them in the corresponding fields.
For use in Teams, use an account in the same tenant with MFA disabled. Enter the User Email and Password.
Once you add the User Email and password as well, you will see that ‘Apply’ but is enabled and you should be able to save the configuration.
The values for ‘API Call Retries’ and ‘API Call Retry Timeout’ configured are passed on to each Graph API calls from the provider.
New MSTeams Configuration
You can now test this configuration by adding the user principal name(user email in most cases) or the Azure Ad Id(Guid) of a user to whom you want to send a Teams notification.
Group chats can be initiated by adding multiple users separated by a ‘;’.
Once the configuration is saved, you can see the method under AlertWorX REST in the DataBrowser
AlertWorX REST in the DataBrowser

UserId is the User principal name(usually the email) or the Azure Id of the person you want to send IM to.
Message is the message you want to send.
The rest of the parameters are optional and may or may not be used.
Importance is the importance of the message. 0- is normal, 1 – is important and 2- is Urgent.
Type is the type of message. 0- is regular text and 1-is HTML.
Topic is the topic of the message you want to send. Used for group messages.
VerifyUsers is used mainly when sending group IM. If set to true, it will verify that the users that were intended to be in the group chat haven’t left the group chat. It will attempt to add back any users that have been removed/or have left from the group chat. If VerifyUsers is set to false, we won’t verify if any of the members in the group chat has left/were removed and won’t attempt to add them back.
Note:
· The record of IMs sent are added to ALERT_RestIMLog in the database. These logs can be archived using the archiving settings in the ‘General Settings’ under AlertWorX provider.
Ref: General Settings (iconics.com)
· There are certain limitations that Teams sets on group chat. Ref: Limits and specifications for Microsoft Teams - Microsoft Teams | Microsoft Docs For example:
o If you have more than 20 people in a chat, the following chat features are turned off: Outlook automatic replies and Teams status messages; typing indicator; video and audio calling; sharing; read receipts. The "Set Delivery Options" button (!) is also removed when private group chats contain more than 20 members.
o Only 200 members at a time can be added to a group chat. See this article for more information. See: https://docs.microsoft.com/en-us/microsoftteams/troubleshoot/teams-administration/unable-send-message-group-chat
· If a person added to a group chat removes themselves from the group, the notification will no longer be received by them in that group chat.
In order to change this behavior and to verify if users left group and add them back use the VerifyUsers parameter. When set to true, it will add users who left back to the group chat.
· If the group chat initiator (the email used in AlertRest teams) is removed by another member from a group chat, a new group will be created by AlertRest if the same set of people needs to be pinged again.
Important Note:
Teams Graph API calls have api rate limits and exceeding this will cause throttling. This means that MS Teams should not be used for high frequency alerts. We use Microsoft SDK to enforce throttling support, hence throttling is handled by Microsoft. If the API call rates are exceeded, these are logged as Service Exception failures in traces as well as the Alert logs.
See Also: