|
|
The features on this page require a GENESIS64 Advanced license and are not available with GENESIS64 Basic SCADA . |

![]()
|
|
The features on this page require a GENESIS64 Advanced license and are not available with GENESIS64 Basic SCADA . |
![]()
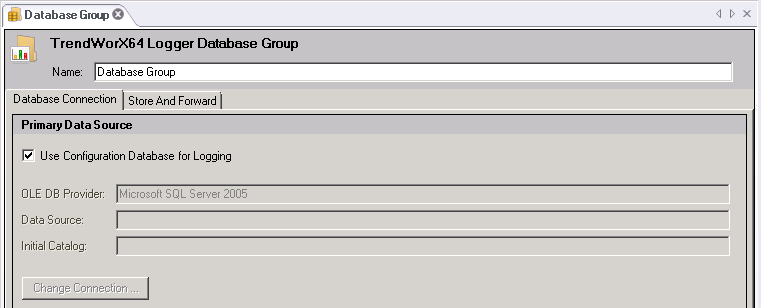
The TrendWorX64 Logger configuration database can connect to one or more SQL logger databases. You can specify any number of database groups, or collections of logger databases, within a single configuration database. When the configuration database is active and data logging is occurring, TrendWorX64 Logger stores data from the different OPC data sources into a logger database. You can configure a database group by using the Database Group form.
A database group is:
A grouping of data logging groups.
A multi-threaded object that manages data updates and logging activities to disk.
The physical connection to the database server.
To create a database group:
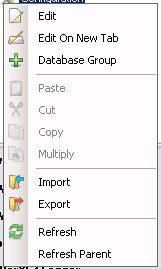
Right-click the Configuration node to which you wish to add a database group in the TrendWorX64 Logger Configurator tree explorer.
Select the Database Group command. The TrendWorX64 Database Group form appears in a new tab.
You can also edit existing database groups using the Edit or Edit on New Tab buttons in the Edit group on the Home ribbon.
Use the Database Connection tab in the Database Group form to establish a connection to a database on the server that you specified when you completed the setup for logger databases.
To Establish a Connection to a Database on the Server:
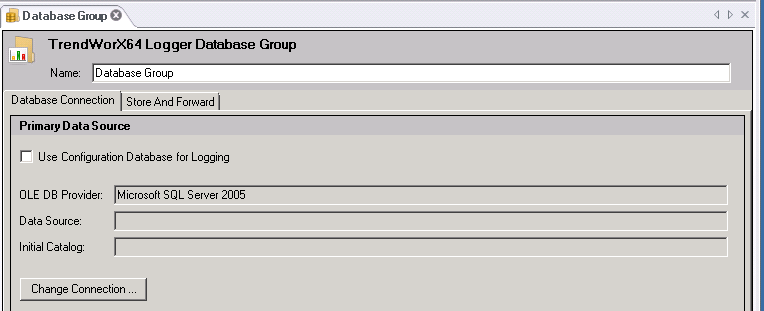
First, you have the option of selecting to 'Use the Configuration Database for Logging'. Clicking this checkbox inactivates the remaining options.
OR
If you do not wish to use the Configuration database, make sure that checkbox is not ticked, then enter the name of the database group into the Name text box.
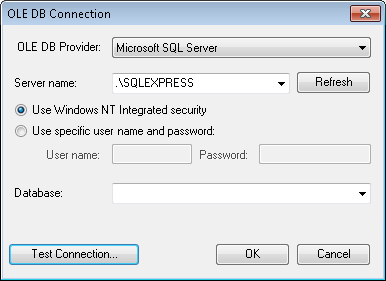
Select the Database Connection tab (if it is not already selected), then click the Change Connection button to view the OLE DB Connection dialog box.
Enter the name of the OLE DB Provider.
Specify the path and server name of the data source in the Server Name text box.
The string .\SQLExpress indicates that the database server is located on the localhost (.\).
Enter the name of the database to which you wish to connect in the Database text box.
Click the radio button for the security option you will use for the connection, and if required enter your credentials into the User Name and Password text boxes.
Click the Test Connection... button to ensure that your database can communicate with the logger. A message with the phrase "Test connection succeeded." should appear.
Click the OK button to close the OLE DB Connection dialog box.
Click the Apply button to save your changes. If you do not want to save the changes you made, click the Refresh button.
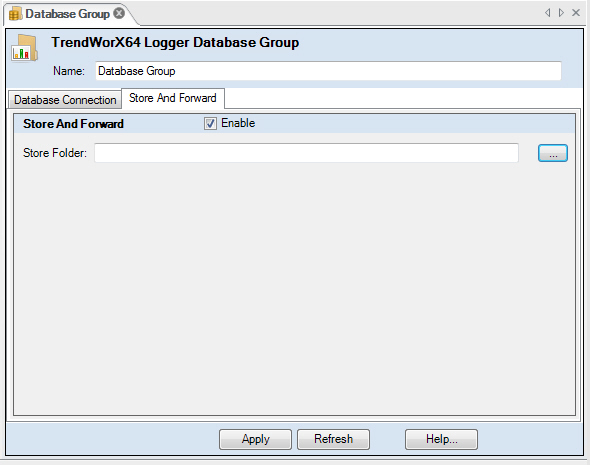
Within the Database Group properties, you can also click on the Store and Forward tab in order to set a store folder. In the TrendWorX64 Logger configurator, store-and-forward technology enables seamless data caching and retrieval for data synchronization. The TrendWorX64 Logger should also be configured as an automatic service using MonitorWorX because the TrendWorX64 Logger is not automatically launched by OPC clients.
To set up Store and Forward:
Click the Store and Forward tab in the Database Group form.
Click the Enable check box.
Click the ellipsis button ![]() next to the Store Folder text entry field, and select the directory that will be used for data caching.
next to the Store Folder text entry field, and select the directory that will be used for data caching.
Click the Apply button to save your changes. If you do not want to save the changes you made, click the Refresh button.
See also: