![]()
![]()
The ICONICS Web Licensing Utility was introduced to help you license your system. You can use the utility to generate a new license, kill a license, and transfer a license. You can also use the ICONICS Web Licensing Utility to upgrade your license from a previous version.
This document will walk you through the steps necessary to upgrade a license to a new version.
There are four basic steps when it comes to upgrading your ICONICS system:
Kill the original license and credit it to our website
Upgrade the license on our website
Uninstall the software and install the newer version
License the newer version
Note: Steps 2 and 3 may be reversed, or even completed at the same time.
This document will take you through the necessary procedure for killing the license (step 1) and upgrading your license to the new version (step 2).
Killing the License
The first step to upgrade your license is to kill it on the original system.
Select Software and log in with your email and password.
Once you have logged into the website, select the Kill License link at the top.
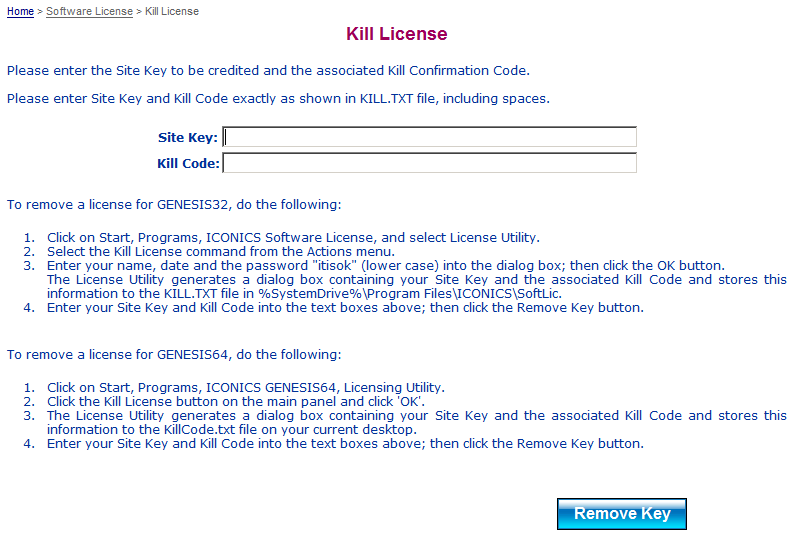
You will see a page similar to Figure 1.
Figure 1 - Site Key/Kill Code Dialog
Open the ICONICS .NET License Utility (for 64-bit products or BizViz) or the Licensing32 License Utility (for GENESIS32).
In the ICONICS .NET License Utility, select Kill Current License button. In the Licensing32 License Utility, go to Actions > Authorize License and select Kill Current License.
A message will pop up asking you if you really want to kill the license. Select Yes.
You will see a License Killed confirmation dialog as shown in Figure 2.
Figure 2 - License Killed Dialog
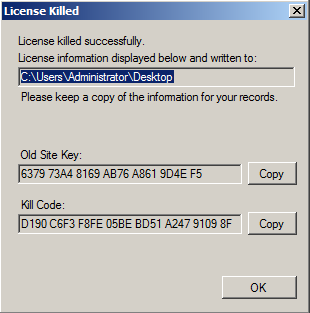
Copy the Old Site Key by selecting the Copy button next to it. Paste it into the Site Key field on the web page.
Copy the Kill Code by selecting the Copy button next to it. Paste it into the Kill Code field on the web page.
Once both fields are filled, select Remove Key on the website.
You will then get a message confirming that the license has been successfully removed. You will also receive an email with the killed license information. The products associated with this Site Key are now safely parked on the website and available to be relicensed at any time.
Notice that in the final kill license page, it will state that if the license is eligible, it can be upgraded to the latest version and it provides a link for you to check for availability, which we will do in the next step.
The easiest way to check if your license is available for an upgrade is by clicking the link on the page immediately after you kill the license. Clicking the link brings you to the Upgrade License page. You can also get to this page by clicking on the Upgrade License link in the sidebar.
You can follow the steps below to upgrade your license.
On the Upgrade License page, fill in your Product Registration Number and Customer Key. This is the same information you received in the webpage and in your email after you have killed the license on our website.
Select Next when you have filled in the necessary information.
If the license is available for an upgrade, you will see the available license on the page.
Figure 3 - Available License for Upgrade
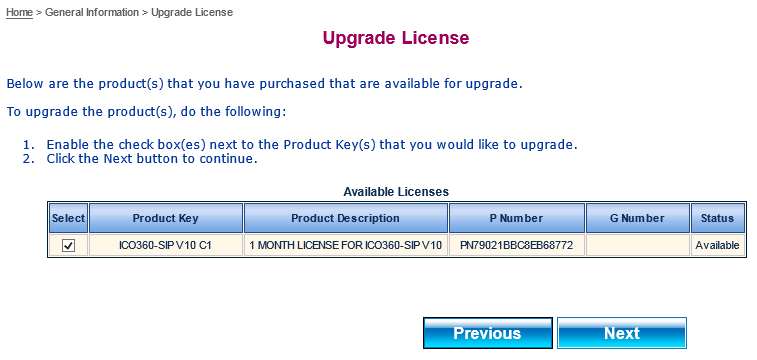
Check the available product that you would like to upgrade and select Next.
The next page is a confirmation page. Verify that the information showing is correct, then select Upgrade.
On the new page that loads, you can see a list of upgraded licenses.
Figure 4 - Upgraded License
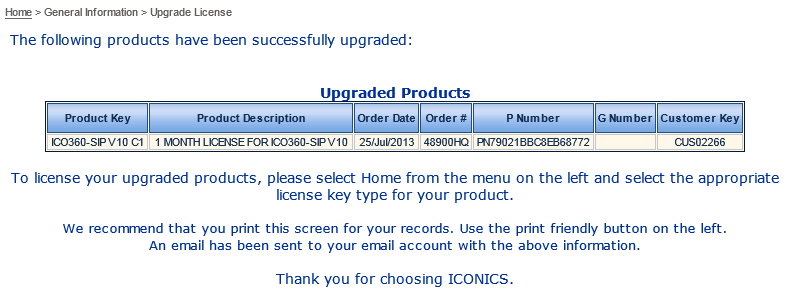
You should also receive an email with the license upgrade information.
Now that you have upgraded the license, you can follow the regular procedure to license your machine with the new version. When it asks you for the Product Registration number and the Customer Key, provide the numbers used when upgrading. This information was sent to you in the last step of upgrading your license via email.
If you need more information on how to license the machine with the upgraded license, please consult Using the ICONICS Web Licensing Utility for Software Key License or the application note entitled Licensing – Using the ICONICS Web License Utility for Software Key Licenses.
Upgrading a hardware license is similar to upgrading the software license. Follow the same procedure as upgrading a software license, but choose Hardware instead of Software on the website, and note that the USB dongle must be plugged into the machine where you are using the Web Licensing Utility. See Using the ICONICS Web Licensing Utility for Hardware Key License or the application note entitled, Licensing – Using the ICONICS Web License Utility for Hardware Key Licenses for more detailed information on how to kill or license a hardware key.
See Also: