![]()
![]()
Each energy asset in the asset tree can have its own temperature source. You can use temperatures to generate reports on the basis of degree days for analysis. In Energy AnalytiX, it is considered a heating degree day if the outside temperature is colder than the base temperature defined for the temperature source; it is a cooling degree day if the outside temperature is warmer than the temperature source's base temperature. For that reason, you may want to define a temperature source for each geographical location where you have facilities where you are monitoring energy use using Energy AnalytiX. If you will not be analyzing heating and cooling days, you do not need to define temperature sources.
Temperature data can come from any of the following sources:
OPC data sources such from as digital thermometers stationed outside your facilities.
Web services that provide regional weather data. Before you can use a web service to collect weather data, a dedicated web service needs to be configured in the Workbench. Steps for setting this up are described below in Steps for defining a temperature instance.
An external source.
If you have campuses that are dispersed geographically, you will need to have sources for the regions where your equipment is located. You may have more than one energy asset at a geographical location. If the base temperatures for the energy assets are different, you will need to create a unique temperature source for each. For example, the Foxboro bakery and the Foxboro storefront have different base temperatures, therefore you might create two temperature sources (will different base temperatures) using the same temperature instance from the Web service.
Once you have determined the sources you need to create, you can go ahead and define your temperature sources as described below in Steps for Defining Temperature Sources.
During runtime, the Energy AnalytiX service uses this data to periodically update the weather data summarization tables to include the following information:
Current temperature
Maximum temperature
Minimum temperature
Heating degree days
Cooling degree days
Base temperature value (which not collected, but is defined on the Temperature Source object but is used as a threshold for calculating the Heating and Cooling degree days)
Average temperature
The temperature summary is updated on a daily basis. The frequency of updates is controlled by the Weather Data Logging Rate setting in the General Options tab's Settings sub-tab; for more about setting this option, refer to the Setting Options for Processing and Data Collection topic.
Open the Workbench.
In the navigation tree, expand your project, then, under the database tree node, expand Product Configuration > System Properties, and click on Temperature Sources. The Temperature Sources tab appears, as shown below.
Temperature Sources Tab
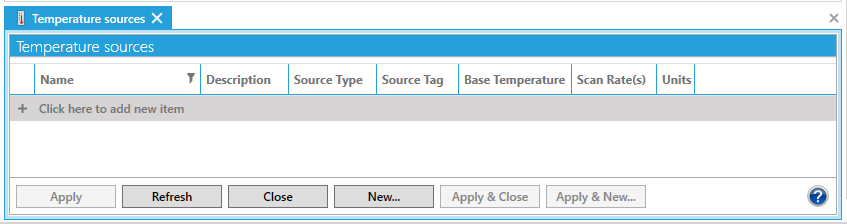
Define a new temperature source by clicking on the + Click here to add new item row. This enables the row so you can configure a source.
Enter a Name and Description for the source. The name should identify the location and the data being collected; for example, "Foxboro Temperature". (At any time you can refer to the Temperature Sources Node topic for supplemental information about using the tab.)
Then define the source:
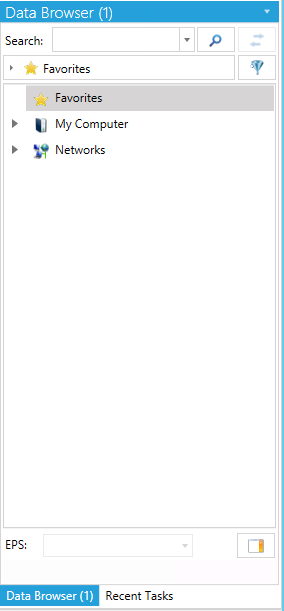
If the source data will be provided by an OPC tag coming from a thermometer located outside the building, select Dynamic Tag as the Source Type and for the Source Tag, click the  button to open the Data Browser. Navigate to the source and select it.
If the source data will be provided by a Web service, select Dynamic Tag as the Source Type and for the Source Tag. Use the Data Browser to navigate to the Web Service to be used for the selection.
Data Browser
If the source data will be entered manually or will be provided by an external source via an application such as BridgeWorX, select Dynamic Manual as the Source Type.
Specify the Base Temperature and the Units (such as Fahrenheit or Celsius). The base temperature is the temperature at which Energy AnalytiX considers a given day to be a heating degree day or a cooling degree day.
Specify the Scan Rate at which this source's data will be logged to Energy AnalytiX.
To add another row, click on the top row that contains the message "+ Click here to add new item". (If you are saving the first temperature source, you must first click Apply to save all changes.)
Click Apply at any time to save your changes, or Apply & Close to save your changes and close the tab.
You can collect temperature data by using a dedicated Web service that is included in the Workbench in your GENESIS64 installation.
Using this (or another) Web service, define the temperature instances that you need in order to define temperature sources. The instances will be used as OPC tags when you define temperature sources. Follow the steps below:
Open the Workbench and expand the Data Connectivity node.
Expand the Web Services node and then the My Web Services node until you see the default Web Service highlighted, as indicated in the example below. Expand the Web Service to reveal the methods for creating temperature instances.
Right-click GetCityWeatherByZIP and select New Web Method Instance from the pop-up menu. This opens the Web Services form, shown in the example below.
Configuring a Temperature Instance from a Web Service
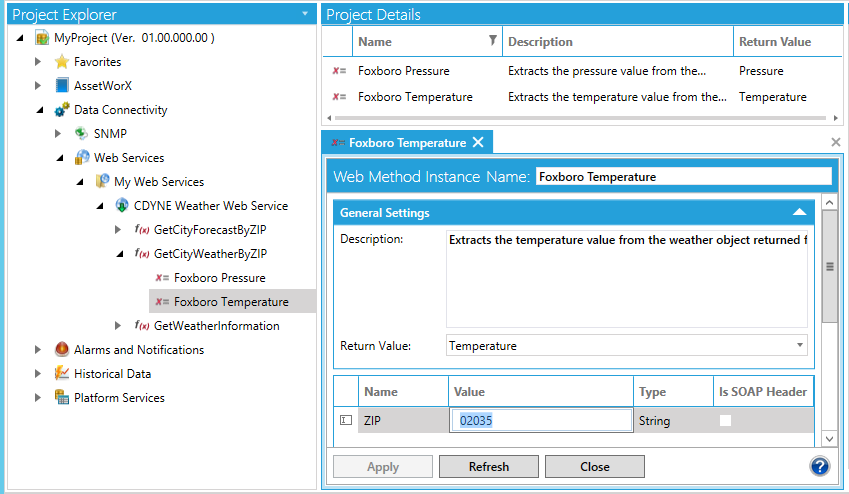
In the Web Method Instance Name field, enter a name that makes the temperature instance easy to find and identify. Use the Description field to enter the use and purpose of the temperature instance.
Click on the Return Value pulldown menu. Expand the Return Value node and select Temperature (String).
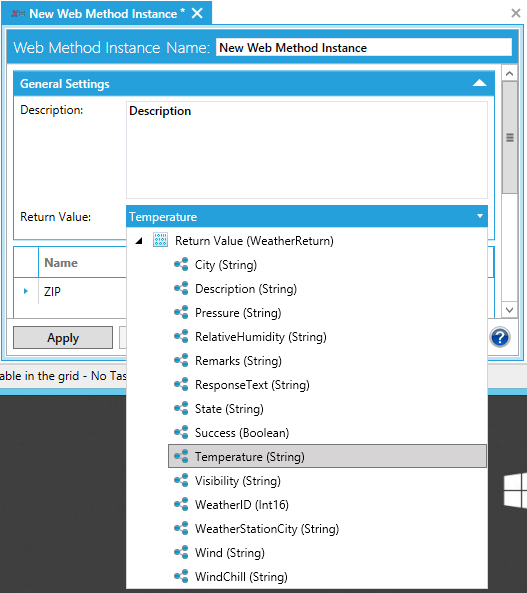
Back on the Web Services form, in the Value column enter the parameter value, which in this example is the ZIP code of the geographic location whose temperature you wish to collect.
Click Apply to save the temperature instance.
Repeat the steps above to define additional temperature instances that you need for defining temperature sources.
Go to the Workbench and finish defining temperature sources as described in Steps for Defining Temperature Sources.
See also: