![]()
![]()
You can export configuration data from Hyper Historian and store it in an XML file, a CSV file, or an Excel Workbook. Once exported, the configuration data can be used for any number of purposes, including storing backups of the configuration database and importing configuration information into other Hyper Historian configurations. You may want to export data simply to see its format for creating your own import files.
|
|
Note: Configuration data exported from the 'Classic' Hyper Historian component is meant for later import into the same component. Configuration data exported from the 'Classic' Hyper Historian component cannot be imported into the Hyper Historian provider contained in the Workbench, the Microsoft Silverlight-compatible tool. |
You can import and export the following Hyper Historian configurations:
Configuration database
Data Collections, a Logging Group, a Collector Group, an Aggregation folder, a folder of Hyper Historian tags
Loggers
Node Setup and Redundancy
System Administration
Calculation Triggers, a folder of calculation triggers
By default, the file is given the name of the folder being exported. This helps you to identify it later on.
The remainder of this file explains exporting and importing Hyper Historian configuration data.
To export Hyper Historian configuration data:
In Hyper Historian, expand the navigation tree in the Project Explorer and select the folder whose content you want to export.
Right-click the folder and select Export. Or click the Export button on the ribbon's Home tab. This opens the Export Settings dialog box.
Export Settings for Hyper Historian
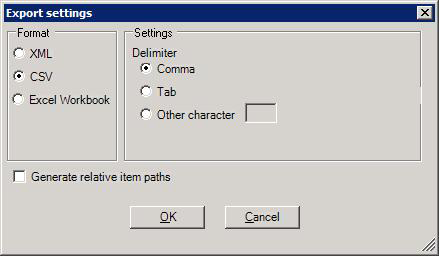
Choose the Format you want to export to. You can choose an .xml file, a .csv file, or an .xlsx (Excel Workbook) file.
Choose any Settings that are offered for the format.
Select the Generate Relative item paths checkbox if it is important to maintain the relative paths of items in the exported file.
Click OK. The Save As dialog box opens.
Navigate to and choose the location where the file is to be saved. You can also modify the File Name. Then click Save.
A dialog box tells you the export's progress and gives you a message when the export is complete. The file name and location are in the dialog box's title bar.
A Successful Export
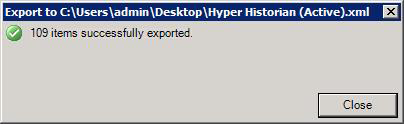
You can check that location to make sure the file is there.
To import Hyper Historian configuration data:
In Hyper Historian, expand the navigation tree in the Project Explorer and select the folder into which you want to import a file of Hyper Historian configuration data. Make sure you select a location that is compatible with the type of data being imported. For example, you don't want to select a Hyper Historian tag folder if you importing aggregates. Doing so will result in a failed import.
Right-click the folder and select Import. Or click the Import button on the ribbon's Home tab. This opens the Import Settings dialog box.
Export Settings for Hyper Historian
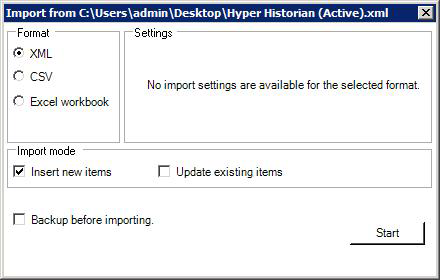
Choose the Format of the file you are importing into Hyper Historian. You can choose an .xml file, a .csv file, or an .xlsx (Excel Workbook) file.
Choose any Settings that are offered for the format. If you are importing a .csv file, you must specify the delimiter character in the Settings section.
In the Import Mode section, indicate how you want the import to work. If you want to insert items that currently are not in the configuration, put a check mark in the Insert New Items check box. If you want to update items in the current configuration with any information that is different in the file you are importing, put a check mark in the Update existing items check box.
If you want to back up the existing configuration before importing, put a check mark in the Backup before importing check box.
Click Start.
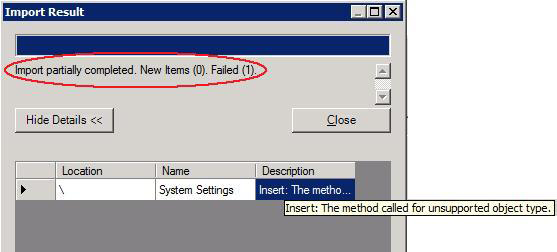
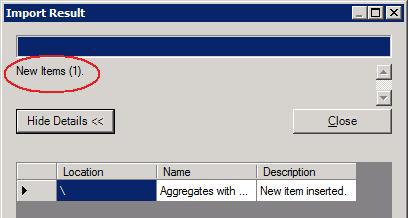
A dialog box tells you the import's progress and gives you a message when the import is complete. Below are examples of a two imports: one that was successful, and another in which the user tried to import a file of System Setting into an incompatible file of Hyper Historian tags.
A Successful Import
An Incompatible Import will Result in Failure