![]()
![]()
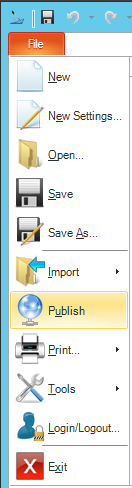
To Launch the Web Publishing Wizard in GENESIS64:
Select Publish from the GraphWorX64 File menu, as shown in the figure below.
Starting the Web Publishing Wizard from GraphWorX64
-OR-
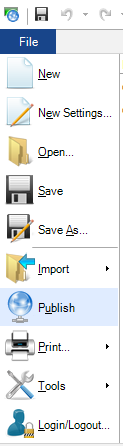
Select Publish from the Workbench File menu (with the GraphWorX64 provider loaded), as shown in the figure below.
Starting the Web Publishing Wizard from the Workbench
When the Web Publishing Wizard appears as shown below, click the Next button.
|
|
Note. The Communication Settings button opens the Publishing Options dialog box, which enables you to set the default publishing preferences and application preferences. For information about the Publishing Options dialog box, see Publishing Options. |
Web Publishing Wizard Step 1
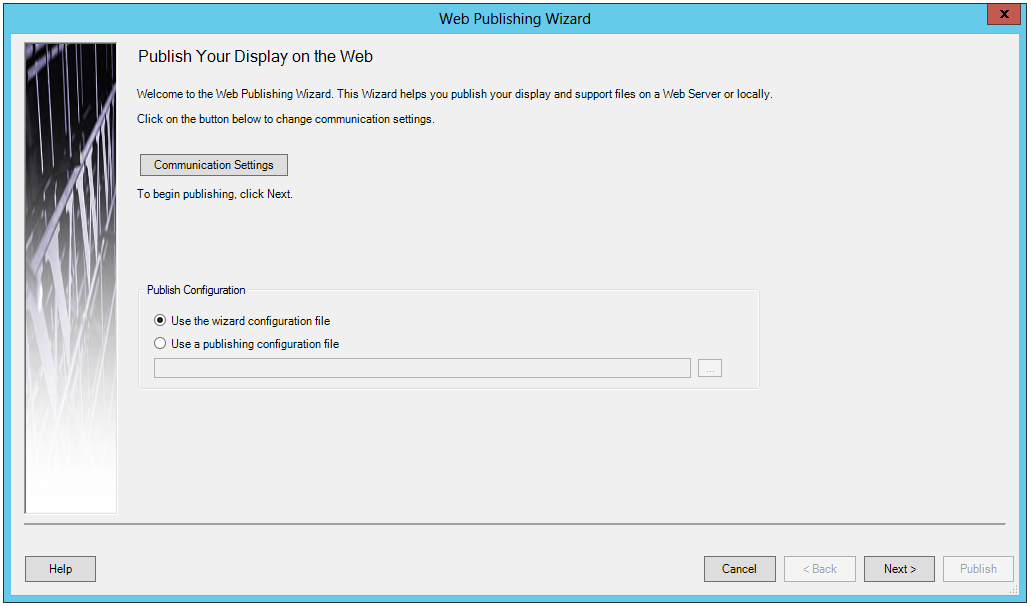
You have the option as to whether you wish to change the Communication Settings. If not and you would like to use the default settings, click 'Next' to proceed. If so, click on the Communication Settings button. This opens the following window.
Communication Settings Window
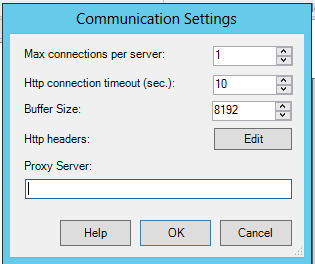
You can change the following settings:
Max connections per server: Specifies the maximum number of files to publish.
Http connection timeout (sec): Specifies the amount of time (in seconds) to wait for the Web server to respond.
Buffer Size: The publishing process breaks each file into smaller chunks of data. The Buffer Size represents the size of these data chunks. You will need to modify the default value only if the destination Web server or the underlying network imposes restrictions on the size of the data packets. The default value for this field is 8192.
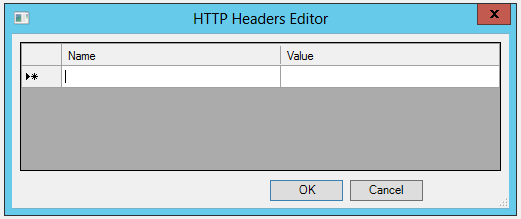
Http headers: The Http headers option is only used for HTTP/WebDAV publishing (not FTP publishing). Some header values are filled in automatically by the web publisher (for example, “User-Agent” and “Depth”). The web publisher Headers option allows additional header values to be specified if desired. These header values are only used for HTTP request operations during publishing and would not end up in any published files. Presumably, the possible header values could be: https://tools.ietf.org/html/rfc4918#section-10 and https://tools.ietf.org/html/rfc2616#section-14. For example, a user may want to specify “From” as a custom Header value. Generally, the Headers option is infrequently required and typically for advanced use cases.
HTTP Headers Editor Window
Proxy Server: Specifies the gateway between the local machine and the target Web server where the display will be published. Where a high level of security is required, a proxy server may be used as a "mediator node" to provide a gateway between a local area network (LAN) and the Web server. The LAN is protected by a firewall on the proxy server. All outgoing HTTP requests from a client computer on the LAN must pass through the proxy server, and similarly all information downloaded from the Web server comes back through the proxy server and is then relayed back to the client.
When you are finished making changes to the Communication Settings window, click on OK to return to the Web Publishing Window.
Publish Configuration
Use the wizard configuration file - Click this radio button to use the last-used configuration for this wizard, which is either the default wizard configuration or the one used the last time a file was published.
Use a publishing configuration file - Click this radio button to load a custom publishing configuration previously saved during a past publishing session. Click on the ellipsis button [...] to load a Publish Configuration file (in .xml format).
When you have completed your settings, click 'Next' to continue.
The Select File(s) to Publish section of the Web Publishing Wizard appears, as shown below. Click on the Add/Remove Files... button.
Select File(s) To Publish Section of the Web Publishing Wizard
The Edit File List window, as shown below, will open. You have the option of either adding files individually via the Add Files... button or adding specific folder via the Add Folder... button.
Edit File List Window
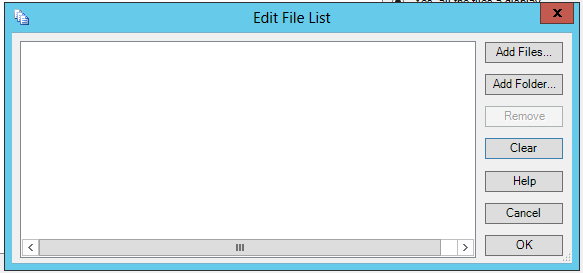
Clicking the Add Files... button opens a file browser, allowing you to navigate to, and select, an individual file.
Clicking the Add Folder... button provides you with additional options, as shown below.
Add Folder... Options
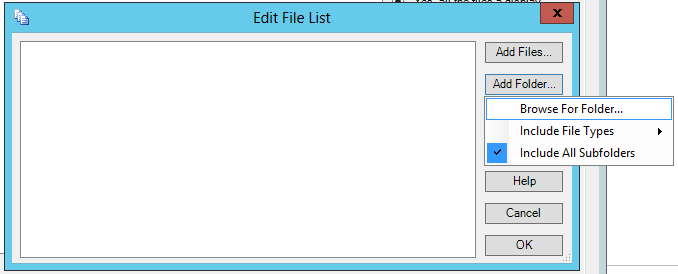
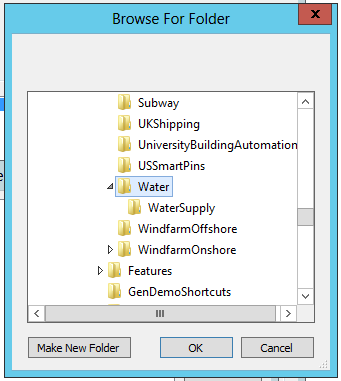
Browse For Folder... opens the Browse For Folder window, as shown below, where you can navigate to a specific folder. Note that you can also opt to Include All Subfolders. This option is checked by default, but you can uncheck it to not include any subfolders if you so choose. Once you have selected your preferred folder, click OK.
Browse For Folder Window
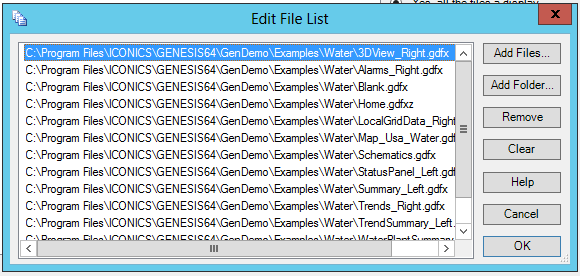
The contents of your folder will now be displayed in the Edit File List window, as shown below. At this point, you can select any files listed here and Remove them, or you can Clear the contents entirely.
Populated Edit File List Window
Include File Types allows you to specify which file types you would like included from your selected folder, as shown in the highlighted menu option below.
Include File Types Menu Option
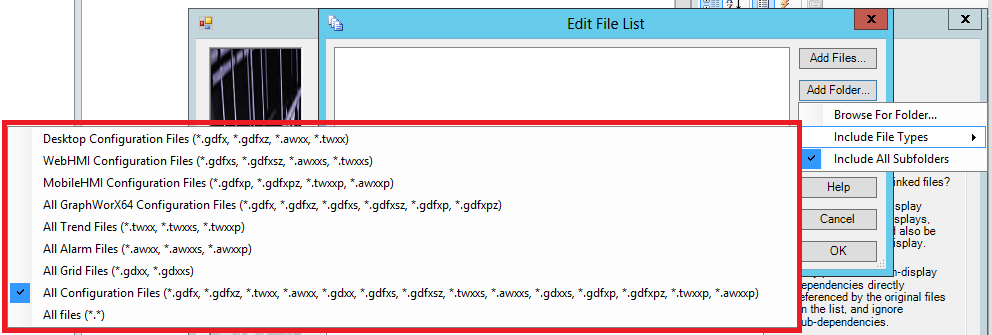
These file types include:
Desktop Configuration Files (*.gdfx, *gdfxz, *.awxx, *.twxx)
WebHMI Configuration Files (*.gdfxs, *.gdfxsz, *.awxxs, *.twxxs)
MobileHMI Configuration Files (*.gdfxp, *.gdfxpz, *twxxp, *awxxp)
All GraphWorX Configuration Files (*.gdfx, *.gdfxz, *.gdfxs, *gdfxsz, *gdfxp, *.gdfxpz)
All Trend Files (*.twxx, *.twxxs, *.twxxp)
All Alarm Files (*.awxx, *awxxs, *.awxxp)
All Grid Files (*.gdxx, *.gdxxs)
All Configuration Files (*.gdfx, *.gdfxz, *.twxx, *.awxx, *gdxx, *gdfxs, *.twxxs, *.awxxs, *.gdxxs, *.gdfxp, *.gdfxpz, *.twxxp, *.awxxp)
All files (*.*)
Once you chosen your file type, when you proceed to the Browse for Folder step, only files of your selected file type will appear in the Edit File List window.
You also have the option to Include All Subfolders to include the contents of any folders contained within your selected folder.
Once you are satisfied with the files listed within the Edit File List window, click on OK.
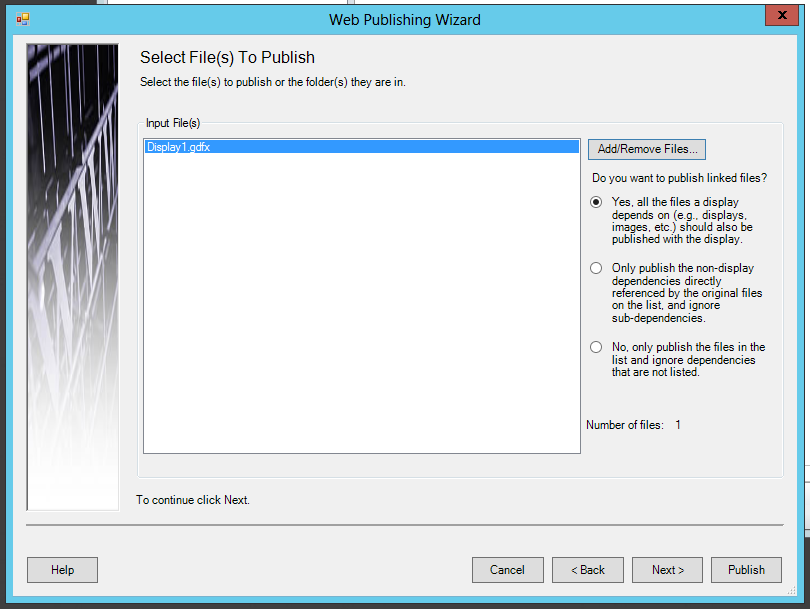
You will then return to the main Web Publishing Wizard window, where the Select File(s) to Publish section of the Web Publishing Wizard will now be populated with your selected file(s), as shown below.
Populated Select File(s) To Publish Section of the Web Publishing Wizard
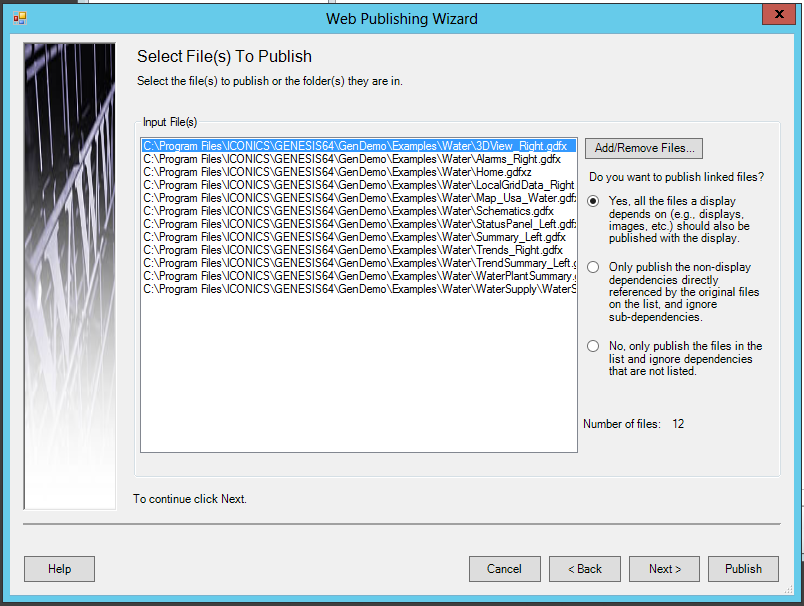
You can now pick from the three publishing options for your linked file(s). These include:
Yes, all the files a display depends on (e.g. displays, images, etc.) should also be published with the display.
Only publish the non-display dependencies directly referenced by the original files on the list, and ignore sub-dependencies.
No, only publish the files in the list and ignore dependencies that are not listed.
Click on the radio button for your publishing preference and then on Next, if you wish to review your files, or Publish, if you wish to proceed without the review process.
If you clicked 'Next' from the previous screen, the Publishing Options section of the Web Publishing Wizard appears, as shown below.
Publishing Options Section of the Web Publishing Wizard

The Control Type dropdown list allows you to determine the level of configuration in the published display file that will be available to client-side users. Choose one of the following options from the drop-down list:
Runtime Only: The published display can be viewed only in Runtime mode. Users may not configure the display.
Configuration: The published display can be viewed in either runtime mode or configuration mode, and all configuration tools are available. A Configuration Control Type disables all options in the dialog box above.
The Vertical scrollbar visible and Horizontal scrollbar visible dropdown menu options include:
Disabled: No scrollbar is used in the published display.
Auto: A scrollbar appears in the published display, as needed when the display is re-sized.
Hidden: A scrollbar is included in the published display, but is initially hidden.
Visible: A scroll bar always appears in the published display.
When Runtime Only is selected from the Control Type drop-down list, the following options are also enabled.
Show Ribbon: Click this checkbox to ensure that the ribbon is used in the published display. If Show Ribbon is deselected, the Show Navigation Bar and Show Menu Bar options are enabled.
Show Status Bar: Click this checkbox to ensure that the status bar is used in the published display.
Show Menu Bar: Click this checkbox to ensure that the menu bar is used in the published display.
Show Border: Click this checkbox to ensure that the border is used in the published display.
Show Navigation Bar: Click this checkbox to ensure that the navigation bar is used in the published display.
Convert Smart Symbols to groups for performance - When checked, any Smart Symbols associated with the published files are published as normal objects. This option only applies to Desktop display formats.
Suffix Options - Select Number only in order to use a number with increasing value to be added to the end of the HTM file name until an unused file name is found. Select Extension + number in order to add the display file extension to the end of the HTM file name. If an HTM file with this new name also exists, a number with increasing value is added to the end of the HTM file name until an unused name is found.
Default HTM Title - Select Empty to use a HTM page start with no title. Select File Name to use a HTM page start with the title equal to the file name it is associated with. Select Other for all HTM page titles set to the text entered in the text entry field to the right.
You have the option to publish in multiple formats. You can check the Use Advanced MultiFormat Options checkbox if you intend to publish files in anything other than a standard Desktop format.
Desktop - Publish files in standard Desktop (.gdfx) or Compressed Desktop (.gdfxz) formats. Use the text entry field to name the folder location for these file types. If you select either of these formats, you can also choose to Convert Smart Symbols to groups for performance. When checked, any Smart Symbols associated with the published displays in desktop format (gdfx, gdfxz) are converted to normal objects during the publishing process. The Smart Symbol conversion is only possible with displays in the desktop (GDFX and GDFXZ) formats.
Mobile - Publish files in standard Mobile (.gdfxp) or Compressed Mobile (.gdfxpz) formats. Use the text entry field to name the folder location for these file types.
Web - Publish files in standard Web (.gdfxs) or Compressed Web (.gdfxsz) formats. Use the text entry field to name the folder location for these file types.
Conflict Resolution Priority - Clicking the plus sign [+] shows the default order of conflict resolution priority (Desktop files first, then Mobile files, then Web files). The order of priority can be changed by entering a new priority number in the text entry field to the right of each file type or by using the up/down arrows.
Once you have completed your changes to the Publishing Options, click on Next to proceed.
If you selected 'Next' from the previous step, you will then see the Review File(s) To Be Published section of the Web Publishing Wizard. Your selected file(s) will appear, where you will see the status of each file, along with any Warnings, if applicable. For each file, you will have the option of setting, via checkbox, whether to Publish that file and/or create an HTM (Web) version of the file and/or create a standard Desktop version of the file and/or create a compressed Desktop Z version of the file. On the top of each file type column (e.g. 'Publish, HTM, Desktop, Desktop Z), you can also choose to check all or uncheck all. The Scroll to File Type pulldown, located in the top right of the window, allows you to scroll directly to a given file type such as .GDFX, .GDFXZ, .JPG, etc.
Review Files(s) To Be Published Section of the Web Publishing Wizard
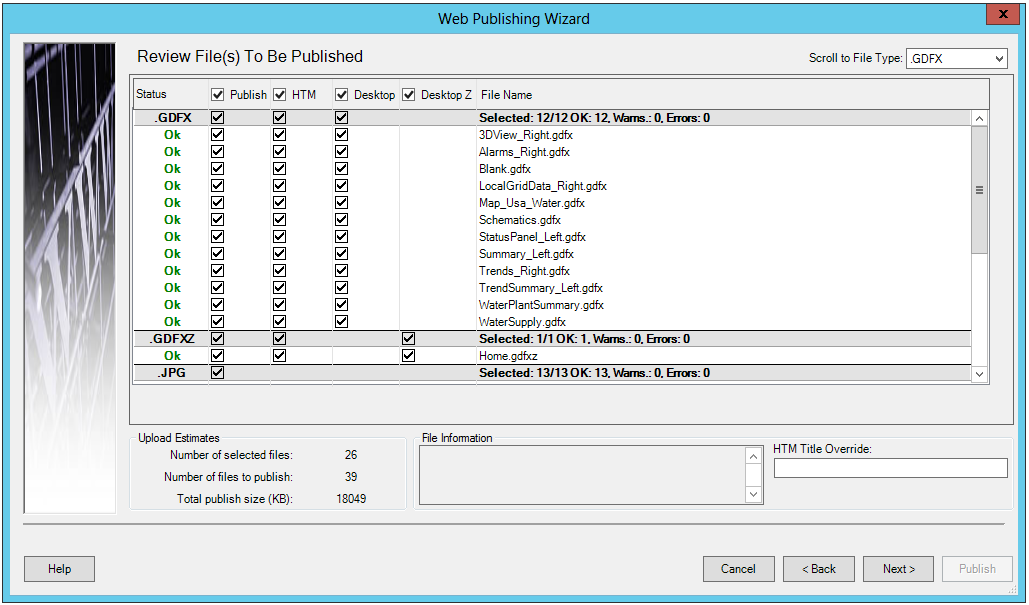
You can review the Upload Estimates, which provides the number of selected files, number of files to publish and the total publish size (in KB).
File Information - This box will show information for individually selected files in the file list above (including file location, size and publish status).
HTM Title Override - You can set the same title for multiple HTM pages by selecting more than one configuration file in the list.
At this point, you can still go Back to change your file selections or click on the Next button to proceed.
If you selected 'Next' from the previous step, you will then see the Select a Publishing Location section of the Web Publishing Wizard.
Select a Publishing Location Section of the Web Publishing Wizard
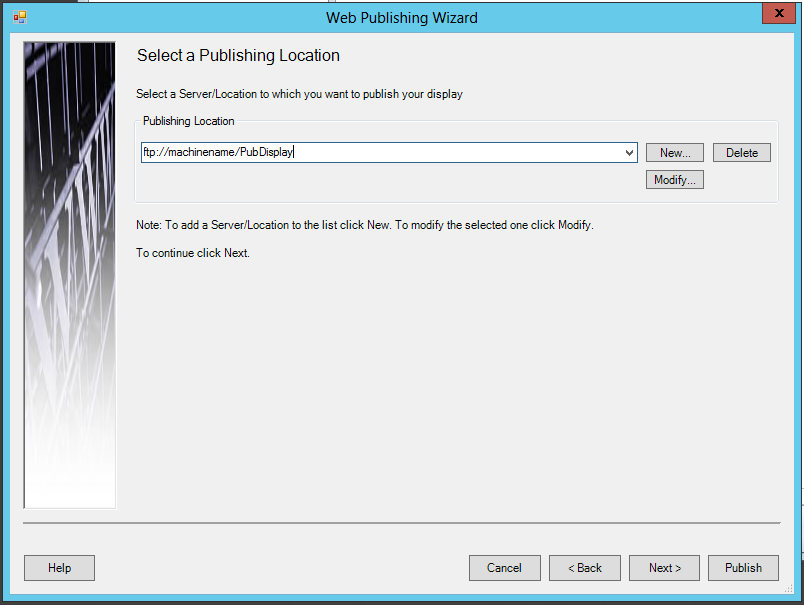
You can enter a Server/Location directly into the text entry field. If you had previously used the Web Publishing Wizard, you could also use the pulldown menu to select a previously used Server/Location. To add a Server/Location, click on the New button.
This opens the Web Server Configuration window, as shown below. [Clicking on Modify... brings up the same window, but meant to overwrite an existing Server/Location.]
Web Server Configuration Window
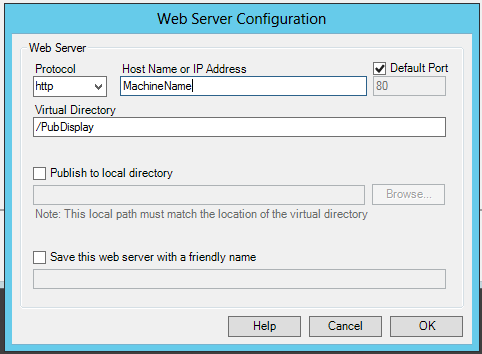
The Web Server Configuration window has the following settings:
Protocol - Use the pulldown menu to select from either http, https, or ftp.
Host Name or IP Address - Enter the Host Name or IP Address of your intended Web Server
Default Port - This checkbox is selected by default. Uncheck this box to enter your own port number in the text entry field below.
Virtual Directory - Enter a name for the Virtual Directory where your published file(s) can be accessed.
Publish to local directory - You can choose to publish your file(s) to a local directory. If you click this checkbox, you can then enter the location in the text entry field or click on the Browse... button, which will launch the Browse For Folder window, where you can navigate to your intended folder location.
Save this web server with a friendly name - Click this box if you wish to create an easy-to-remember or 'friendly' name for your file(s) location on the Web Server.
Once you have finished making your changes, click on OK to return to the Web Publishing Wizard, then click on Next to proceed.
The Enter Access Credentials section of the Web Publishing Wizard will appear, as shown below.
Enter Access Credentials Section of the Web Publishing Wizard
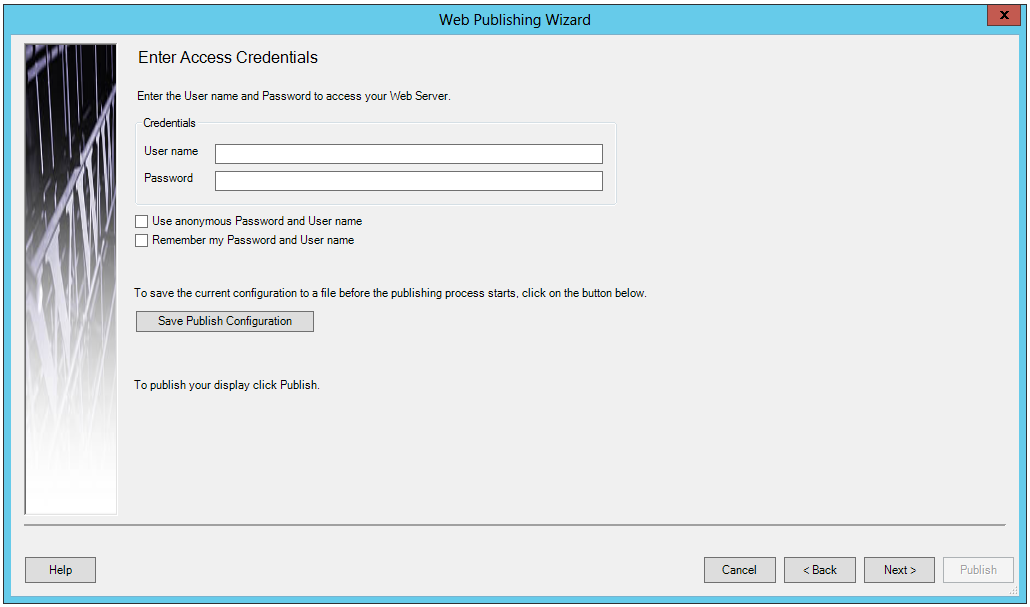
In the Credentials section, enter your User name and Password.
You can choose to Use anonymous Password and User name and/or to Remember my Password and User name.
You can also opt to save the current configuration to a file before the publishing process starts by clicking on the Save Publish Configuration button.
Once you have entered this information, click on Next or Publish.
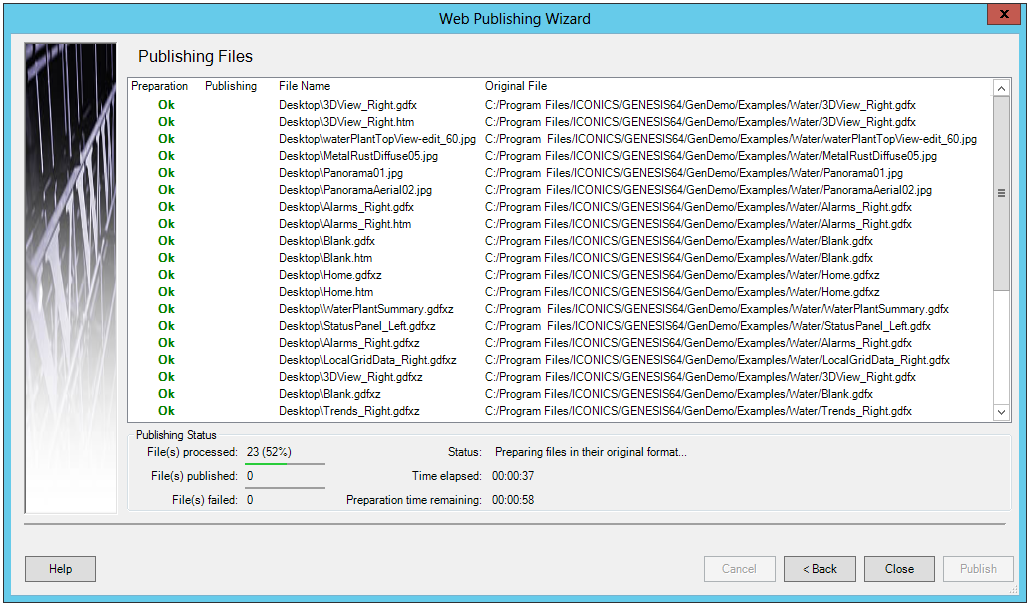
The Publishing Files section of the Web Publishing Wizard will appear. The Published files tab will open by default, where you can see the file publishing process status for each individual file, as shown below.
Publishing Files Section of the Web Publishing Wizard
Once the Publishing process is complete, the lower portion of the Publishing Files step of the Web Publishing Wizard will resemble the following:
Selected File Info

For a selected file, the Status Message box will display information including Preparation Status and Publishing Status. In some instances, the Open File button will be activated in order to review/edit the file.
Similar to the previous wizard screen, you can also opt to save the current configuration to a file, now after the Publishing process, by clicking on the Save Publish Configuration button.
You can also decide whether to go Back to change any settings and re-publish or click on Close to close the Web Publishing Wizard.
You can now navigate to your intended folder location to see the published files.
See also:
Publishing Displays Using the FTP Channel