![]()
![]()
This topic describes how to configure Windows XP SP2/SP3 and Windows Server 2003 to Publish GraphWorX32 Displays via FTP for WebHMI.
Due to security vulnerabilities, Microsoft Windows does not support HTTP publishing since Windows Server 2003. However, it is still possible to publish your displays via FTP. This document lists the steps on how to publish your displays via FTP channel. Publishing displays is a two step procedure. First, you have to set-up FTP sites and create a Virtual FTP directory. Then you can use GraphWorX32 to publish pages.
OS Requirements: Microsoft Windows XP (with Service Pack 2 or 3), Windows Server 2003.
General Requirements: ICONICS GENESIS32 V9.x (includes GraphWorX32), WebHMI V9.x, Internet Information Services (IIS), and FTP Services must be installed.
Follow these steps:
Step 1: Setting Up FTP Service in Windows XP Windows Server 2003
Step 2: Publishing Displays Using GraphWorX32
Windows XP/Windows Server 2003
Go to Start > Settings > Control Panel > Add/Remove Programs.
Click on the “Add/Remove Windows Component” button.
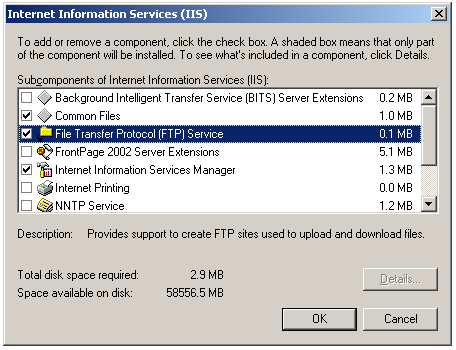
Click on “Application Server for Windows Server 2003”, then click “Details”. For Windows XP, click on “IIS” and then click “Details”.
Check the box besides FTP Services, then click “OK”.
Installing FTP Services on Windows Server 2003/Windows XP
Click “OK” until you reach the Add/Remove Windows Component dialog. Click Next to install the FTP Service.
Windows Vista
Go to Start > Control Panel > Programs and Features
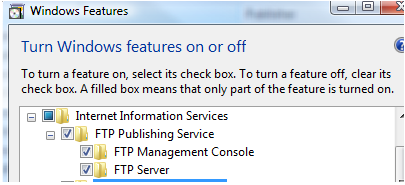
Click on “Turn Windows Features On or Off”
Expand “Internet Information Service/FTP Publishing”
Make sure the first level “FTP Publishing Service” box is checked, as well as the sub-level “FTP Management Console” and “FTP Server” options.
Installing FTP Services on Windows Vista
Windows XP / Windows Server 2003 / Windows Vista
Open the IIS Manager by going to Start > Settings > Control Panel > Administrative Tools > Internet Information Services.
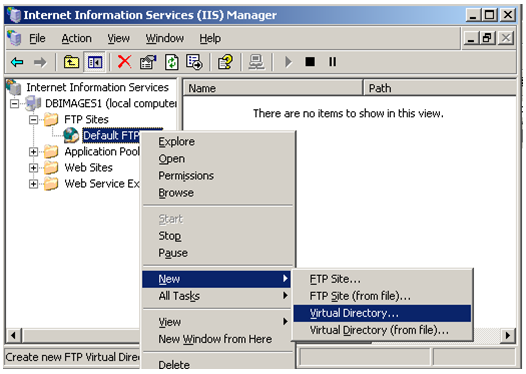
In the IIS Manager tree control on the left-hand side of the screen, expand your computer so that you can see the “FTP Sites” branch, then expand that branch.
Right-click on “Default FTP Site” then select “New”, then “Virtual Directory”, as shown below.
Creating a Virtual Directory
Type in “WebHMI” (without quotes) as the Alias of the directory, then click “Next”.
Click on the “Browse” button and browse to C:\Program Files\Common Files\ICONICS\WebHMI, then click “Next.
Check both Read and Write Permissions for the virtual directory, if it is not already checked, then click “Next”.
You should then see confirmation that you have successfully created a virtual directory. Click “Finish” to complete the process.
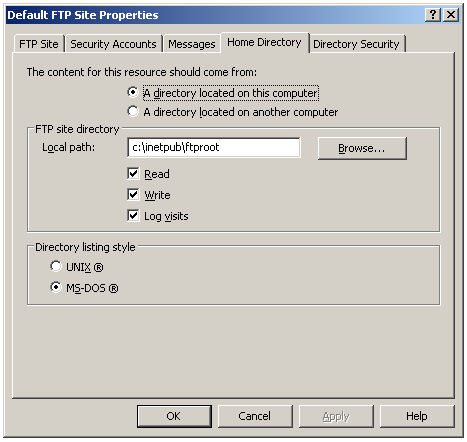
In the IIS Manager window, right-click on “Default FTP Site” and select “Properties”.
Go to the Home Directory tab and check “Write” to give write permissions, then click “OK”.
Default FTP Site Home Directory
You can now close the IIS Manager.
Windows 7 / Windows Server 2008
Go to Start > Settings > Control Panel > Items/Administrative Tools > Internet Information Services (IIS) Manager.
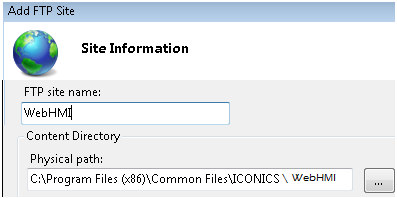
Click “Sites”, then “Add FTP Site…”.
Enter FTP site name (WebHMI) and locate WebHMI directory and click “Next”.
FTP Physical Directory
Select “All Unassigned / Start FTP Site Automatically”.
Select “No SSL” and click “Next”.
For Authentication, check “Anonymous” and “Basic” and for Authorization/Permission, check “All User” or “Specific User”.
Authorization & Permissions

Check “Read and Write” under Permissions.
Note: By default, FTP Services is NOT installed on IIS7.X Web Server (IIS).
On the Start menu, click on Administrative Tools, then click on Server Manager.
In the Server Manager Pane, in the Roles Summary section, click on Web Server (IIS).
In the Web Server (IIS) section, click on Add Role Services.
Under Role Services, select FTP Publishing Service. This will install the FTP Service and the FTP Management Console.
Click Next, and then Install.
Create or Open a GraphWorX32 display to be published.
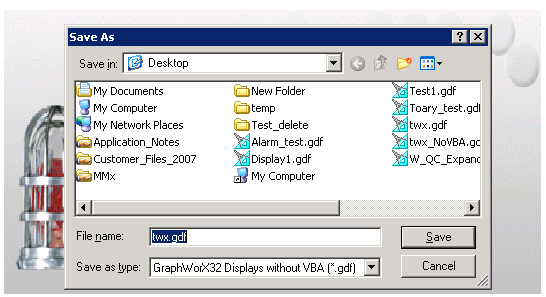
Save your GraphWorX32 display without VBA.
Saving GraphWorX32 Display
After saving, click on the “Publish to HTML” button and click on the Advanced… button.
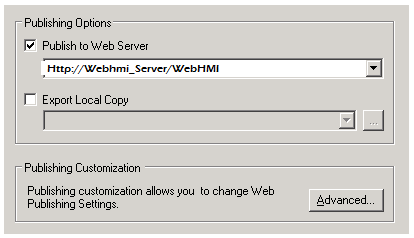
NOTE: Do not change the path in Publish to Web Server to a FTP path. You should leave that as HTTP.
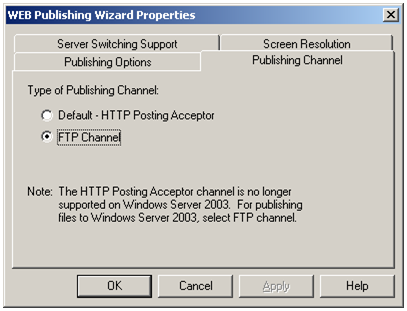
Click on the Publishing Channel tab and select to use the FTP Channel and then click OK.
Publishing Channel
Click OK to publish in the Web Publishing Wizard.
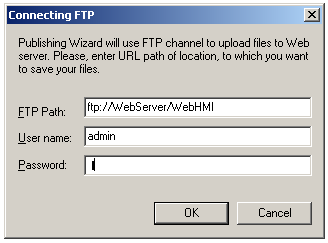
An FTP Connection window will pop up. Fill in the FTP path as ftp://WebServer/WebHMI (you should replace WebServer with the name of your computer or your IP address).
Enter a user name and password and then click OK to finish publishing.
NOTE: For successful publishing, you must use an administrator account, which must have a password. An administrator account with a blank password will not work.
FTP Connection Credentials
You should get a confirmation that the pages published successfully or a failure message.
Once you have published successfully, you can try to view your pages on a client machine without GENESIS32. You would view the page on your client machine by going to http://WebServer/WebHMI/PublishedPage.htm.
See also:
Publishing Displays Using the FTP Channel
Publishing Display Files to a Web Server