![]()
![]()
ICONICS Suite and GENESIS64 uses a security model that is both granular and additive. You can set individual rights and access based on users and groups, create named policy settings that can be applied to users and groups, and control access to individual applications, features, systems, and more based on time settings if you wish.
General security protection is applied to the following items within the ICONICS system:
Application actions
Process points
Alarms
Files
Stations
Methods
Assets
Reports
Transactions
Mobile layouts
Custom security tokens
Critical points and alarms
The security system contains two components: the Security Server, which manages user logins, and security system clients contained within the applications in the GENESIS64 family (e.g. GraphWorX64, TrendWorX64, AlarmWorX64, etc.). Any stimulus (i.e. a user login or logout) that causes a change in security status will be immediately posted to the affected clients.
Open Workbench and expand Security in the Project Explorer.
Security in Workbench
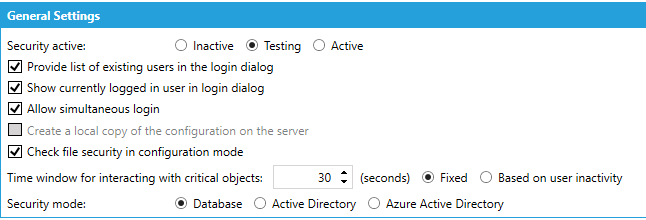
There are three options to choose from:
Inactive – Security is deactivated, all permissions are granted all the time.
Testing – Security is activated, but when nobody is logged in, all permissions are granted. When a user is logged in, permissions are granted as normal. This setting is mostly meant for the phase when setting up a GENESIS64 installation, as it allows tweaking the settings while minimizing the risks of getting locked out.
Active – Security is active as normal.
Security Options
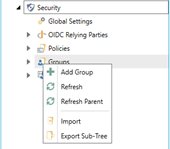
We will create a user group next. Right-click on the Groups folder and select Add Group. Name this group Administrators and click on Apply.
Adding a User Group
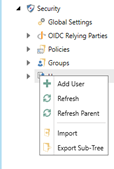
Next, we will add a user. Right-click on Users folder, select Add User. Call this user Admin. Click on Apply. You will be prompted to enter a password for Admin. Make sure you remember this password!
Adding a User
You will be prompted to log in. As soon as you create your first user security will become enabled, and you will have to log in to continue. The first user that you add to security is always the system administrator with all permissions granted. This will prevent you from being locked out of the system as soon as you enable security if your security configuration is in Active mode.
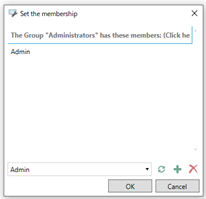
We will now associate the user Admin with the group Administrators. Right-click on the group Administrators, and select Membership.
Membership

Select your user from the dropdown at the bottom and hit the + button. Your user should be added to the list. Click OK.
Adding a User to a Group
NOTE: You could also have set the membership from the user – right-click the user, select Membership, then add the groups for that user.
We will now look at application privileges. Create a new group called Users.
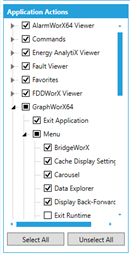
In the Application Actions sidebar, expand GraphWorX64 Menu, then uncheck Exit Runtime and click Apply.
Removing GraphWorX64 Exit Runtime Permission
Create a user called Operator, specify a password, and then add this new user to group Users.
Look at Operator’s Application Actions. There should be nothing checked. If there are any Application Actions checked, use the Unselect All button at the bottom to deselect them.
NOTE: When a user and its groups have separate permissions the least secure of each set takes effect. Or, in other words, if any of a user’s or his groups’ permissions gives him permission to do something, he can do it, even if another set of permissions revokes that thing. For example, UserA is a member of two groups, GroupA and GroupB. If UserA is denied access to PointX, and GroupA is denied access to PointX, but GroupB is granted access to PointX, then UserA will have access to PointX. In order to deny UserA access to PointX, none of his permission sets – UserA, GroupA, or GroupB – can give permission to PointX.
This includes the Default Group, if you have one! All users are considered a member of the Default Group. Any permissions granted to the Default Group are granted to every user on the system, including when no user is logged in.
Account policies are a set of rules that you can apply to users. It dictates items such as password complexity, password life, account lockout and other items. You can create a new Account Policy by right-clicking on the Policies folder and select Add Policy. Once you create the policy, you can associate the policy to a user in the General Properties section of the user’s page. By default, when you create a user, it uses the Default Policy.
Open GraphWorX64.
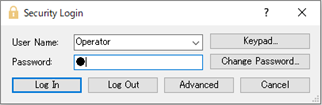
Click the lock icon in the lower right corner of the page or go to File > Login/Logout.
Log in as Operator.
Security Login Dialog
You should now see the name “Operator” next to the lock icon in the lower right corner.
User Logged In

Go into runtime.
You will note that the Configure button in the upper right corner is grayed out. You cannot exit runtime because Operator does not have the proper permissions.
No Permission to Exit Runtime
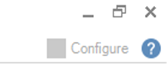
Use the lock icon in the lower corner or go to File > Login/Logout again and log in as Admin. The Configure button will be enabled again.
See Also:
Modifying the Access Denied Screen
Securing Desktop for Operations