![]()
![]()
Users and Groups will be stored inside Active Directory.
The server machine where the clients will be connecting to, will be joined to the Active Directory domain. Also, all GENESIS64 services will be running under an Active Directory domain account. (This came up during testing. If the server does not run under a domain account, client certificates will not get properly mapped to their respective domain account and the server will refuse the network connection.)
For communication between GENESIS64 clients and the server (IcoFwxServer), GENESIS64 will use HTTPS with client certificates to provide encryption and client authentication.
A valid server certificate for HTTPS communication needs to be stored in a Local Computer certificate store. How to obtain the certificate and how to store it is outside the scope of this document.
This section describes how to bind the HTTPS port (443) to the correct server certificate, and at the same time how to set up the HTTPS port to only accept client certificates which are chained to a certificate from the Local Computer Client Authentication Issuers store.
First, it is necessary to obtain the certificate hash of the server certificate. To do that:
Open Start, type in “Manage computer certificates”, run the result
Locate the server certificate there
Double click it, go to the Details tab and click on the “Thumbprint” field
Copy the thumbprint into notepad
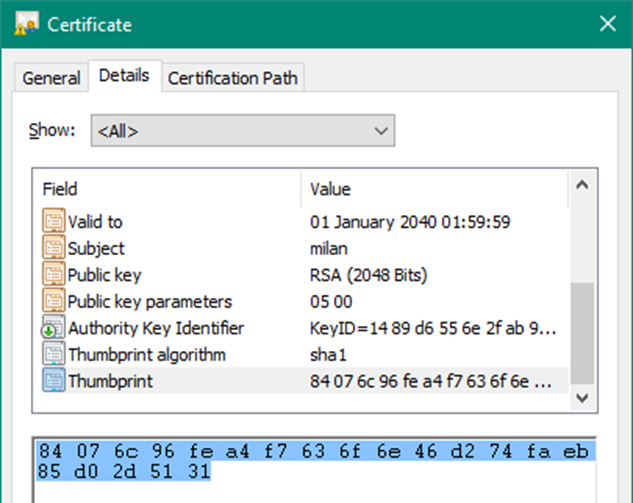
5. Delete white space from the thumbprint. Warning: most likely, when copying the thumbprint this way, it will contain an illegal whitespace character at the start. Delete this white space character from the thumbprint.
Now, modify the following command to contain the correct thumbprint as the ‘certhash’ parameter and run it as a local administrator on the server machine:
netsh http add sslcert ipport=0.0.0.0:443 certhash=84076c96fea4f7636f6e46d274faeb85d02d5131 appid={4dc3e181-e14b-4a21-b022-59fc669b0914} sslctlstorename=ClientAuthIssuer clientcertnegotiation=disable
The ‘appid’ GUID just identifies the application that ran the command and its value is not important to get the certificates working correctly. It is possible to use the GUID from the example, or to generate a new one.
The sslctlstorename parameter tells the system to only trust client certificates signed by a certificate from the Local Computer Client Authentication Issuers store.
The clientcertnegotiation=disable is necessary for ClickOnce (XBAP) application. If this setting is set to ‘enable’, XBAP will not work.
Note: to delete the binding between the HTTPS port and the certificate again, run this command:
netsh http delete sslcert ipport=0.0.0.0:443
The previous step described how to set up the system to trust only client certificates, which are chained to a certificate from the Local Computer Client Authentication Issuers store. That certificate should be imported into this store now, if not done already.
For testing purposes, follow these steps to import the Active Directory domain certificate into this certificate store:

3. Copy this certificate.
4. Paste it into the Client Authentication Issuers store.
Note: under Windows 7 and earlier, the Client Authentication Issuers store does not exist in the system. It is necessary to copy this certificate into a different store and also modify the netsh command in the previous step: the sslctlstorename=ClientAuthIssuer parameter must be replaced by a different value. For example, if copying the issuer certificate into the Local Computer Personal store, the parameter would be sslctlstorename=MY.
This step is only required if using WebHMI through XBAP (ClickOnce).
Open the IIS Manager, go to the Default Web Site node and open SSL Settings. Set the Client certificates option to Ignore. Without this setting, XBAP deployed WebHMI will not work over HTTPS. XPAB fails any time it needs to pop up any sort of client certificate prompt during the download process. Details are here and here.
This step is only required if running WebHMI through both XBAP (ClickOnce) and Silverlight.
Now, after following the previous step (setting up IIS of XBAP), client certificate authentication will no longer work with Silverlight. To fix that, open the IIS Manager, and for each application or virtual directory which contains Silverlight pages, open the SSL Settings and set the Client certificates option to Accept or Require. Do this for example for the WorkbenchSL application to make Workbench Silverlight work with client certificates.
These requirements, together with the requirements in the previous steps, mean that the same directory cannot contain both XBAP published displays and Silverlight published displays. Unfortunately, GENESIS64 installation puts the GraphWorX64 Silverlight startup program into the PubDisplay directory next to the XBAP pages, which means only one of them can work at the same time.
Now, it is necessary to instruct the clients to use the HTTPS channel to communicate with the server. To do that, run the GENESIS64 FrameWorX Server Location utility on the server computer (open Start, type in “FrameWorX Server Location”, run the result), and set up the appropriate client types. Client certificates are supported by the .NET Clients, WebHMI Clients and Silverlight Clients. Theoretically they are also supported for Servers, but servers are unable to show a client certificate selection GUI or PIN prompt, so be cautious.
Into the Primary Server text box, type in the correct name of the server, which matches the server certificate. Most likely, the server certificate will not allow localhost to be used as the computer name.
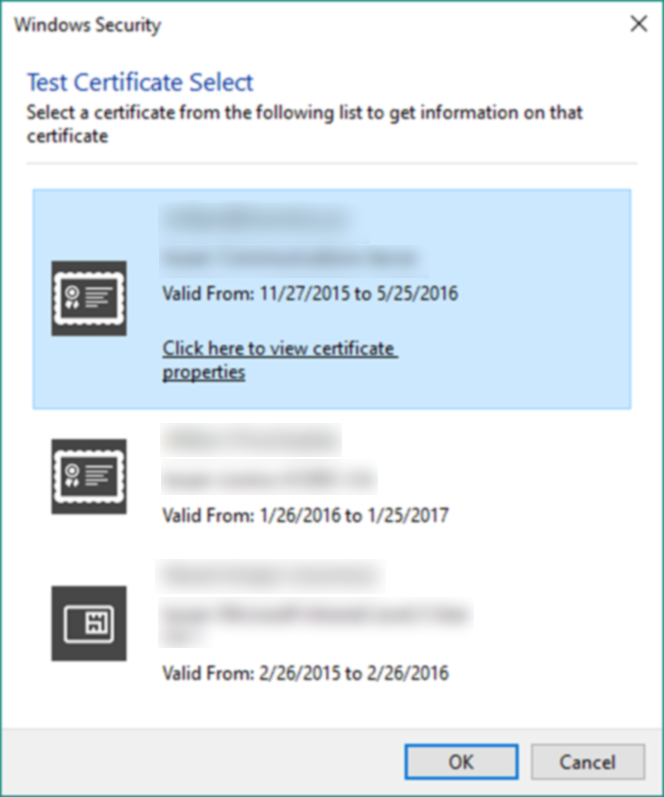
The GENESIS64 clients look for a client certificate in the Current User Personal certificate store, which matches the issuer. If only one is found, it is used automatically, if more than one matches, a dialog pops out.
By WebHMI clients, we refer to XBAP clients that are run over HTTP or HTTPS. All the same steps apply as for .NET Clients; they just get applied to the WebHMI Clients tab. The first one (changing localhost for a real computer name) is not necessary, the client automatically replaces localhost by the host from the XBAP URL.
Unfortunately, XBAP seem to have a limitation that it cannot be run from a HTTPS connection that requires client certificates. Not much research has been done by Iconics on this matter, here is just one reference: https://social.msdn.microsoft.com/Forums/vstudio/en-US/4056e581-f25f-4da0-a896-b81dd21be21b/xbap-client-certificates?forum=wpf
As a workaround, it is possible to host the WebHMI XBAP pages over plain HTTP, and use HTTPS only for the data transfer and authentication between the client and the server. To do so, simply use the http schema instead of https in the web browser’s URL box to access the WebHMI content.
If it is required to host WebHMI over HTTPS, it is necessary to set up two HTTPS ports on the machine. One (443?) without client certificates to host the WebHMI, and a different one (444?) with client certificates for communication between the client and the GENESIS64 server. Exact steps are not provided.
For Silverlight clients, it is only necessary to switch to the HTTPS Transport and check the “Use Client Certificates” check box. Client certificates are fully handled by the hosting web browser.
For the .NET Clients, WebHMI Clients and Servers, the communication layer (.NET WCF) does not check the server certificate revocation status by default. This is the standard .NET behavior and it also makes it easy to use testing certificates. To enable this revocation check, it is necessary to edit a configuration file in the C:\Program Files\ICONICS\GENESIS64\Components folder:
And set the value of CheckServerCertificateRevocationList to true:
For Silverlight, this setting does not apply, as certificates are handled by the hosting web browser completely and not by Gensis64.
GENESIS64 security needs to be set up to connect to the Active Directory, and Automatic log in needs to be enabled (client certificate logins are categorized as an automatic login by GENESIS64 security).
Also, there are three options that fine tune how the system behaves on such log ins.
When in an Active Directory domain, it is possible to get a personal client certificate for testing purposes this way:
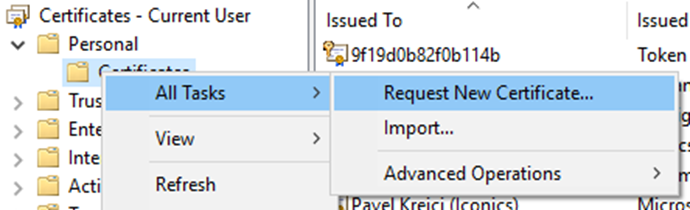
3. Go through the wizard and select the User policy under the Active Direct Enrollment Policy:


This certificate can now be used to test the login into the system.
The user will need to have his client certificate in the system or smart card connected before launching any GENESIS64 client application. Upon application launch, it will automatically select the appropriate certificate, or pop up a selection dialog if more than one certificate matches the accepted issuer.
If the certificate is protected, a password or PIN dialog will pop up.
Because the user needs to potentially select the certificate and enter his PIN for every new process that starts up and tries to communicate with the server, the integrator will need to take extra caution to configure the system in a way that prevents opening unnecessary GraphWorX displays, for example in separate GraphWorX instances.
This feature is backported to GENESIS64 10.93. However, it was not possible to port the GUI changes for technical reasons. This section helps to set this feature up without one.
It is necessary to edit the configuration file in the C:\Program Files\ICONICS\GENESIS64\Components folder:
And change the following XML tags:
FwxServerNucAddressFormat – must be https://{0}:443/BasicHttps_Cert
FwxServerNucAddressNode – the computer address to connect this client type to. The text {0} in the FwxServerNucAddressFormat gets substituted by this value.
FwxServerNucSecondaryAddressFormat = also must be https://{0}:443/BasicHttps_Cert
FwxServerNucSecondaryAddressNode – the secondary computer name of the secondary server, if using one.
ClientCertificateIdentifierType – set to IssuerDistinguishedName, to have the client filter the client certificates by the issuer
ClientCertificateIdentifier – the distinguished name of the certificate issuer. Must match exactly the format on the certificate, that is no spaces around equation signs (=) and a space after commas (,)
CheckServerCertificateRevocationList – set to true or false, depending whether revocation is required.
Set up the Active Directory connection through Workbench as usual. There are just three settings missing from the GUI. If you need to change them, edit the file C:\ProgramData\ICONICS\IcoSetup64.ini and in the existing section [SECURITY\Configuration] add the following key=value pairs:
UnknownAutoLoginUserMapping=1 To set the “Valid Active Directory users which are not mapped into security” option to “Close connection”. The default value is “Treat as if nobody is logged in” and has the value 0.
AutoLoginWithManualLoginEnabled=0 To disable the “Also enable manual login” option. Enabled by default (1).
AutoLoginUserCanBeLoggedOut=1 To enable the “Allow the automatically logged in user to log out” option. Disabled by default (0).
See Also:
GENESIS64 Security - Quick Start