Triggers can be used to set actions that can invoke operations within other ICONICS products.
NOTE: If you install Triggers in a separate database, there is no way to retrieve/port the triggers from the Unified Data Manager. You must install Triggers over Unified Data Manager if you want to port the triggers from previous product versions.
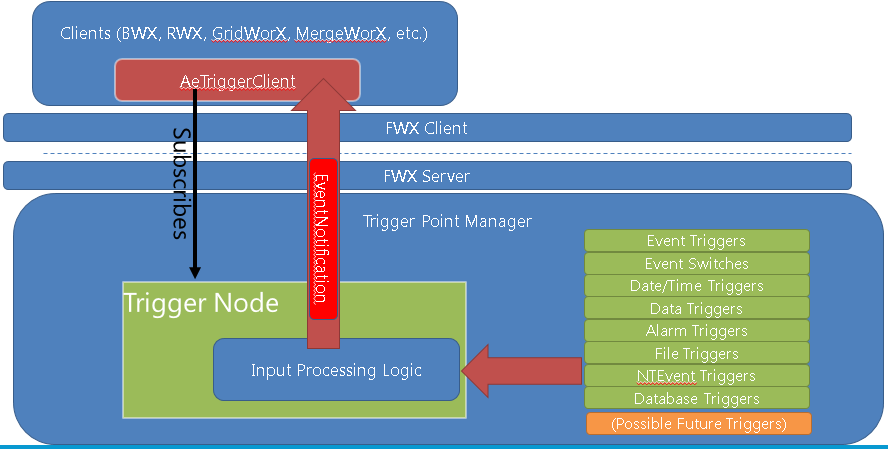
Trigger Point Manager Architecture
Within the Workbench, you can select from a variety of trigger types, including:
Triggers within the Workbench

For each trigger type, you can create a folder to contain multiple triggers of that type.
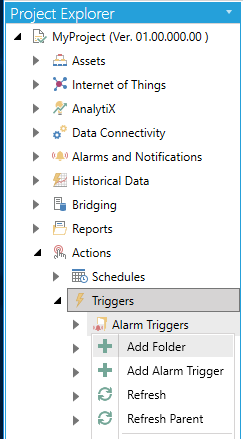
To Create a Trigger Folder:
Open the Workbench and expand your project in the Project Explorer and then the Actions node and then the Triggers node. Right-click on your selected Trigger type (in the example below, we are creating an Alarm Triggers folder) and click on Add Folder. [Note, in installations other than GENESIS64 (AnalytiX, etc.) the Triggers node may be nested higher in the Project Explorer.]
Adding a Folder in the Project Explorer
-OR-
Select the preferred Trigger type then click on the Add Folder button, shown below, in the Edit section of the Home ribbon in the Workbench.
Add Folder Button

This opens the Folder properties, shown below, beneath the Project Details section of the Workbench. Enter a name in the Folder Name text entry field.
Folder Properties
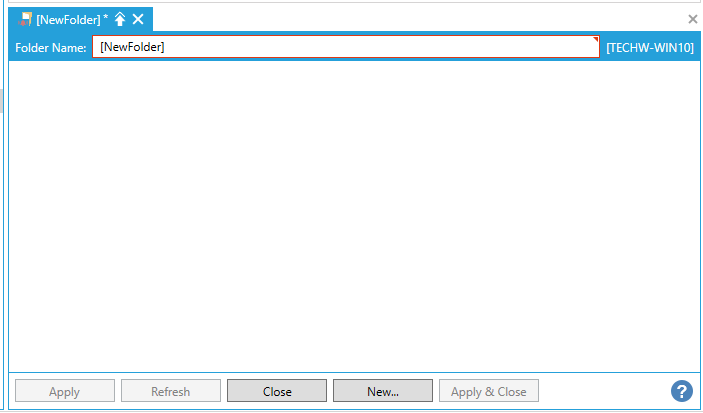
Click Apply to save your changes then Close to return to the Workbench. Your new folder will now appear in the Project Explorer within the selected Trigger type node.
See Also: