Using SNMP Traps with GENESIS64
SNMP Traps are special events generated by devices that are sent over the network. They can be compared to OPC Alarms. GENESIS64 has a special OPC AE server that receives SNMP Traps and converts them into OPC Alarms such that they can be visualized in AlarmWorX64 Viewer as well as logged by AlarmWorX64 Logger. This topic covers how to:
- Set up the machine to receive traps
- Set up the SNMP Configuration to filter SNMP Traps
- Configure SNMP traps and SNMP variables
- Create a subscription to the SNMP Trap AE Server
Set Up the Machine to Receive Traps
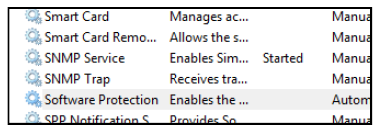
- Open the Windows Services Control Panel and double-click on the SNMP Service element.
Windows Services Manager
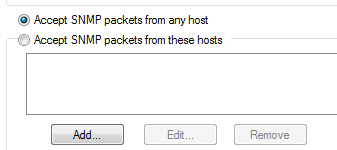
- Click on the Security tab and select “Accept packets from any host”.
SNMP Server Properties
- If you want, you can also configure the machine to send traps to the machine itself. You can use the same method to configure other machines to send traps to the server. Go in the Traps tab and specify an SNMP community as well as the list of devices where you want to send the trap.
SNMP Properties: Community

- Go back in the services list and make sure that the SNMP Trap Service is stopped and disabled. In fact, Traps are sent on port 161 and if it’s already used by the Windows SNMP Trap service, the ICONICS SNMP Trap Server will not be able to receive the traps.
Set Up SNMP Configuration to Filter SNMP Traps
- Open the SNMP provider in the Workbench. Expand the “SNMP” tree. Here you will find a list of networks and for each network a list of devices. If you want to receive traps from a device you must add it to the configuration, specifying its IP Address.
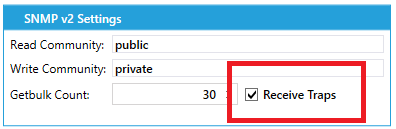
- You can use the SNMP provider to import the devices automatically in the configuration. Once the devices are added to the configuration, double-click on each one of them. A configuration form will open. You can check the “Receive Traps" checkbox, as shown below.
Receive Traps Option
- If you don’t want to set up each device individually, it’s possible to receive traps from all the devices in a network. In this case double-click on the network. Then select the “Receive SNMP Traps from all devices in this Network” checkbox, as shown below.
Receive SNMP Traps from All Devices in the Network

- Click Apply to save your changes. You can create different networks and use them to organize your devices.
Configure SNMP Traps and SNMP Variables
Now you can specify which traps you want to receive. Usually traps are defined in MIB files. MIB files are usually delivered by the company that produces the machine. It’s possible to import them automatically using the MIB parser. For supplemental information, refer to the MIB Items in SNMP Connector topic.
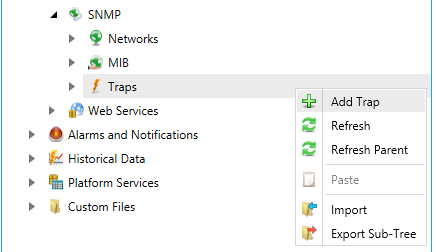
- Expand the Traps node. Traps will be automatically imported into the database. You can also create your own traps. In this case, you can right-click on the Traps node and select Add Trap.
Manual Creation of Traps
-OR-
Select the Traps node and click on the Add Trap button, show below, in the Edit section of the Home ribbon in the Workbench.
Add Trap Button

- The trap is identified by an OID. The device will send a message containing the OID, a timestamp, and a list of variables. The purpose of the SNMP Trap AE Server is to get the OID, translate it into a Human Readable name and add some information such as the Severity or a useful Description. In the Trap properties, it’s possible to specify all these parameters.
Trap Definition
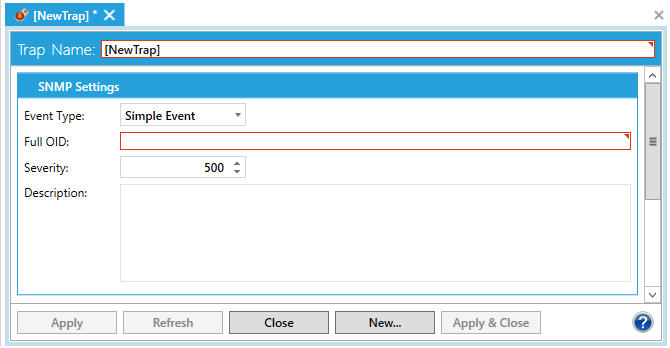
- Some fields will be automatically filled. It’s up to you to specify a different Severity depending on your settings, or to enter a different Trap Name.
- As stated before, the device sends, together with the trap, a list of variables. These variables can be set to be shown in the “Attributes” of the Alarm or Event. It’s also possible to add custom Trap Variables.
To Create a Trap Variable:
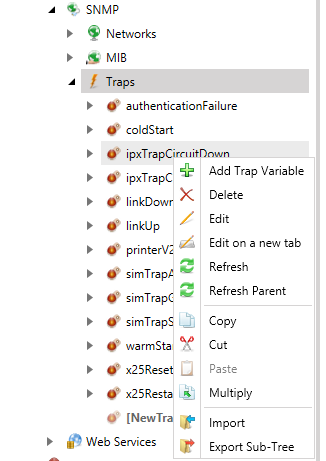
Right-click on a Trap in the SNMP provider in Workbench and click on Trap Variable, as shown in the figure below.
Creating a New Trap Variable
-OR-
Select a Trap in the project explorer then click on the Add Trap Variable button in the Edit section of the Home Ribbon in the Workbench.
Creating a New Trap Variable

- Trap Variables are automatically imported into the database if you imported your traps from MIB Files. It’s also possible to edit trap variables by double-clicking on them. A special form will appear.
Setting the Properties for the New SNMP Trap Variable
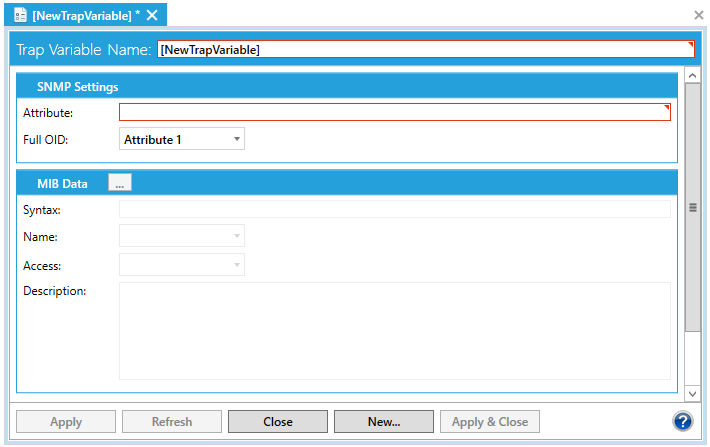
- Trap Variables are also identified by an OID. It’s possible to customize the OID in the SNMP Data Panel. In the same panel, it’s possible to specify in which attribute you want to put the Trap Variable when a Trap is received. You should understand that for each Attribute, one and only one Trap Variable is allowed.
- In the MIB Data Panel, you can see information coming from the MIB tree that explains the Trap Variable. The MIB information is retrieved using the Full OID of the Trap Variable.
Create a Subscription to the SNMP Trap A&E Server
Now that the configuration is completed, you can proceed to visualize traps in AlarmWorX64 Viewer.
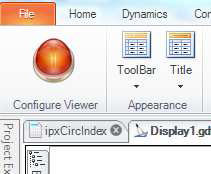
- Open GraphWorX64 and insert a new AlarmWorX64 Viewer Control in the display.
- Click on the “Configure Viewer” button in the upper-left corner.
Configure the AlarmWorX64 Viewer
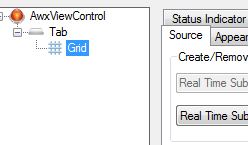
- In the configurator that opens, select the Grid node in the tree and select the “Source” tab in the pane on the right.
Alarm Viewer Config
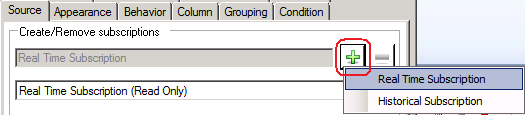
- Create a new Subscription by selecting “New” from the subscription combo box. Insert a name (such as “Trap Subscription”) and click on the “+” button circled below and the subscription selection.
Clicking the + Button
- Insert a name (such as “Trap Subscription”).
- Click on the “Local Alarm Server” point and delete it clicking on the “Minus” button on the left. Then click on the adjacent “Plus” button to add a new Event Point. Browse on the Local Server for the SNMP Trap Server and press the OK button
The ICONICS SNMP Trap Server

- Select the point and then use the buttons to the left (circled below) to customize the attributes in the dialog box that opens.
Edit Column Mappings

- A dialog will appear. Here you can select all the attributes that you need to show the trap variables in the grid. You can select up to 10 attributes. You can also reorder them.
NOTE: To record the traps, you can create the same subscription in the AlarmWorX64 logger to log SNMP Traps.
- Once you are done click on OK.
- Go to the “Columns” tab. Here it is possible to show or hide the columns you are interested in.
- When you are done, close the configurator by clicking on the “Close” button.
- Go into Runtime. You will see your traps appear in the AlarmWorX64 Viewer.
See also:
SNMP Traps Management