
Once all the information is stored in the SNMP Connector, the data shown under the SNMP tree are exactly the same data that will be shown in the ICONICS Unified Data Browser. From the SNMP Connector, you can configure everything to make things easier in the ICONICS Unified Data Browser. Just remember that every item here is an SNMP tag, which acts like a normal OPC tag in the GENESIS64 world. So there is no problem in using SNMP tags in the same places where the OPC tags are used. Simply the source of the data is different, but this is totally transparent to you.
This topic describes: Devices, Folders, and Items.
Clicking on a device (for example, a printer) shows the device properties in the right side of the Workbench.
Device Properties in the SNMP Provider in the Workbench
Settings include:
Device Name: Specifies the name of the device, and it has nothing to do with the DNS name.
Read and Write Community: These are the passwords that enable SNMP Connector to talk with the device. If these passwords are wrong, it is impossible to read or write SNMP data on the device.
Getbulk Count: SNMP GetBulk is an SNMP message that can request a lot of information from the device at once. With this feature you can reduce the number of messages sent to the device and, as a consequence, the network traffic and the device's agent working time will be lower. Here you can set the maximum number of elements that can be retrieved with a single GetBulk message. Usually GetBulk is used for arrays and tables data retrieval.
Receive Traps: Allows the machine to receive traps from the device (assuming the device is correctly configured).
Update Rate: The period (in milliseconds) between two data requests.
Timeout: Specifies the timeout of the SNMP requests to the device.
Retry Count: Specifies how many times the SNMP Connector must try to retrieve an SNMP value.
Device Type: The SNMP provider automatically detects the type of device, but you can modify it using additional options in the pulldown menu including: Apple, AS 400, Bridge, Firewall, Handheld, HP Printer, HUB, Linux, No SNMP, Phone, PLC, Printer, Router, Switch, Unknown, UPS, Webcam, Windows, Windows (Old Versions), and Wireless.
Parameters: Allows the creation of templates that do not have a specific IP address or port. They will be specified in GraphWorX64 (for example) as a parameter of the OID. This allows users to create aliases or pre-configured displays without changing the SNMP tags each time.
SNMP Version: Specifies either the traditional SNMP v1 (the standard version) or v2 (an update to the original version that includes additional features). The latest "v3" is not yet fully supported by SNMP Connector.
Host: Specifies the IP address of the device.
SNMP Port: You can change the default port where the SNMP service tries to connect.
Authentication: SNMP v3 allows you to set an Authentication protocol. Use the pulldown menu to select from MD5, SHA or None.
Auth. Username: If you have selected an Authentication protocol, enter a User Name in this text entry field.
Auth. Password: If you have selected an Authentication protocol, enter a Password in this text entry field.
Encryption: SNMP v3 allows you to set an Encryption protocol. Use the pulldown menu to select from AES 128, AES 192, AES 256, DES, Triple DES or None.
Enc. Password: If you have selected an Encryption protocol, enter a Password in this text entry field.
You can add a folder to a device that appears in the tree control in the Project Explorer in the SNMP Connector in the GENESIS64 Workbench.
To Add a Folder:
Right-click on a device, then click Add Folder, as shown below.
Adding a Folder through the Workbench Project Explorer

-OR-
Select a device, then click on the Add Folder button, shown below, in the Edit section of the Home ribbon in the Workbench.
Add Folder Button

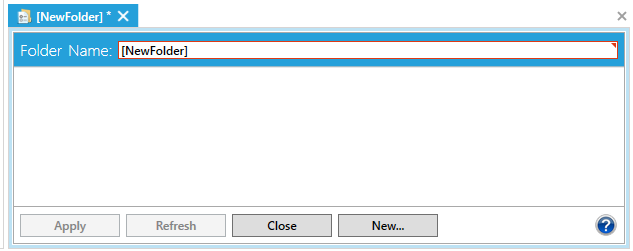
Creating a new folder or clicking on an existing folder opens the Folder properties in the right side of the Workbench. This box only allows you to name (or rename) the connected folder.
Folder Properties in the SNMP Provider in the Workbench
You can add a new item or, specifically a new SNMP Tag, to a device or folder in the SNMP provider in the Workbench.
To Add a New Item (SNMP Tag):
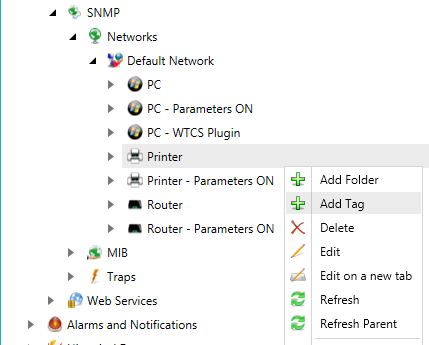
Right-click on a device, then click Add Tag.
Adding a Tag in the SNMP Provider in Workbench
-OR-
Select a device in the Project Explorer, then click the Add Tag button in the Edit section of the Home ribbon in the Workbench.
Add Tag Button

Creating a new tag or clicking on an existing tag opens the Tag properties in the right side of the Workbench.
Tag Properties in the SNMP Provider in the Workbench

From here you can configure all the information about the SNMP tag:
Tag Name: Enter the name of the SNMP Tag. The name of the tag is critical. For Scalar Values, Table Tags and Array Tags (see Exploring the Network), you can change the name of the tags, without limits. For array elements, it is really dangerous to change the ending part of the name because it contains information about the Full OID itself.
SNMP Settings
Full OID: The identifier for every SNMP tag is the Full OID. With this information you can retrieve the associated data in the MIB dictionary tree (if it exists).
Syntax: The SNMP type of the tag. It can also be a table, but only if the SNMP item associated with the tag (which has the very same Full OID) is a table, too.
Data Type: Specifies the OLE data type, and is identical to the OPC data type. This field must be set to Array for SNMP tables.
Access: A tag can be readable, writable, both, or none.
Update Rate: Enter a device Update Rate only for the selected tag.
Use GetNext: Check this check box to retrieve values through a Get-next instead of the default Get. This field is disabled for Array Data, Table Data, and writable tags.
MIB Data
The following information is filled in automatically after you have filled out the SNMP Data section and saved the SNMP Tag:
Syntax
Name
Access
See Also: