A Logging Group establishes a groups of parameters for collecting samples. Once you have established a logging group, you can set up collector groups of Hyper Historian tags, calculated tags, and aggregate tags.
To Add a Logging Group:
Start the Workbench, then expand your project. Next, expand the Historical Data node to show the Hyper Historian node. Expand the Hyper Historian node to show the Data Collections node.
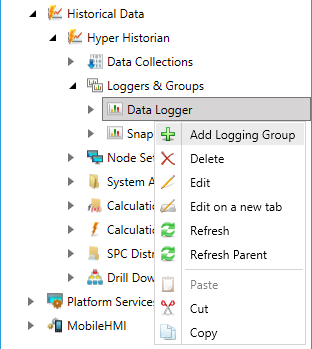
Right-click a Logger node beneath the Loggers & Groups node in the navigation tree and select Add Logging Group, as shown in the figure below.
Add Logger from the Project Explorer
-OR-
Select a Logger node beneath the Loggers & Groups node in the Project Explorer then click on the Add Logging Group button, shown below, in the Edit section of the Home ribbon in the Workbench.
Add Logging Group Button

This opens the Hyper Historian Logging Group properties window, shown below, beneath the Project Details section in the Workbench. Enter a name in the Hyper Historian Logging Group Name text entry field.
Hyper Historian Logging Group Properties

Select the Snapshot Logger from the dropdown menu. Click on the refresh button if needed.
Enter a Description for the Logging Group in the text entry field.
Ensure the Enabled check box is checked.
Click the Apply button to save your changes.
Once you have defined a logging group, you will see it in the Workbench's Project Explorer under a logger node. An Aggregation folder is added to the group automatically. Here, you can add aggregates. More importantly, you can add collector groups and Hyper Historian tag for collecting data. You can also add tags that calculate totals.
The Refresh button will refresh the screen with the current configuration settings for the Logging Group by reading it from configuration database. To edit a logging group, select the Edit command for the specific logging group's context menu.
Note that, alternatively, you can import logging group configuration information from an Excel spreadsheet, an XML file, or a CSV file. Once imported, you can edit imported information as needed.
See Also: