
Data models define relationships between data tables. These relationships can be used to easily query the data in a model. The data for the tables in a model is cached in memory.
To Create a Data Model:
Open the Workbench, then expand AnalytiX and then BI Server. Right-click on Data Models (or a Data Models Folder), then select Add Data Model, as shown below.
Add Data Model in the Project Explorer in the Workbench
-OR-
Select Data Models (or a data model folder), then select Add Data Model (shown below) in the Edit section of the Home tab in the Workbench.
Add Data Model Button

This opens the New Data Model Properties window, shown below.
New Data Model Properties
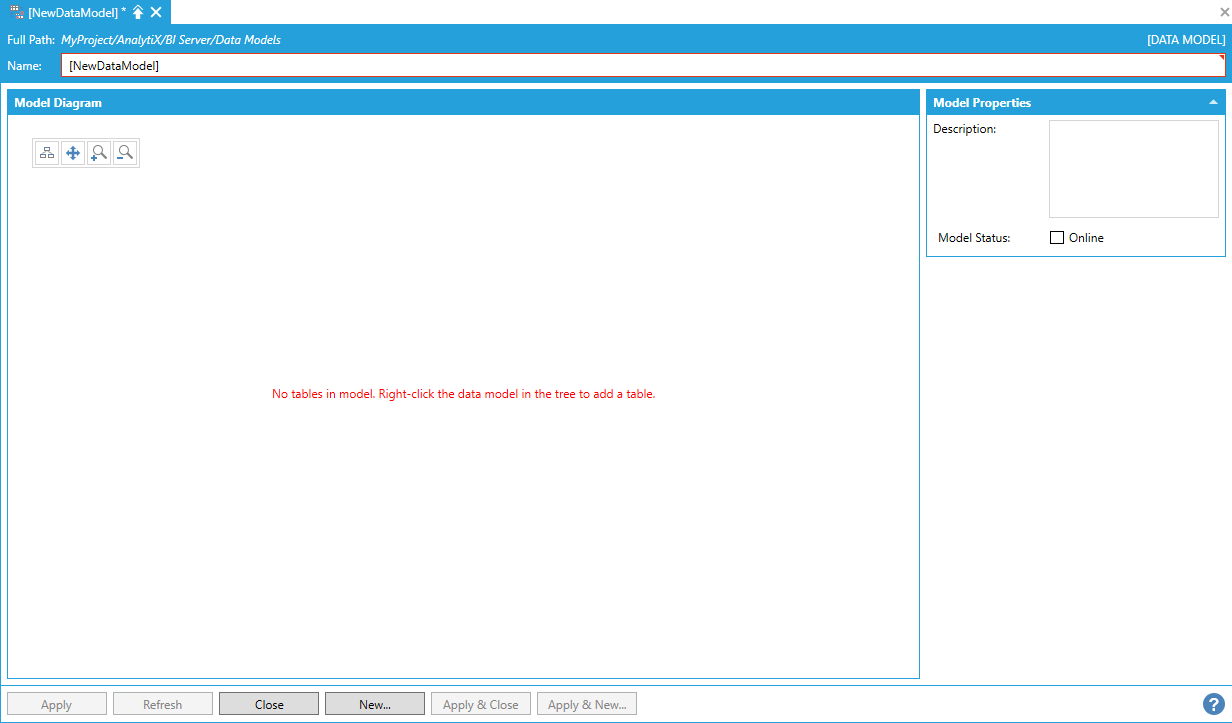
Enter a name in the Data Model Name text entry field.
The Model Diagram section of the properties will appear blank until data tables are added to the data model in the Project Explorer tree. Once data tables have been added, the model diagram is where relationships between those tables are defined. Select Refresh after adding data tables to see them appear in the model diagram.
The Model Properties panel can be used to specify a description for the data model and whether the data model should be online or offline.
Newly created data models are offline by default. Offline data models are not loaded by the AnalytiX-BI Server runtime and are not available to clients.
Offline is the recommended setting while configuring a new data model. When a model is offline, the AnalytiX-BI Server runtime does not have to track changes made to the configuration and load unnecessary or partial data while major changes to the data model are being made. This is a recommendation for efficiency only. Changes to an online data model are fully supported and processed by the AnalytiX-BI server runtime.
When your model is ready to be used by clients, it should be put online. All the data flows associated to the tables in the model will be executed, and the output datasets loaded in the data model's tables.
Data Tables Added to the Data Model - Showing in the Model Diagram after Refresh

To create a relationship between two tables in the model diagram, select the outline of one table. Connection points will appear along the edge.
Creating a Relationship Between Two Tables

Select a connection point and drag it over to the table you want to create the relationship with. Drop the connection on the destination table, or on one of its connection points.
Dropping the Connection on a Destination Table's Connection Points
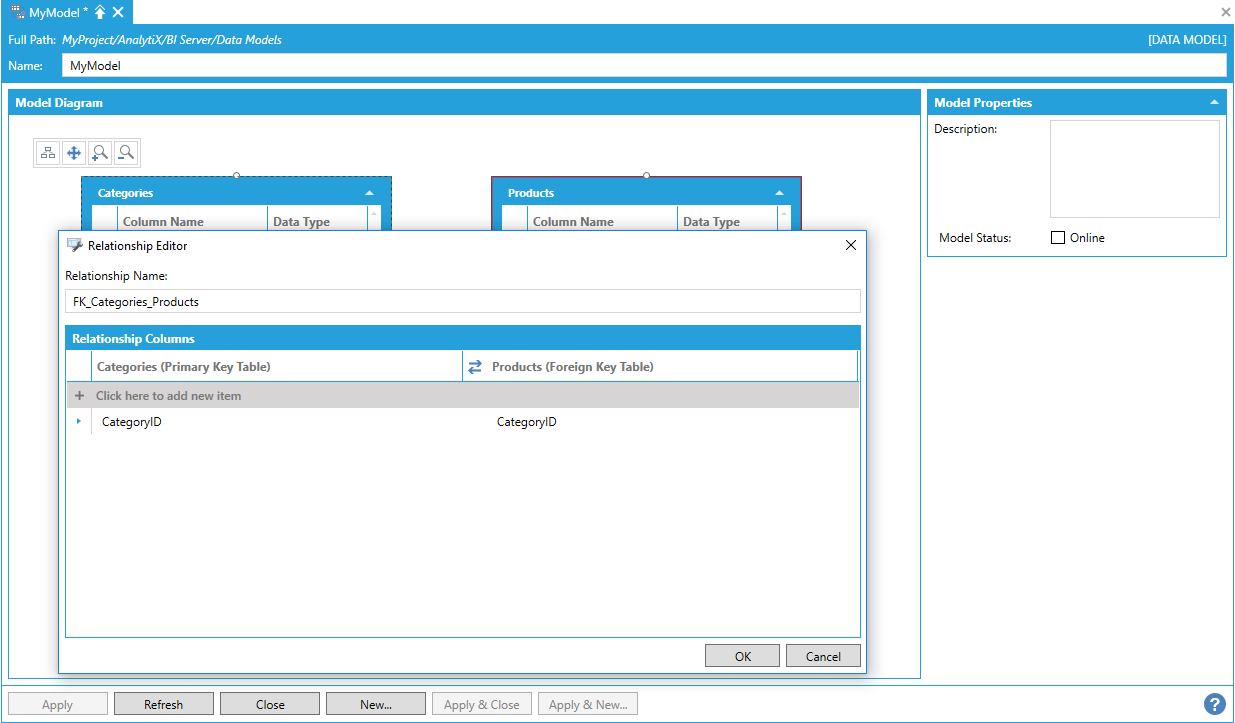
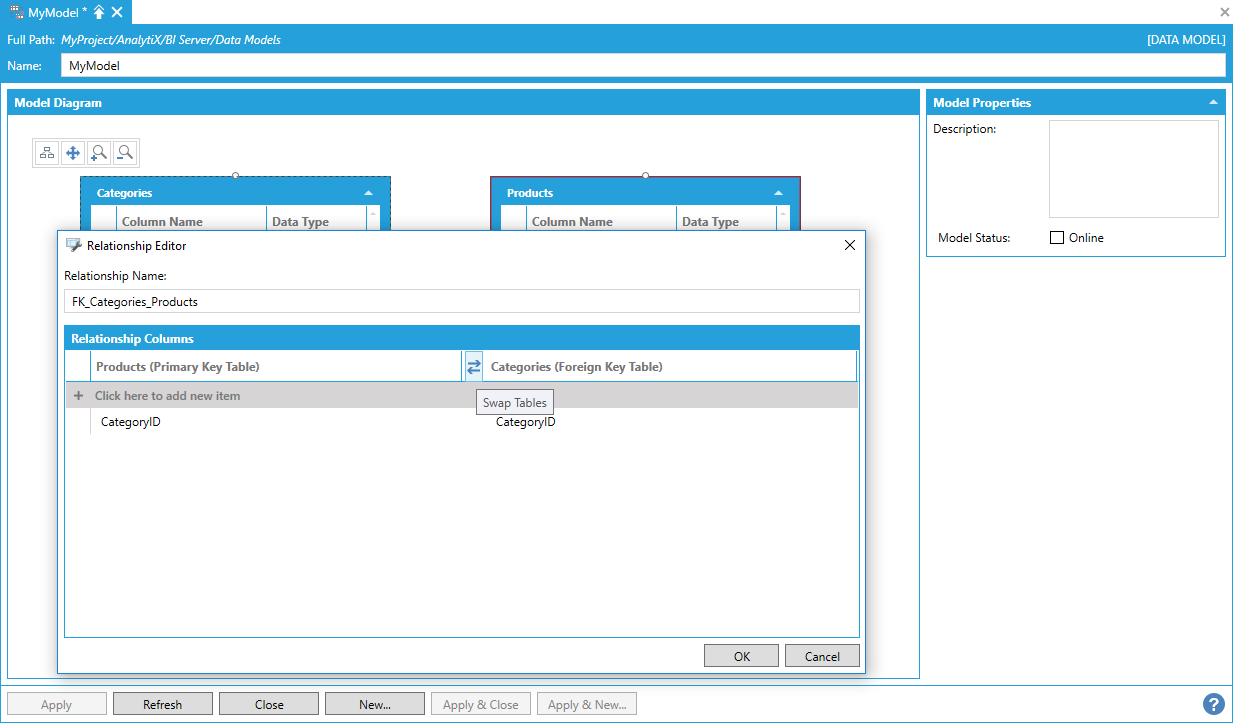
The Relationship Editor dialog will be visualized.
Relationship Editor Dialog
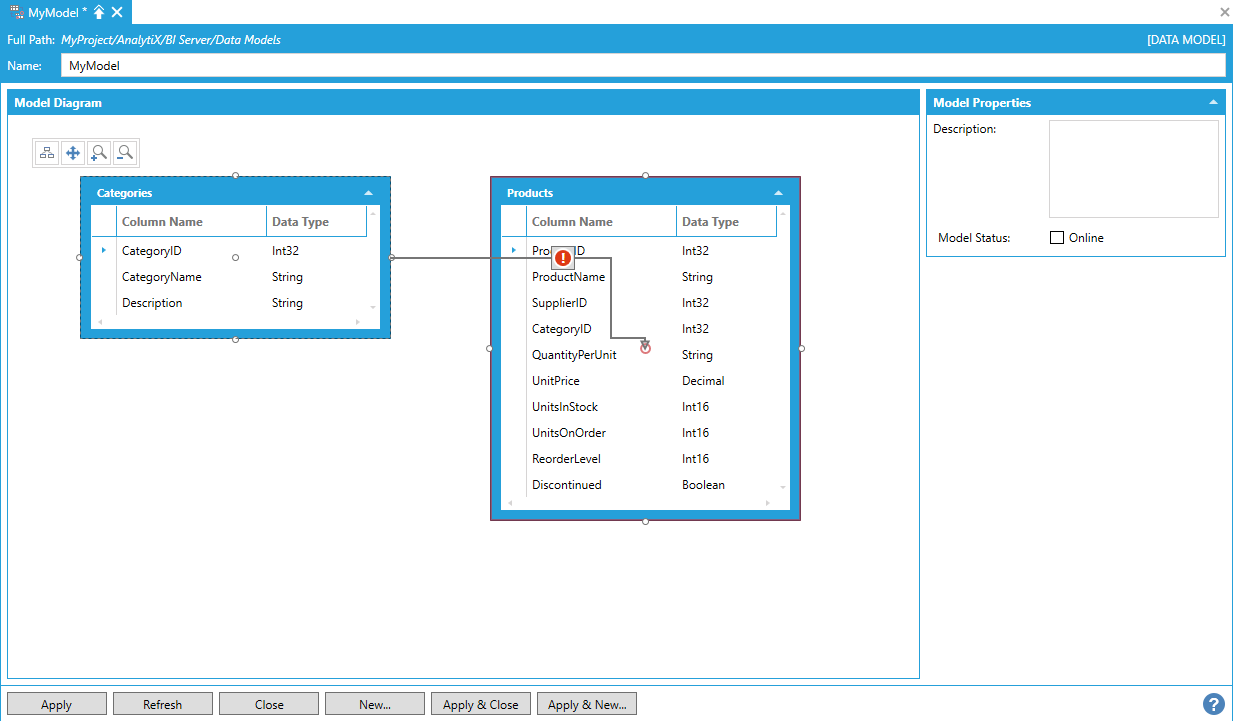
AnalytiX-BI tries to automatically identify Primary and Foreign key tables based on both tables’ primary key definitions and column names.
In the example above, the Categories table has a primary key defined on the CategoryID column, and the Products table has a non-primary key column also called CategoryID with the same data type. For this reason, AnalytiX-BI automatically infers that Categories is the primary key table and Products is the foreign key table.
In the Relationship Editor dialog, it is possible to modify the automatically generated relationship name and, under the Relationship Columns table, it is possible to specify which columns in the primary and foreign key tables should be used to create the relationship. Columns can be selected from a list of table columns.
Selecting Columns from a List of Table Columns
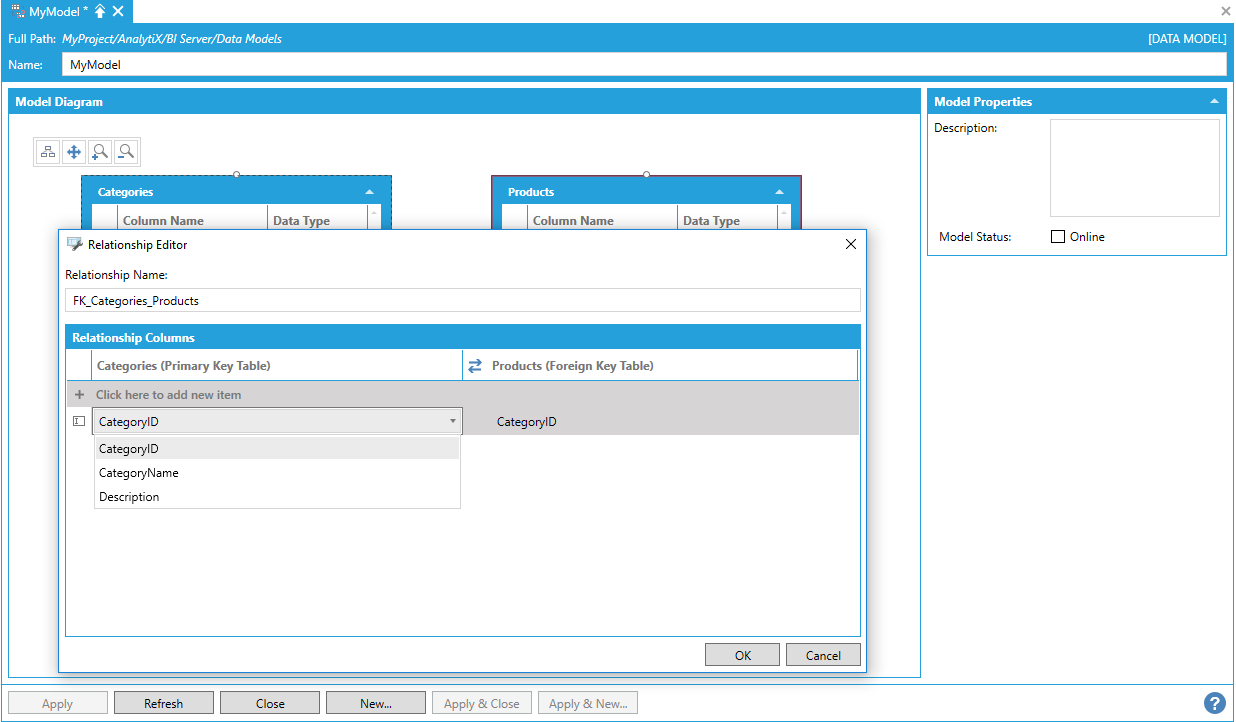
Note: it is not possible to create a relationship involving calculated columns. For this reason, calculated columns will not be shown in the columns list.
The Swap Tables button can be used to quickly invert the primary and foreign roles in the relationship.
Using the Swap Tables Button to Invert Primary and Foreign Relationship Roles
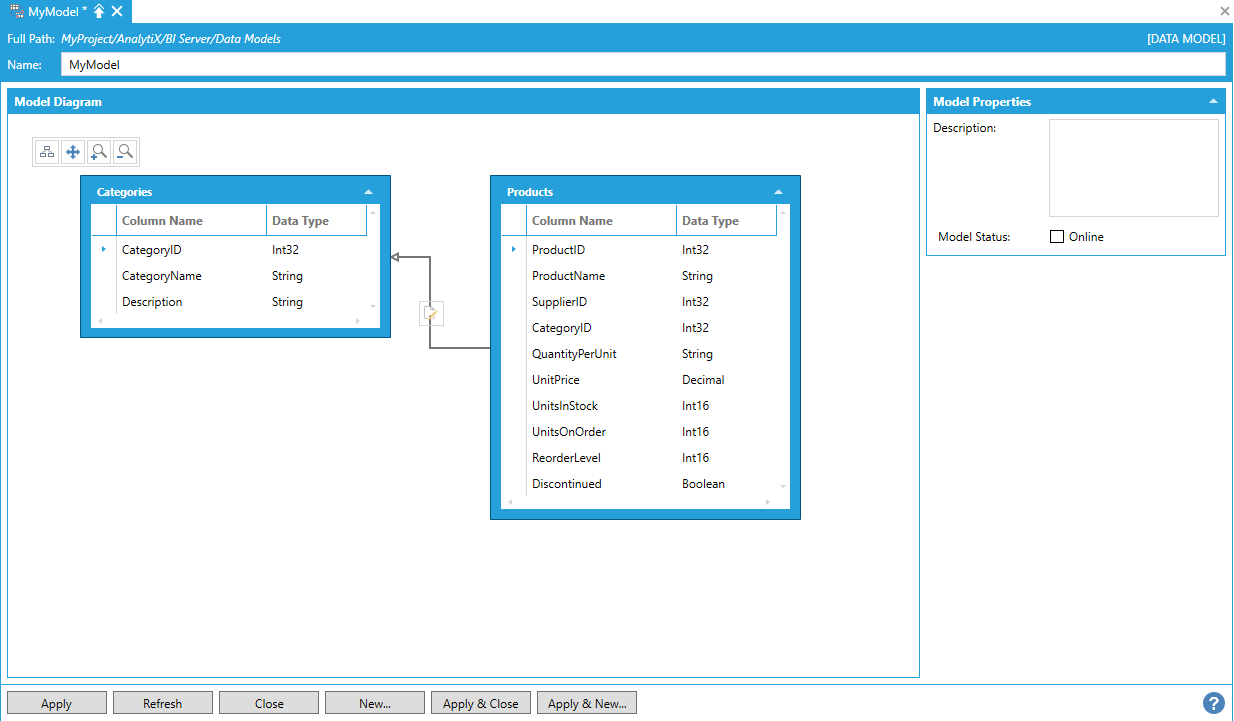
Once the relationship is configured, the changes can be applied with the OK button, and the icon on the relationship will update to show that the relationship is configured correctly.
Applying the Changes Once the Relationship in Configured
Note: Relationships are only used by the AnalytiX-BI Server runtime as hints to automatically perform implicit JOINs between the specified tables. AnalytiX-BI Server runtime does not enforce referential integrity in relationships.
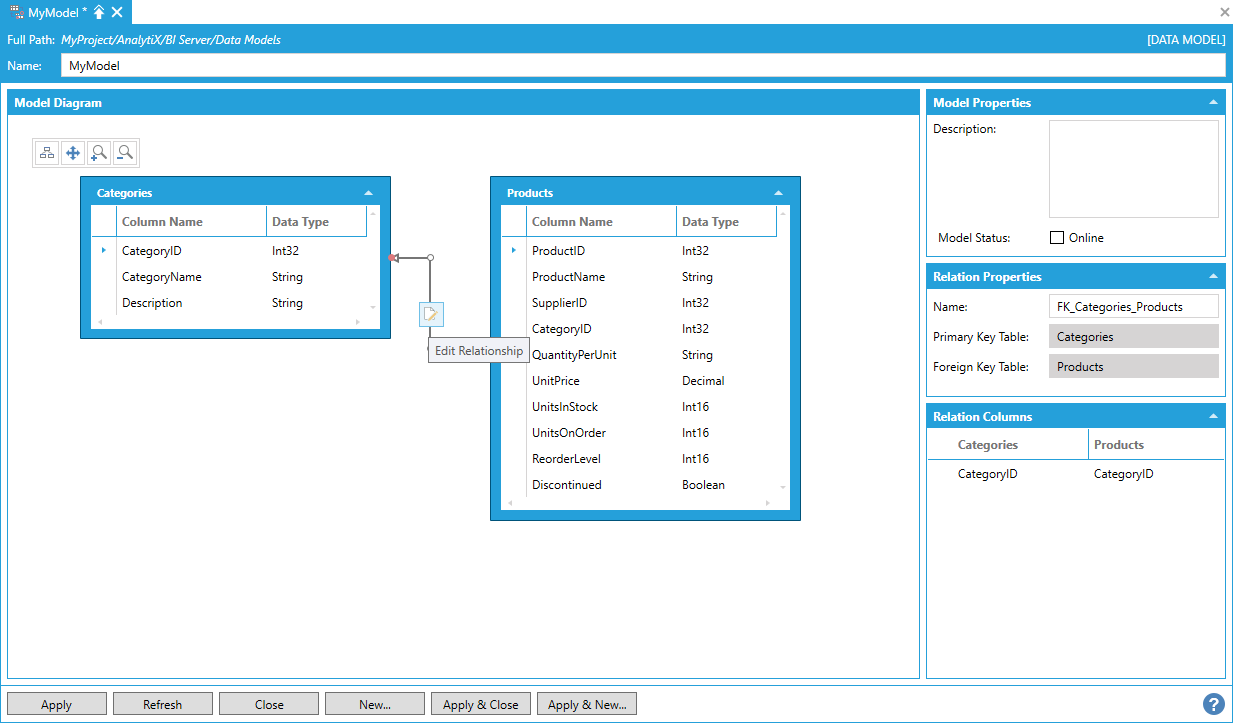
To visualize information about a relationship, click on the relationship arrow in the Model Diagram panel.
Relationship Arrow in the Model Diagram Panel

The relationship properties will be visualized on the right, below the Model Properties panel. To edit a relationship, select the Edit Relationship button on the relationship arrow.
Editing a Relationship
This will display the Relationship Editor again. To delete a relationship, click on the relationship arrow in the Model Diagram panel to select it and then hit the delete key on the keyboard.
Data Views, When Added to a Model, Are Also Displayed in the Model Diagram Panel

It is possible to create relationships between Data Tables and Data Views or even between Data Views. As mentioned above, the AnalytiX-BI Server runtime uses relationship information to perform implicit JOINs between related entities.
Creating a Relationship between a Table and a View

Note: It was not possible to create relationships between Data Views and Data Tables in previous versions and, for this reason, Data Views were not displayed in the Model Diagram panel. If you have a Data Model that was upgraded from a previous version of AnalytiX-BI, you will need to manually upgrade your Data Views if you want them to show up in the Model Diagram panel. To upgrade a Data View, just open the related configuration form and make any change that will trigger the form to apply the changes (it can be as simple as adding and then removing a character from the Data View’s name). Once the Data View has been saved, refreshing the Data Model configuration form will bring the Data View in the Model Diagram panel.
See Also:
AnalytiX-BI Server SQL Queries