PortalWorX-SL is a Web browser-based, Microsoft Silverlight-integrated runtime tool for viewing and analysis of data configured via complementary ICONICS applications (including AlarmWorX64, FDDWorX, GraphWorX64, GridWorX, ReportWorX and TrendWorX).
To Add a Smart Tile Viewer in PortalWorX-SL
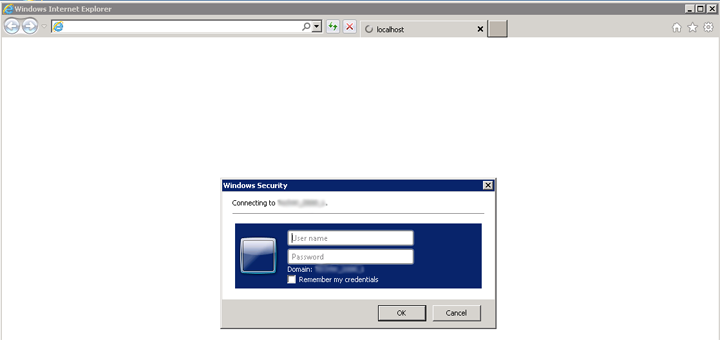
First, launch PortalWorX-SL via the Start Menu > All Programs > ICONICS > PortalWorX-SL. You will first see the Windows Security login in order to connect to PortalWorX SL, as shown below. Enter your User Name and Password, then click on 'OK' to proceed.
Windows Security Login
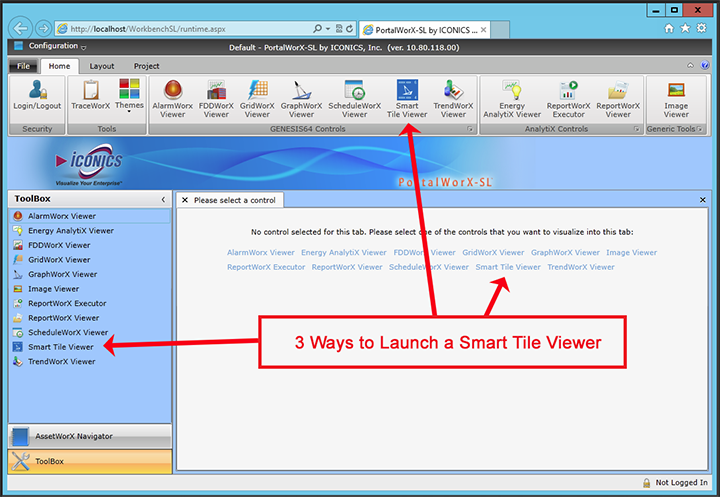
PortalWorX-SL will now open in your selected Web browser, as shown below. You can launch a Smart Tile Viewer in multiple ways. You can select it within the GENESIS64 Controls in the Home Ribbon OR you can select it within the main window in the lower right of the PortalWorX SL browser window OR you can select it from the list within the ToolBox in the left navigation box.
Options for Launching a Smart Tile Viewer in PortalWorX-SL
The following "Configure Web Part" window will then appear.
Configure Web Part Window
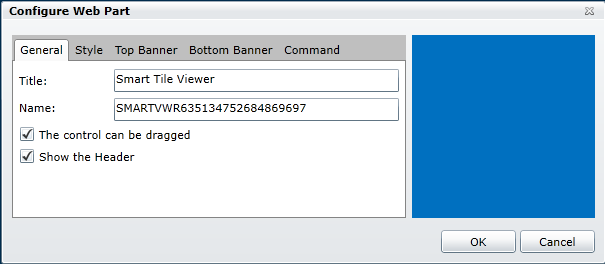
The Smart Tile Viewer in PortalWorX-SL in configured through the 'Configure Web Part' window, which contains five separate tabs:
The General Tab of the Smart Tile Viewer configuration within PortalWorX-SL, shown below, contains the following properties:
General Tab in the Smart Tile Viewer Configuration
Title - This is the name for the Viewer itself.
Name - This can be a specific name for the data that will shown within the viewer. When first launched, the Smart Tile Viewer will include default characters here.
The control can be dragged - Click on this checkbox to enable dragging for this viewer.
Show the Header - Click on this checkbox to include the Viewer's Header.
Back to Smart Tile Viewer Configuration
The Style Tab of the Smart Tile Viewer configuration within PortalWorX-SL, shown below, contains the following properties:
Style Tab in the Smart Tile Viewer Configuration
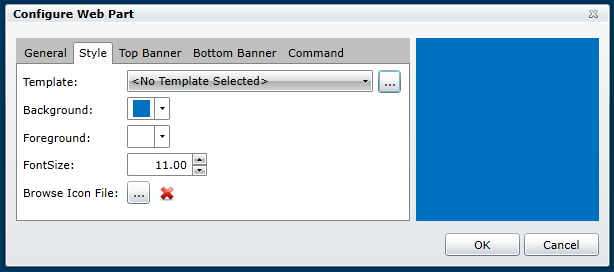
Template - If you choose to use a template, you can use the pulldown menu to select an existing Smart Tile template (if available). You can also click on the ellipsis [...] button, which allows you to navigate to a saved Smart Tile template file (.tiles.gdfxp).
Background - Clicking on the pulldown next to the colored square to the right of the Background setting opens a Color dialog box. This allows you to select from either Theme or Standard colors. Clicking the 'More colors' button opens a color picker window.
Foreground - Same as Background, clicking on the pulldown next to the colored square to the right of the Background setting opens a Color dialog box. This allows you to select from either Theme or Standard colors. Clicking the 'More colors' button opens a color picker window.
Font Size - You can enter a font size in the text entry field or increase/decrease the size with the up/down buttons.
Browse Icon File - Click on the ellipsis button [...] to navigate to your selected icon file.
Back to Smart Tile Viewer Configuration
The Top Banner Tab of the Smart Tile Viewer configuration within PortalWorX-SL, shown below, contains the following properties:
Top Banner Tab in the Smart Tile Viewer Configuration
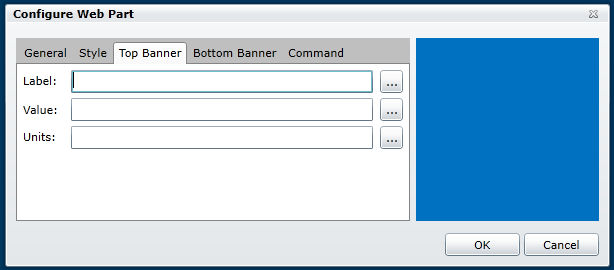
Label - Sets the text of the label in the top banner. Clicking on the ellipsis button [...] opens the Data Browser, allowing you to browse for a data point that will provide the label name automatically. This sets the background options for the text within the top banner only. You can then set the font, font size, style (bold/italics) and text wrapping option (the default is no text wrapping).
Value - Sets the data source of the value in the top banner. You can type directly into the text entry field or use the ellipsis button [...] to access the Data Browser.
Units - Sets the text of the units in the top banner. You can type directly into the text entry field or use the ellipsis button [...] to access the Data Browser.
Back to Smart Tile Viewer Configuration
The Bottom Banner Tab of the Smart Tile Viewer configuration within PortalWorX-SL, shown below, contains the following properties:
Bottom Banner Tab in the Smart Tile Viewer Configuration
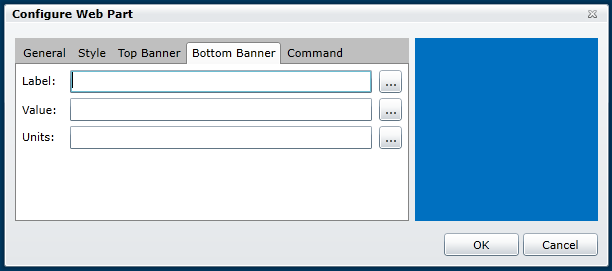
Label - Sets the text of the label in the bottom banner. Clicking on the ellipsis button [...] opens the Data Browser, allowing you to browse for a data point that will provide the label name automatically. This sets the background options for the text within the bottom banner only. You can then set the font, font size, style (bold/italics) and text wrapping option (the default is no text wrapping).
Value - Sets the data source of the value in the bottom banner. You can type directly into the text entry field or use the ellipsis button [...] to access the Data Browser.
Units - Sets the text of the units in the bottom banner. You can type directly into the text entry field or use the ellipsis button [...] to access the Data Browser.
Back to Smart Tile Viewer Configuration
The Command Tab of the Smart Tile Viewer configuration within PortalWorX-SL, shown below, contains the following properties:
Command Tab in the Smart Tile Viewer Configuration
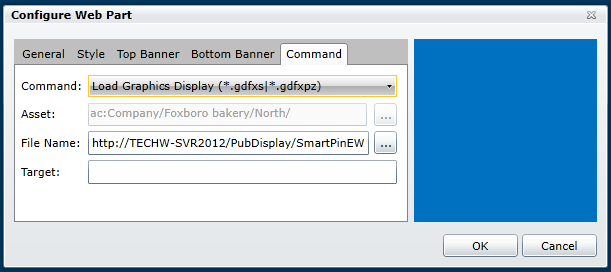
Command - The pulldown tab allows you to set commands including Load Alarm Configuration (*.awxxs), Load Graphics Display (*gdfxs|*.gdfxpz) and Load Trend Configuration (*.twxxs). You can also choose 'Select Asset', which will activate the Asset field, as described below.
Asset - Once you have activated this field by choosing 'Select Asset' from the Command pulldown, you can either enter an asset directly into the text entry field or click on the ellipsis [...] button to navigate to your selected asset via the Data Browser. At any point
File Name - Depending on the Command you selected, you can navigate to a specific Alarm Configuration (*.awxxs), Graphics Display (*gdfxs|*.gdfxpz) or Trend Configuration (*.twxxs) file by either entering it in the text entry field or navigating to it via the Data Browser by clicking on the ellipsis [...] button.
Target - Enter the name of the existing viewer within PortalWorX-SL to load your selected file into.
Back to Smart Tile Viewer Configuration
Once you have completed updating these settings, click on the 'OK' button to proceed.
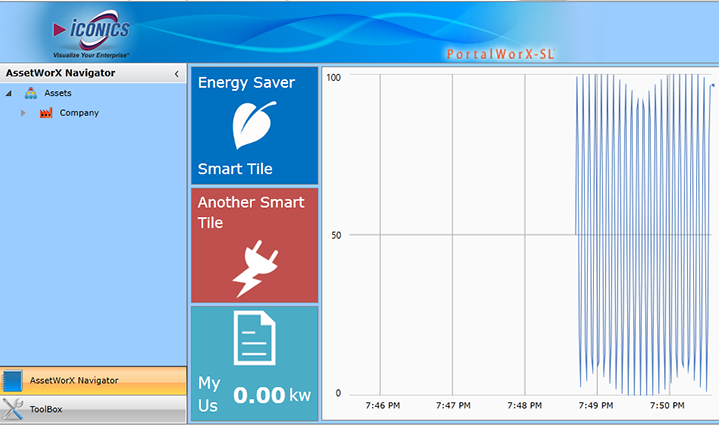
Your configured Smart Tile will then appear within your specified location within PortalWorX-SL, as shown below.
Smart Tiles within PortalWorX-SL