the Workbench features both Import and Export functions to make project configuration and transport quick and easy.
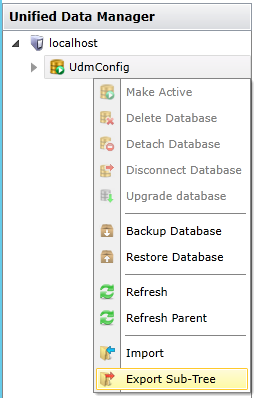
The Export operation in the Workbench is available by right-clicking on an item within the tree explorer in a the Workbench provider, as shown below, and selecting Export Sub-Tree.
Exporting from the Tree Explorer

-OR-
Select an item within the tree explorer in a the Workbench provider and then click on the Export Sub-Tree button in the Import/Export section of the Home ribbon.
Export Sub-Tree Button

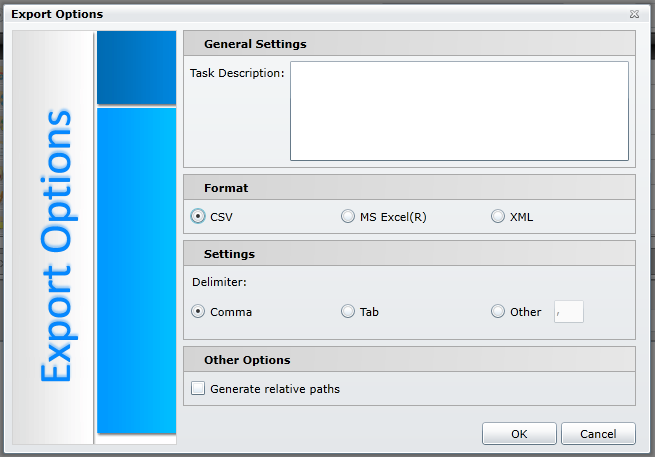
This opens the Export Options window, as shown below.
Export Options Window
General Settings
Task Description - You can enter a description of the exported item(s) or of the intended project or task in the text entry field.
Format
Select from one of the following exported file formats:
CSV - saves in the Comma Separated Values .csv file format. The output is in user-friendly plain text where each data object takes a new line and object values are separated by a selected delimiter.
MS Excel(R) - saves in the native Microsoft Excel® workbook file format. This allows users to work with formatted tables to easily sort and filter data. The output data can be displayed and manipulated in any XML-compatible editor.
XML - saves in the .xml file format.
Settings
If you choose the CSV file format, you can then set a Delimiter of either a Comma, a Tab or Other (when selected, you can enter your chosen delimiter character in the text entry field).
For MS Excel(R) and XML, there are no further Settings options.
Other Options
Generate relative paths - Click this checkbox to generate relative paths for the exported items.
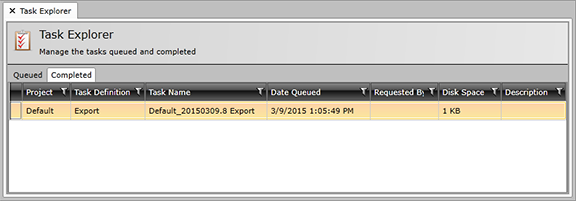
Once you have made your settings and click on the OK button, the Export task will appear in the Tasks pane on the right side of the the Workbench window, as shown below. You can also click on Task Explorer to see the task within the bottom middle of the window. You can also right-click on the task and select to View Log.
Export Task in the Task Pane in the Workbench
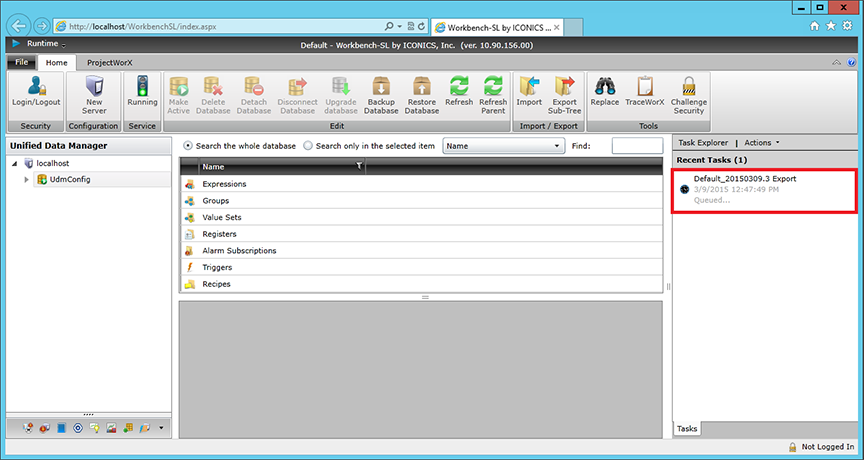
An Exported Task in the Task Explorer
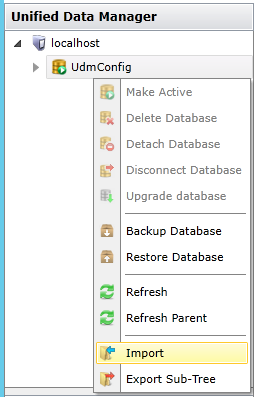
The Import operation in the Workbench is available by right-clicking on an item within the tree explorer in a the Workbench provider, as shown below.
Importing from the Tree Explorer
-OR-
Select an item within the tree explorer in a the Workbench provider and then click on the Import button in the Import/Export section of the Home ribbon.
Import Button

This opens the Import Options window, as shown below.
Import Options Window
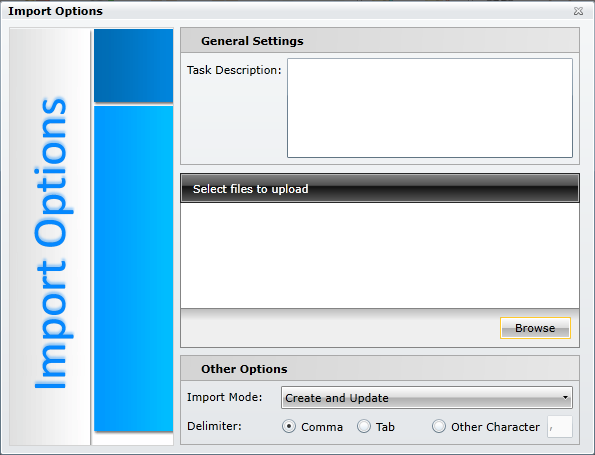
General Settings
Task Description - You can enter a description of the exported item(s) or of the intended project or task in the text entry field.
Select files to upload
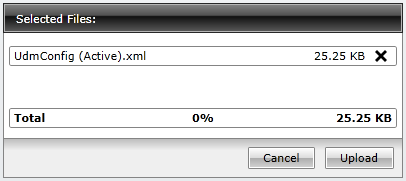
Browse - Click this button to open a file explorer to navigate to your selected file to import. Once you select a file, it will show up in the Selected Files section of the window and the action buttons will change to Cancel (to remove selected files) and Upload (to commit your selected file[s] to the Workbench).
Selected File to Import
Other Options
Import Mode - Click on this pulldown menu to select from Create (to make new items or overwrite what is existing), Update (to only update those items that exist in the current tree explorer) or Create and Update (which does both).
Once you click on the Upload button, you'll be able to see the Import task in the Tasks pane on the right side of the the Workbench window, similar to the Export function. You can also click on Task Explorer to see the task within the bottom middle of the window. You can also right-click on the task and select to View Log.
Your imported items will now appear within the tree explorer in the relevant the Workbench provider(s).
See Also: