Open the the Workbench and, in the Project Explorer, click the AssetWorX provider button to open AssetWorX.
Then in the navigation tree expand localhost > AnalytiX Catalog configuration > Assets to access the asset tree. Expand the asset tree and click on the equipment you are defining runtime menu commands for. This displays the Equipment tab, with the Properties tab on top.
(If you are defining permissions for an equipment class instead, expand localhost > AnalytiX Catalog configuration > Equipment Classes. Navigate to the equipment class you are defining runtime menu commands for and select it. This displays the Equipment Class tab, with the Properties tab on top.)
Click the Permissions sub-tab. When you first use the Permissions sub-tab, it looks like this:
Initial Appearance of the Permissions Sub-tab
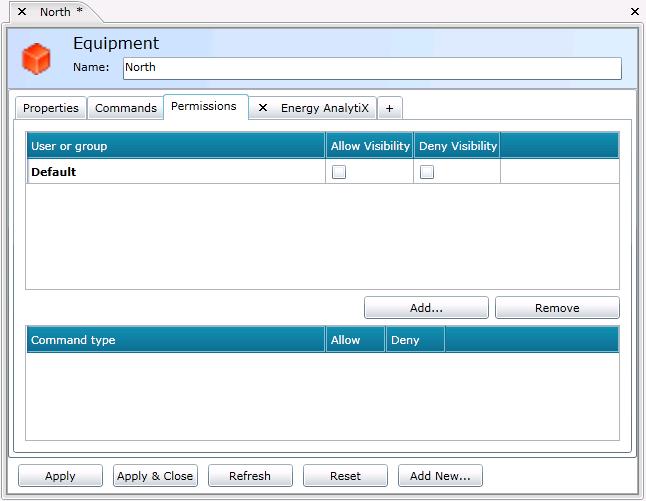
Such an appearance inherits all of its permissions from its parent equipment node. Before you continue, review the rules for how permissions are applied at runtime in the Permissions Tab for Equipment topic. (You can also refer to them in the Permissions Tab for Equipment Classes topic.)
To override the default permissions for the equipment node, you must add the users and/or groups you are overriding them for. To add a user or group from the Security Server, click the Add button and select one. You may need to navigate to the Security Server. (Security Server, users, and groups are configured in the Classic Workbench for GENESIS64; refer to the online help for the Classic GENESIS64 Workbench for information.)
To allow or deny access to types of commands, select the user or group to display the commands in the table at the bottom of the form. The table will look like this:
Allow or Deny Command Types
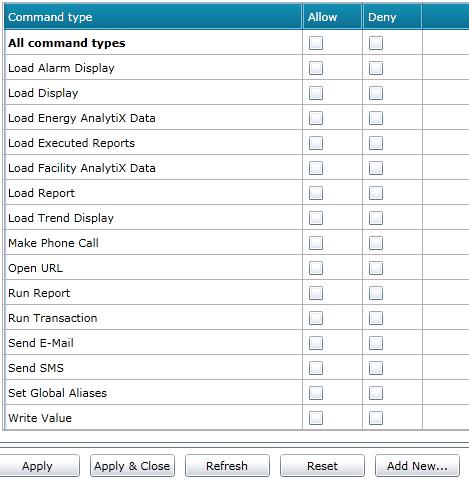
Clicking a check mark in the Allow or Deny check box on the All command types line adds a check mark to that box for all commands. You can change the setting for each command type.
Click Apply at any time to save your changes, or Apply & Close to save your changes and close the Equipment form.