|
|
The features on this page require a GENESIS64 Advanced license and are not available with GENESIS64 Basic SCADA . |
|
|
The features on this page require a GENESIS64 Advanced license and are not available with GENESIS64 Basic SCADA . |
The Unified Data Manager (UDM) provides a centralized management of commonly used expressions, groups, value sets, registers, and event triggers across the GENESIS64 suite. This topic helps shows how to configure global expressions and demonstrates how they are used.
You create an expression using the UDM and can then use that expression in all other GENESIS64 applications. Each global expression is implemented as a single expression data tag, which recalculates on input values or on trigger data tags. Client applications can access these expression data tags as read/write data tags. Expressions can also accept parameters. To understand how expressions can be used, refer to the Expressions in the Data Browser topic.
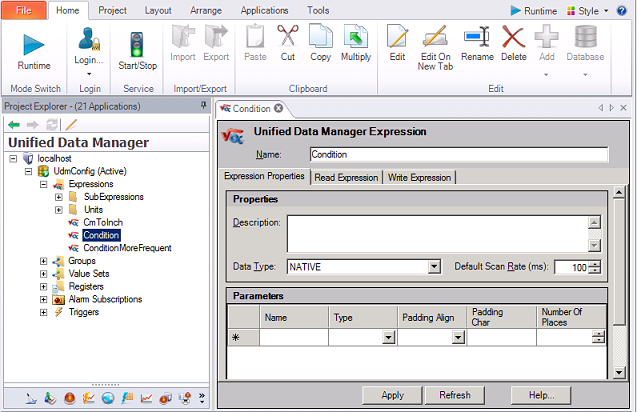
Unified Data Manager with an Expression Configuration

Launch the UDM by going to Start > Programs > ICONICS > Tools > Unified Data Manager. The Workbench opens with the UDM provider selected.
Create a new configuration database by right-clicking on your server at the root of the tree and select New Database.
Follow the Create Database Wizard instructions to create a new configuration database. You can check or uncheck Include Sample Data check box.
You should now have a new configuration database. Right-click it and select Make Active.
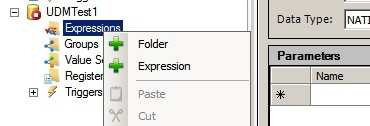
In the tree-control in the Project Explorer, expand this new configuration, right-click on Expressions, and select Expression, as shown below.
Adding a new expression

NOTE: Alternatively, you can create a new Folder and then add your new Expression to the folder. Use folders to organize the expressions that you have defined.
Enter SumExample in the Name field of the expression.
Continue to the next section of this topic.
Next, you are going to create a simple expression that calculates a sum of three data points (for example, FastL000, FastL001, and FastL002).
Once you have created the expression, select the Read Expression tab and click the Expression Editor button.
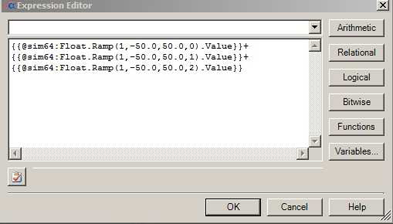
Write the point names enclosed with double curly brackets {{ }} or browse for them one-by-one using the Variables button, (which opens OPC UA Browser). Add them by using the addition sign + (which you can type, or select by clicking the Arithmetic button and selecting +). Your expression should look similar to the one shown below.
Click OK to close the Expression Editor.
Example Read Expression

NOTE: At this point, you can also specify a tag to enable/disable this expression based on a condition. To do this, you would put a check mark in the Use Trigger Tags check box. Enabling this check box lets you specify tags and the method or condition under which the expression is to be used. For additional information, refer to the Read Expressions Tab topic.
Click the Apply button to save your changes.
Launch GraphWorX64 by going to Start > Programs > ICONICS > GENESIS64 > GraphWorX64 > GraphWorX64.
Insert a Process Point and open the Data Browser.
Navigate to OPC Servers > My Server > Global Expressions and select the expression you just created.
Click OK to close the Data Browser.
Save the GraphWorX64 display.
Selecting an Expression from Data Browser

Enter Runtime and you will see results of the read expression you configured.
One of the most common uses of global expressions is scaling and conversion of values. The steps below describe how to create an expression that will scale an OPC tag value by 10.
Create a new expression as described in the previous example and enter ScaledExample as the Name.
On the Read Expression tab, open the Expression Editor and select a Simulation tag OPC UA. You will see its syntax in double curly brackets. Append “/10” at the end of the line to divide it by 10. This expression will divide a value that comes from the selected source by 10.
Select the Write Expression tab and put a check mark in the Enable Write Expression check box.
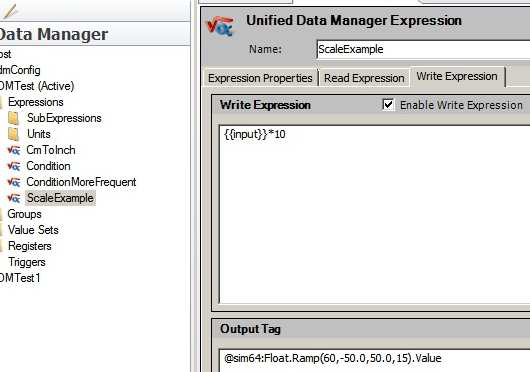
Click the Expression Editor button, type manually {{input}}. This is a keyword used to represent the input coming from the Write action performed from a client. Append “*10” at the end of line. This expression will multiply the input by 10.
Click OK to close the Expression Editor. The result will look something like the following:
Multiplying the Input by 10

In the Output Tag section at the bottom of the Write Expression tab, click the Browse button and select the point you selected in Step 2. Select OK to close the Data Browser.
NOTE: Keep in mind that the Output Tag can be only a single point. If you use a complex write calculation involving more tags, you can select only a single point where the result will be written to.
Click Apply to save the new expression.
You can create expressions that are more complex than the ones created in the prior examples. You can create expressions that take multiple parameters in their calculations. In this example, you will use two parameters that take in two OPC Tag strings. The Read Expression will add the two resulting OPC values.
Create a new expression and enter Addition as its Name.
On the Expression Properties tab add two Parameters called tag1 and tag2.
Select String as their Type from the drop-down list, as shown below.
Adding Two New String Parameters

Go to the Read Expression tab and enter the following expression:
x= {{<<tag1>>}}+{{<<tag2>>}}
NOTE: When you refer to a parameter in an expression, the parameter's name must be enclosed in double carets << >>.
Click Apply. The expression is now ready for use. When you browse for the tag in the Data Browser it will have the following syntax:
@exp64:Addition("tag1","tag2").Value
You need to substitute the “Tag1” and “Tag2” parameters with OPC Tag names in your client.
NOTE: Parameters can be used in all previous examples instead of constants.
See Also:
Expressions in the Data Browser