|
|
The features on this page require an add-on to work with GENESIS64 Basic SCADA. |
|
|
The features on this page require an add-on to work with GENESIS64 Basic SCADA. |
To Add a Tag to Device or Folder
Open the Workbench and expand your project within the Project Explorer. Expand the SNMP provider node, then the Networks branch, then your specific Network. Right-click on your specific Device or Folder, then click on Add Tag, as shown below.
Add Tag from Project Explorer

OR
Select a Device or Folder within the Networks branch in the Project Explorer then click on the Add Tag button, shown below, in the Edit section of the Home ribbon in the Workbench.
Add Tag Button

This opens the Tag properties, shown below, in the middle section of the Workbench. Enter a name for the tag in the Name text entry field.
Tag Properties
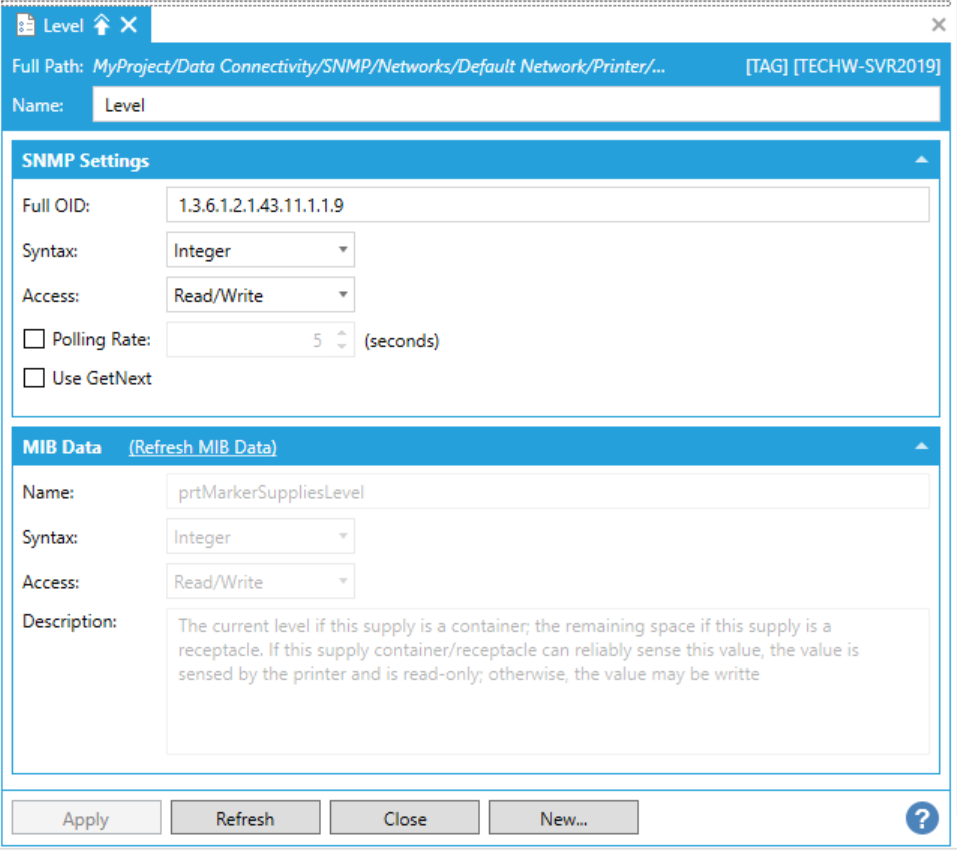
SNMP Settings
Full OID - Enter the full object ID in the text entry field. The identifier for every SNMP tag is the Full OID. This information enables the retrieval of the associated data in the MIB dictionary tree (if it exists).
Syntax - Use the pulldown menu to select from Bits, 32 bits Counter, 64 bits Counter, Date And Time, 32 bits Gauge, Integer, IP Address, NSAP, Null, Octets, OID, Opaque, Table Value, Array, Ticks, or Unknown.
Access - Use the pulldown menu to select from Read, Write, Read/Write, Not Accessible, Unknown, Notify, or Read/Create.
Polling Rate - Check this checkbox if you intend to use a polling rate with this tag. Once activated, enter the rate, in seconds, in the text entry field, or use the up/down arrow buttons.
Use GetNext - Check this check box to retrieve values through a Get-next instead of the default Get. This field is disabled for Array and Table VAlue.
MIB Data
The MIB Data section is automatically entered when the SNMP Settings section is completed and the Tag is saved.
(Refresh MIB Data) - When activated, click this link to refresh the MIB data shown in this section.
Name
Syntax
Access
Description
Once you have completed making your changes to the Tag properties, click Apply then Close to return to the Workbench.
See Also:
