Once you have added SNMP tags in the SNMP Connector provider in GENESIS64, you can create a GraphWorX64 display utilizing that SNMP data.
To Create a Display Using SNMP Data in GraphWorX64:
First, set up your desired SNMP items (your devices, and so on) in SNMP Connector; see SNMP Explorer/Edit Network Settings.
SNMP Explorer Window - Editing SNMP Network Settings
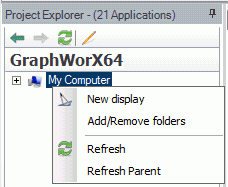
Select GraphWorX64 from the Project Explorer. (If GraphWorX64 does not appear, follow similar instructions as Starting SNMP Connector in GENESIS64, choosing GraphWorX64 as the provider). Right-click on your default machine (for example, My Computer) and click New display.
Creating a New Display in GraphWorX64

-OR-
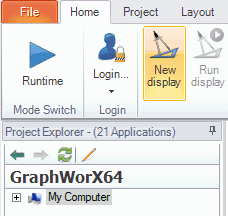
Click on the GraphWorX64 button in the Applications ribbon, then go to the Home ribbon and click the New Display button.
Creating a New Display in GraphWorX64

In GraphWorX64, go to the ribbon's Dynamics tab and click the Process Point button.
Process Point Selection in GraphWorX64

Draw the location of your Process Point in your new GraphWorX64 display; when you finish drawing, the Data Browser automatically opens, prompting you for the location of the data source you want to connect to.
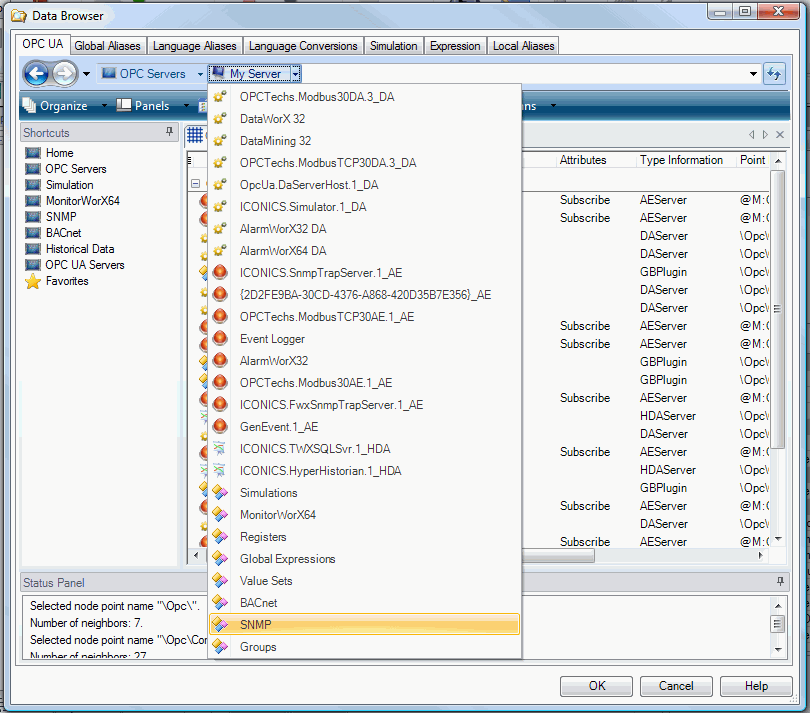
In the Data Browser, you can navigate to your selected data source in multiple ways. For example, you can type the direct network path, browse using the Grid, browse using the Mesh, or use the server Shortcuts in the left navigation pane. You can also use the down-facing arrow (![]() ) after each selected level for quicker selection. In this example, the OPC UA tab is selected; the user has navigated in the Grid view to OPC Servers, then My Server, then SNMP. (The Data Browser is described in detail in the Unified Data Browser topic.) Select the data source, and click OK.
) after each selected level for quicker selection. In this example, the OPC UA tab is selected; the user has navigated in the Grid view to OPC Servers, then My Server, then SNMP. (The Data Browser is described in detail in the Unified Data Browser topic.) Select the data source, and click OK.
Navigating to SNMP Data Source Using the Data Browser in GraphWorX64 (from the GENESIS64 Workbench)

See also:
Process Points and Data Entry Labels
Data Connections in GraphWorX64