In the Web Services Provider in the Workbench, you can create new Web Services, either a SOAP Service or a REST Service.
To Add a New SOAP Web Service
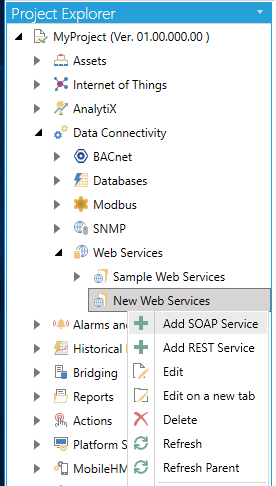
Expand the Web Services provider tree control, then My Web Services. Right-click on a Web Services folder, as shown below, and select Add SOAP Web Service.
Creating a New SOAP Web Service in the Web Services Provider
-OR-
Select a Web Services folder then click on the Add SOAP Service button in the Edit section of the Home ribbon in the Workbench.
Add SOAP Service Button

SOAP Service Properties
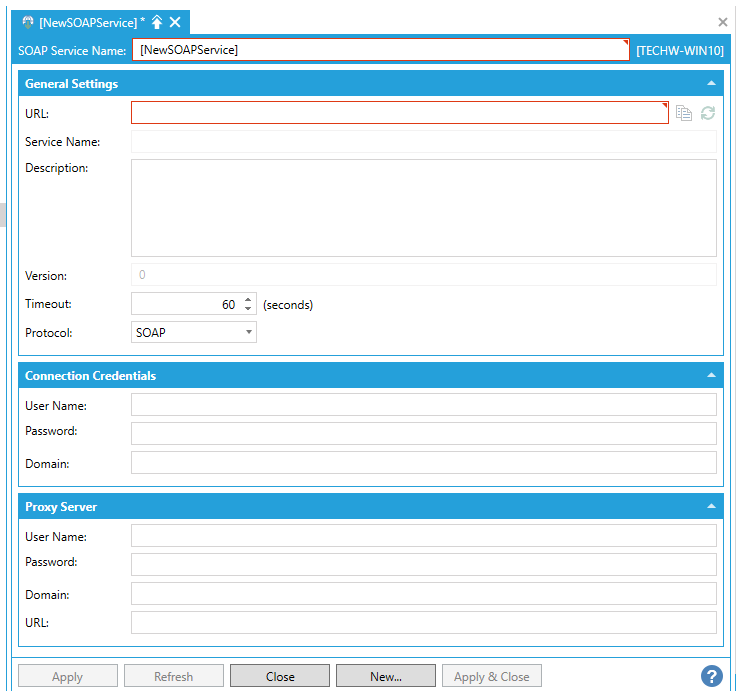
General Settings
In the General Settings section, you can enter the URL for the SOAP service, as well as provide a Service Name, Description, and Version. You can also set a Timeout (in seconds) after which, the attempt to connect to the URL will cease. You can select the Protocol as to how to connect (SOAP, HTTP Get or HTTP Post).
Connection Credentials
In the Connection Credentials section, you can enter a User Name, Password and specific Domain that might be required for the URL to which you intend to connect.
Proxy Server
In the Proxy Server section, you can enter a User Name, Password, Domain and URL for a Proxy Server (if the URL requires use of one or if you decide for any reason to use a proxy server) through which you intend to connect to the originally entered URL.
Once you have finished with your settings, click Apply to save them and Close to return to the Workbench.
To Add a New REST Web Service
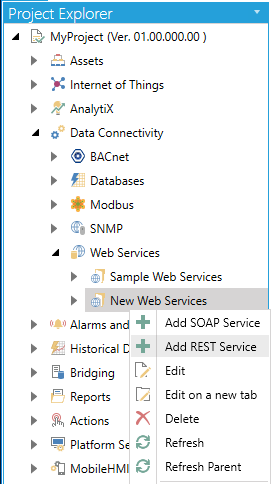
Expand the Web Services provider tree control, then My Web Services. Right-click on a Web Services folder, as shown below, and select Add REST Web Service.
Creating a New REST Web Service in the Web Services Provider
-OR-
Select a Web Services folder then click on the Add REST Service button in the Edit section of the Home ribbon in the Workbench.
Add REST Service Button

REST Service Properties
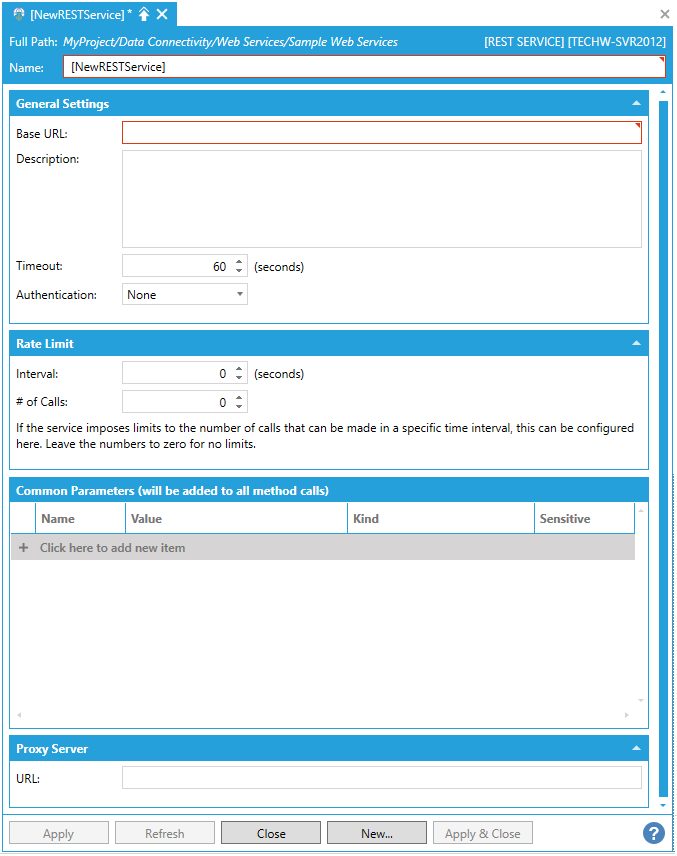
General Settings
In the General Settings section, you can enter the Base URL for the REST service, as well as provide a Description. You can also set a Timeout (in seconds) after which, the attempt to connect to the URL will cease. You can select the Authentication (None, Query String, Basic, OAuth 1.0 or 1.0a, OAuth 2.0, or NTLM).
Connection Credentials
If you select an Authentication method, the Connection Credentials section will appear, where you can enter the required info for the selected method:
Query String: User Name Key, User Name, Password Key, Password
Basic: User Name, Password
OAuth 1.0 or 1.0a: Consumer Key, Consumer Secret, Request Token URL, Authorize Token URL, Access Token URL
OAuth 2.0: Client Id, Consumer Secret, Scope, Callback Url, Authorize Token URL, Access Token Request Type
NTLM: User Name, Password, Domain
Rate Limit
The Rate Limit allows you to set an Interval (in seconds) and a # of Calls. If the service imposes no limits to the number of calls that can be made in a specific time interval, it can be configured in this section. Leaving the numbers as '0' means no limits.
Common Parameters (will be added to all method calls)
Click the "+ Click here to add new item" link to add a new default parameter. You can then enter a Name, Value, and Kind (using the pulldown menu, select from Query String or POST Body, Cookie, URL Segment, HTTP Header, Query String, or Request Body) and select whether the parameter will be Sensitive (by clicking the checkbox within that column).
Proxy Server
In the Proxy Server section, you can enter a URL for a Proxy Server (if the URL requires use of one or if you decide for any reason to use a proxy server) through which you intend to connect to the originally entered URL.
Once you have finished with your settings, click Apply to save them and Close to return to the Workbench.
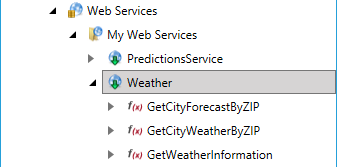
Once you click Apply within a newly added Web Service settings window, you may notice some additional sub-branches added beneath newly added Web Services within the Project Explorer, as shown below. In the example below, you'll notice that "GetCityForecastByZIP", "GetCityWeatherByZIP" and "GetWeatherInformation" were added.
Sub-branches Added Along with Newly Created Web Service
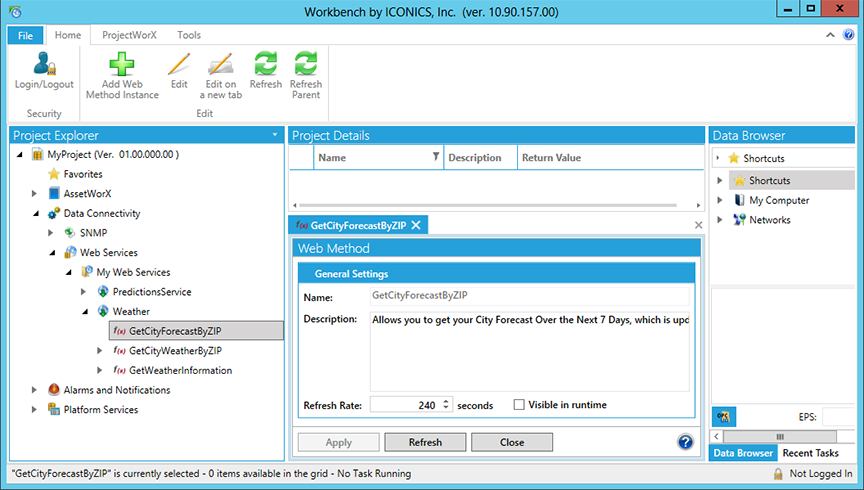
If you double-click on any of these sub-branches, you'll be able to make edits to additional settings. The Web Method's Name might be pre-filled, but you will be allowed to edit the Description, as well as Refresh Rate (in seconds). You also have the option of selecting whether or not you would like this specific Web Service to be available to other ICONICS applications while in Runtime. Click the Visible in runtime checkbox if you want to be able to select this particular Web Service, then click Apply to proceed and Close to exit.
Web Method Properties
See Also:
Create a New Web Authentication Method