|
|
The features on this page require a GENESIS64 Advanced license and are not available with GENESIS64 Basic SCADA . |
|
|
The features on this page require a GENESIS64 Advanced license and are not available with GENESIS64 Basic SCADA . |
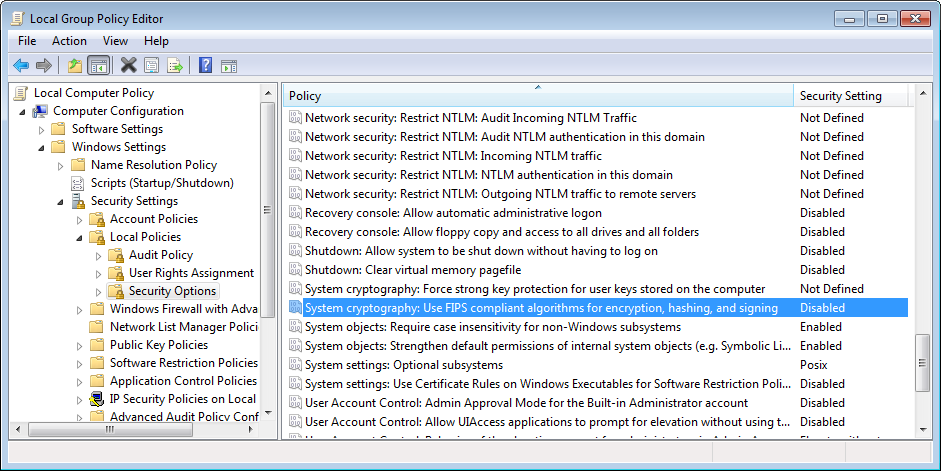
To enable Federal Information Processing Standards (FIPS), follow these steps:
[Note: This example uses Windows 7. There may be some differences based on your selected operating system.]
Using an account that has administrative credentials, log on to the computer.
Click Start, click Run, type gpedit.msc, and then press ENTER.
In the Local Group Policy Editor, under the Computer Configuration node, double-click Windows Settings, and then double-click Security Settings.
Under the Security Settings node, double-click Local Policies, and then click Security Options.
In the details pane, double-click System cryptography: Use FIPS-compliant algorithms for encryption, hashing, and signing.
In the System cryptography: Use FIPS-compliant algorithms for encryption, hashing, and signing dialog box, click Enabled, and then click OK to close the dialog box.
Close the Local Group Policy Editor.
Selecting 'System cryptography: Use FIPS-compliant algorithms for encryption, hashing, and signing' in the Local Group Policy Editor

Once FIPS is enabled, it allows for only certain types of Authentication and Encryption within the SNMP Provider.
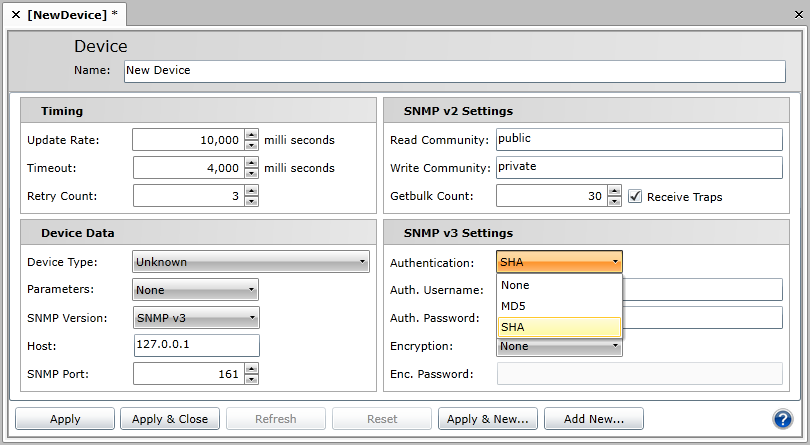
In the example below, once you have selected SNMP v3 in the SNMP Version pulldown within the Device Data section of the Device settings, you have the option of selecting your preferred method of Authentication. However, once FIPS is enabled, only SHA is supported.
Selecting SHA for Authentication in the SNMP v3 Settings

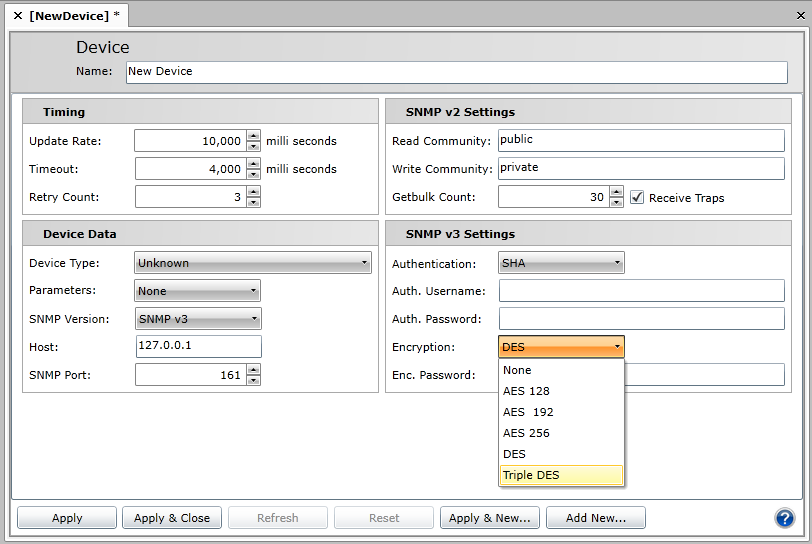
Using the same example, once you have selected SNMP v3 in the SNMP Version pulldown within the Device Data section of the Device settings, you have the option of selecting your preferred method of Encryption. However, once FIPS is enabled, only DES or Triple DES are supported.
Selecting DES or Triple DES for Encryption in the SNMP v3 Settings

See Also: