|
|
The features on this page require a GENESIS64 Advanced license and are not available with GENESIS64 Basic SCADA . |

![]()
|
|
The features on this page require a GENESIS64 Advanced license and are not available with GENESIS64 Basic SCADA . |
![]()
To Add a New SQL Server Configuration Database:
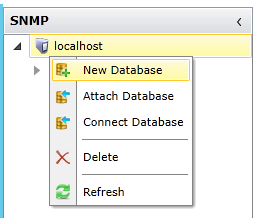
Right-click on the top level Workbench "server" (for example, "localhost") and select New Database. In addition to being able to delete pages, you also have the option of refreshing any individual database or parent.
Creating a New SQL Server Configuration Database through the Project Explorer
-OR-
Click the New Database button in the Edit section of the Home Ribbon at the top of the screen. Other menu options using this method include Attach Database, Connect Database, Delete, and Refresh.
This will bring up the Create a new Database Wizard.
Create a new Database Wizard
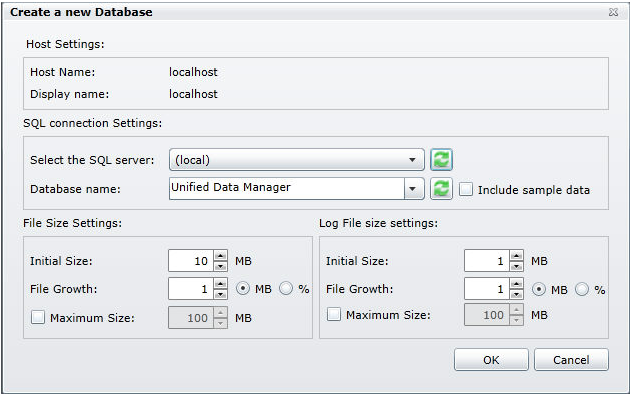
The Create a New Database Wizard Window gives the user access to all of the necessary options for creating a database.
Both the Host Name and Display Name are displayed under Host Settings. Under SQL Connection Settings, the user can select both the SQL Server and the Database Name. The user can also select to Include Sample Data. Settings for both the File Size and Log File Size are also available. The user can specify the Initial Size, the Size Growth (in either MB or percent), and the Maximum Size.
Click OK once you have made your database file size changes to close the dialog box, then in the wizard click Finish.
Your New SQL Server Configuration Database now appears in the Project Explorer under the Workbench server (for example, "localhost") in the Project Explorer. The database will be inactive until you activate it.
New Database in the Project Explorer

See also:
Attaching an Existing SQL Server Configuration Database
Connecting to an Existing SQL Server Configuration Database
