|
|
The features on this page require a GENESIS64 Advanced license and are not available with GENESIS64 Basic SCADA . |
|
|
The features on this page require a GENESIS64 Advanced license and are not available with GENESIS64 Basic SCADA . |
Users can add Data Tables in AnalytiX-BI to establish relationships within data models.
To Add a Data Table:
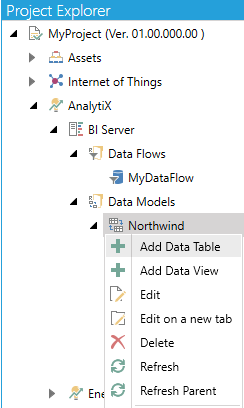
Open the Workbench, then expand AnalytiX, then BI Server, then Data Models (and, optionally, a data model folder), then select Add Data Table, as shown below.
Add Data Table from Project Explorer
-OR-
Select a Data Model or Data Model Folder then select Add Data Table, shown below, in the Edit section of the Home ribbon in the Workbench.
Add Data Table Button

This opens the New Data Table Properties window, shown below.
New Data Table Properties
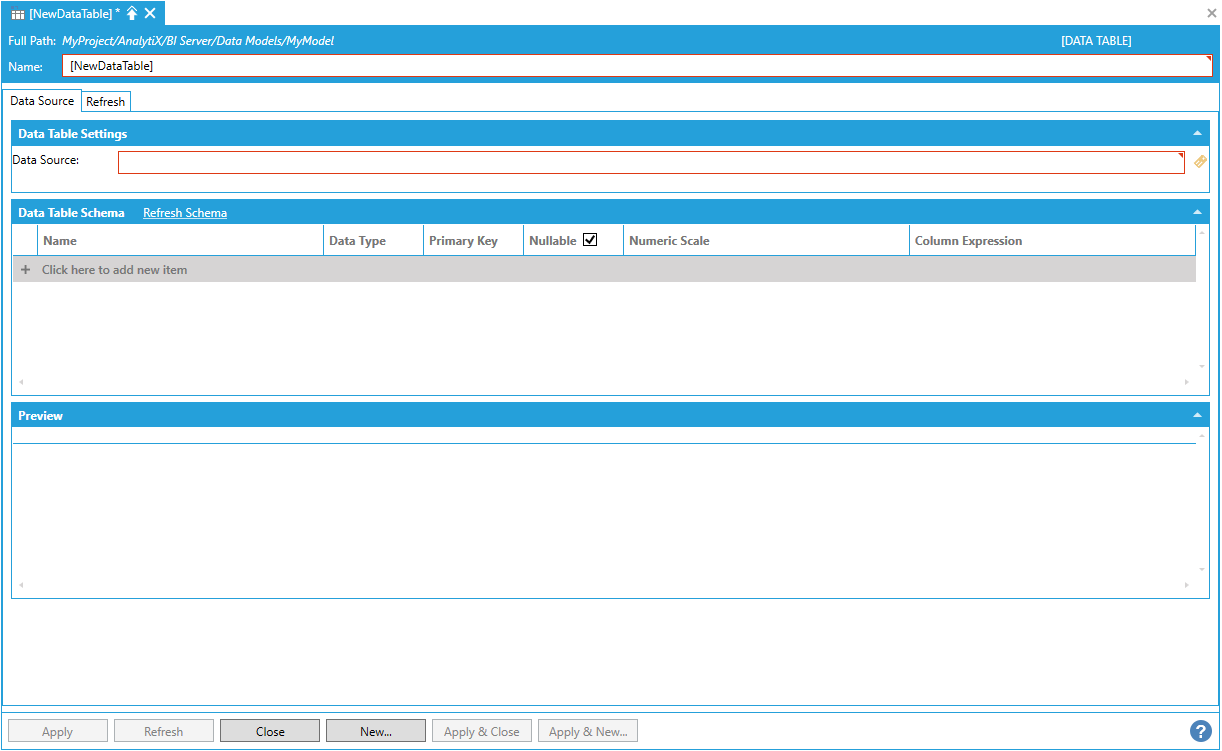
Enter a name in the Data Table Name text entry field.
To fully configure a data table, it is necessary to specify the table’s data source. Any dataset exposed by ICONICS Platform Services can be used as a data table’s data source. However, typically, it is recommended to use data flows, as they provide the highest flexibility in data ingestion.
The data source can either be typed in manually, browsed by clicking on the tag icon, or dropped from the Workbench Data Browser panel. Once a selection is made, the Data Table Schema will list information about the table columns.
Once a data source has been specified it is then queried for its schema, and the returned metadata is used fill the Data Table Schema panel. The schema is only retrieved the first time the data source is queried, which means that changes to the underlying data source will not be reflected in the Data Table Schema automatically. To refresh the Data Table Schema, select Refresh Schema in the header area.
Note: You can also Subscribe to Columns as Arrays.
Note: If the underlying data source accepts parameters (for example a GridWorX data source), the values of the parameters need to be specified in the Data Source field and cannot be bound to any type of parameter from this form. Please refer to the Advanced Configuration section below for more details.
Note: Even though the Data Table Schema has been loaded by the form, no preview data is currently available and the runtime status of the Data Table shows “Not Saved” for the current table. This happens because the Data Table has just been created and has not been saved yet, which means that the AnalytiX-BI Server runtime is not yet aware of this new entity.
To update the Runtime Status of the Data Table and to load the preview, apply the changes to the form as this will make the AnalytiX-BI Server runtime pick up the Data Table and load its data in memory.
Loading the Table with Data
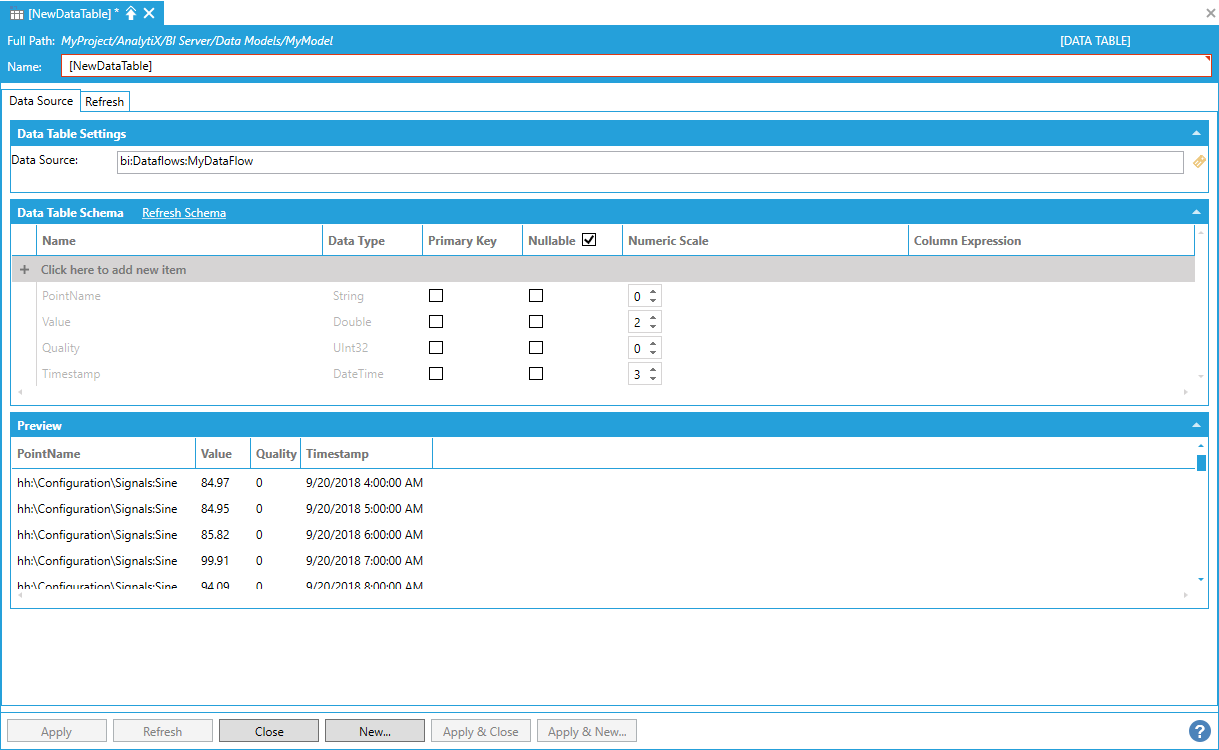
The points under Runtime Status will briefly show a bad quality value while the AnalytiX-BI Server runtime creates the Data Table and starts loading the data, and then they will update to reflect the current table’s status. In this example we are loading the table with data coming from a data flow ingesting Hyper Historian aggregated data. The aggregate is calculating the interpolated value of some historical tags at 1-hour intervals over a 1-day span.
Note: If the Data Model is offline the Runtime Status of the Data Table will show “Offline” to indicate that the table is, indeed, offline. No preview data will be shown in this case as offline Data Models are not loaded by the AnalytiX-BI Server runtime.
Note: If the AnalytiX-BI Server runtime is not running (ICONICS AnalytiX BI Service in the Windows Services Panel) the Runtime Status panel will show bad quality values as the configuration form cannot connect to the server to retrieve the status.
The following list explains all the possibly statuses that a Data Table can be in:
Not Saved. The Data Table has just been created and has not been saved yet.
Offline. The Data Table’s parent model is currently in the offline state.
Initialized. The Data Table has been saved and the AnalytiX-BI Server runtime has picked up the new entity and scheduled the process to load the Data Table’s data.
Loading. The data for the Data Table is currently being loaded by the AnalytiX-BI Server runtime.
Online. The AnalytiX-BI Server runtime has completed loading the data and the Data Table is ready to be queried by clients.
Error. The AnalytiX-BI Server runtime has encountered an error while loading data into the Data Table. Data may be partially loaded or not loaded at all: TraceWorX can be used to diagnose the issues encountered while loading the data.
The Last Updated field under Runtime Status displays the last time data was added to the Data Table. Row Count reports how many rows of data are currently loaded in the Data Table. The Drop and Reload Table Data hyperlink in the Runtime Status panel header allows to signal the server that it should drop the Data Table’s data and reload it from the data source. Clicking the link prompts a confirmation dialog to make sure the user wants to go forward with the operation.
Confirm Reloading Table Data
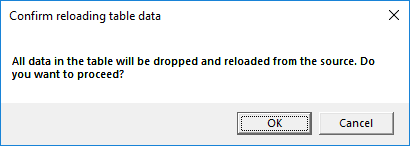
Note: Dropping and reloading the data causes the data source to be queried again and data reloaded and re-compressed by the AnalytiX-BI Server runtime, which is potentially an expensive operation. Only use this functionality when necessary.
Customizing the Data Table Schema

Besides containing information about the structure of data, the Data Table Schema panel allows the users to make some other modifications to how the data is loaded in the model. The following is a list of columns in the Data Table Schema panel and what alterations can be made to them:
Name. Represents the name of the column. This field is read-only for schema columns that come from the underlying data source. To rename a column, use the Rename Column step in a data flow while ingesting and processing the source data.
Data Type. Represents the data type of the column. This field is read-only for schema columns that come from the underlying data source. To change the data type of a schema column, use the Change Column Type step in data flow while ingesting and processing the source data.
Primary Key. Specifies whether the column represents (or is part of) the table’s primary key. This field is editable and does not necessarily have to correspond to a physical primary key in the source data. AnalytiX-BI Server does not enforce uniqueness of the values in a primary key column. However, for some advanced scenarios (see Refresh), it is recommended that values in a primary key column are effectively unique.
Column Expression. Used to specify the expression for calculated columns. This field is read-only for schema columns coming from the underlying data source. You can also utilize Quality-based Functions in the Expressions in AnalytiX-BI Server.
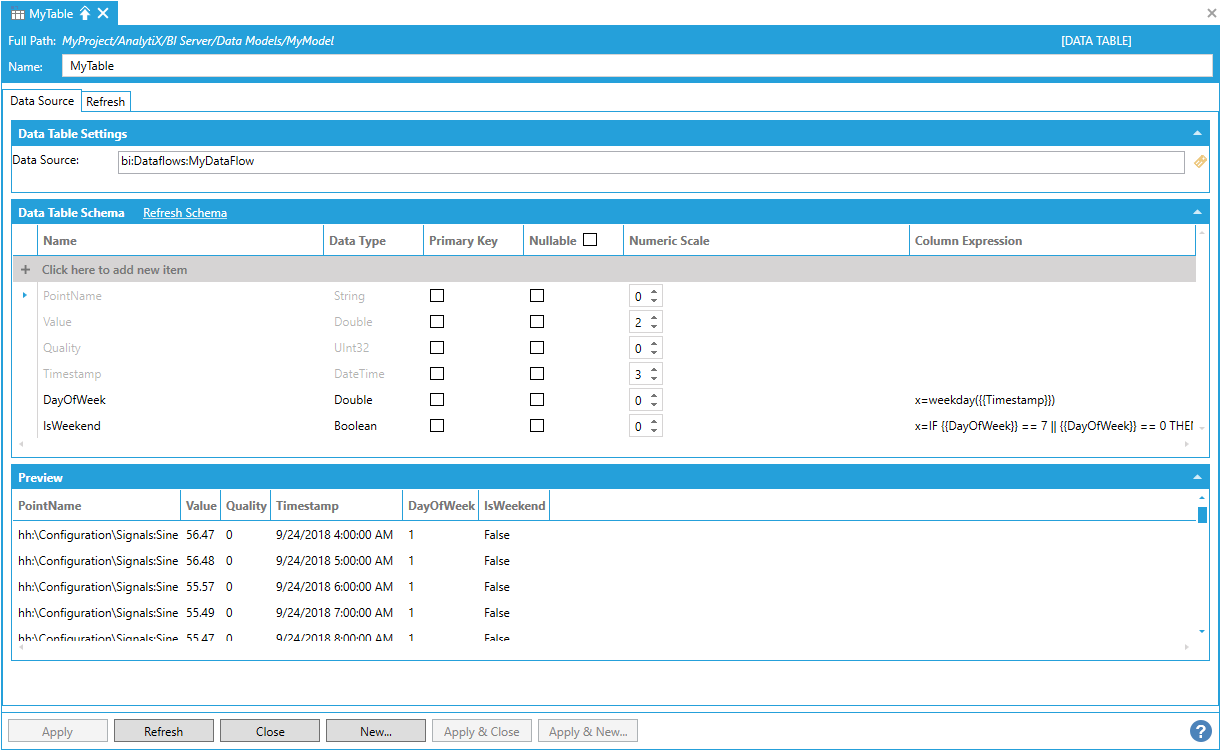
To create a calculated column, select Click here to add new item in the Data Table Schema panel.
Creating a Calculated Column
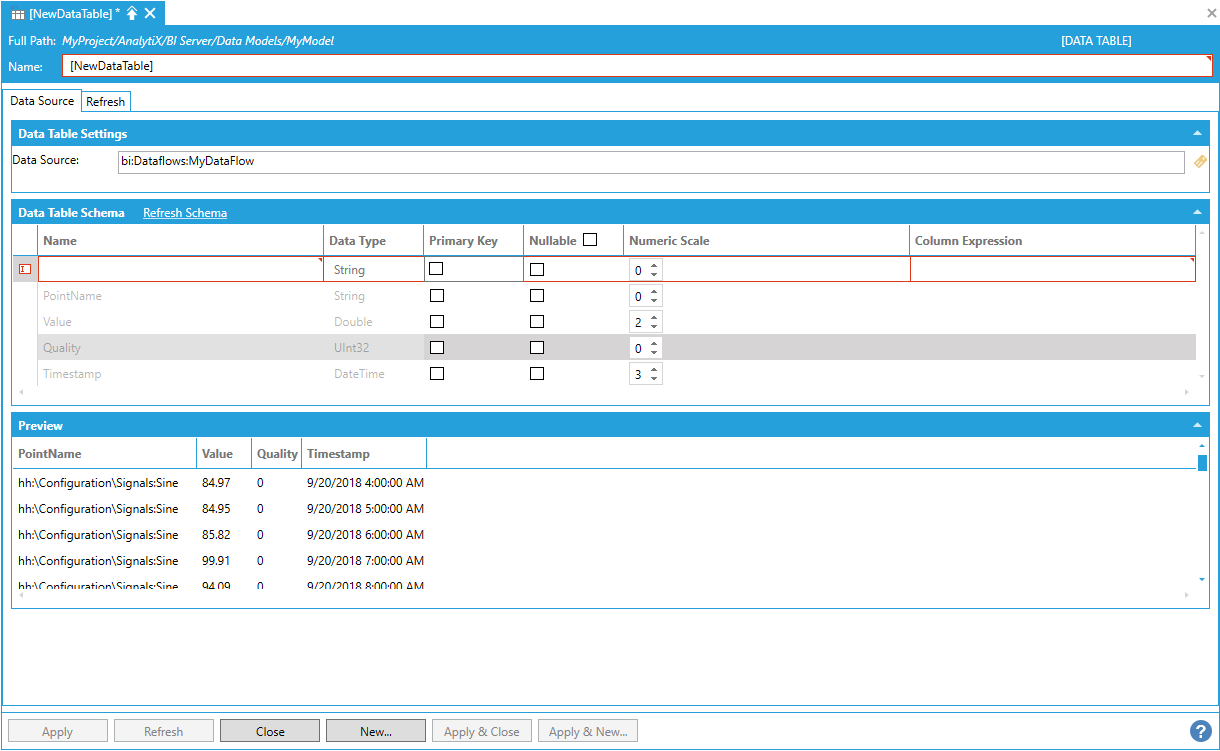
To fully configure the new column, you must enter a name, specify a data type and define the expression that produces the column’s value. To enter the expression, you can either type it manually in the Column Expression field, or select the cell in the Column Expression field, and then select Configure Expression to launch the expression editor.
Launching the Expression Editor
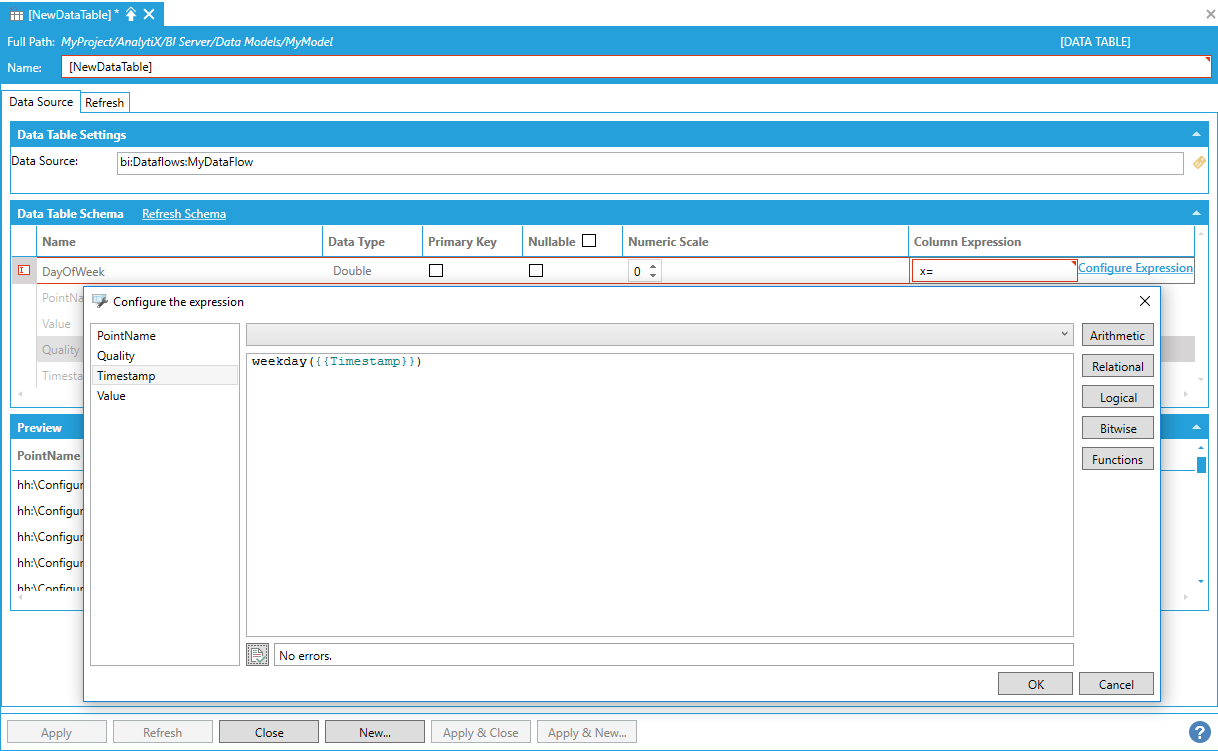
In a similar fashion to calculated columns in data flows, all the current columns in the table are available as variables for the expression. In the example above, we are using an expression to extract the day of the week from the Timestamp column.
Once the expression is configured, the new column will be shown in the Data Table Schema panel.
New Column Shown in the Data Table Schema Panel
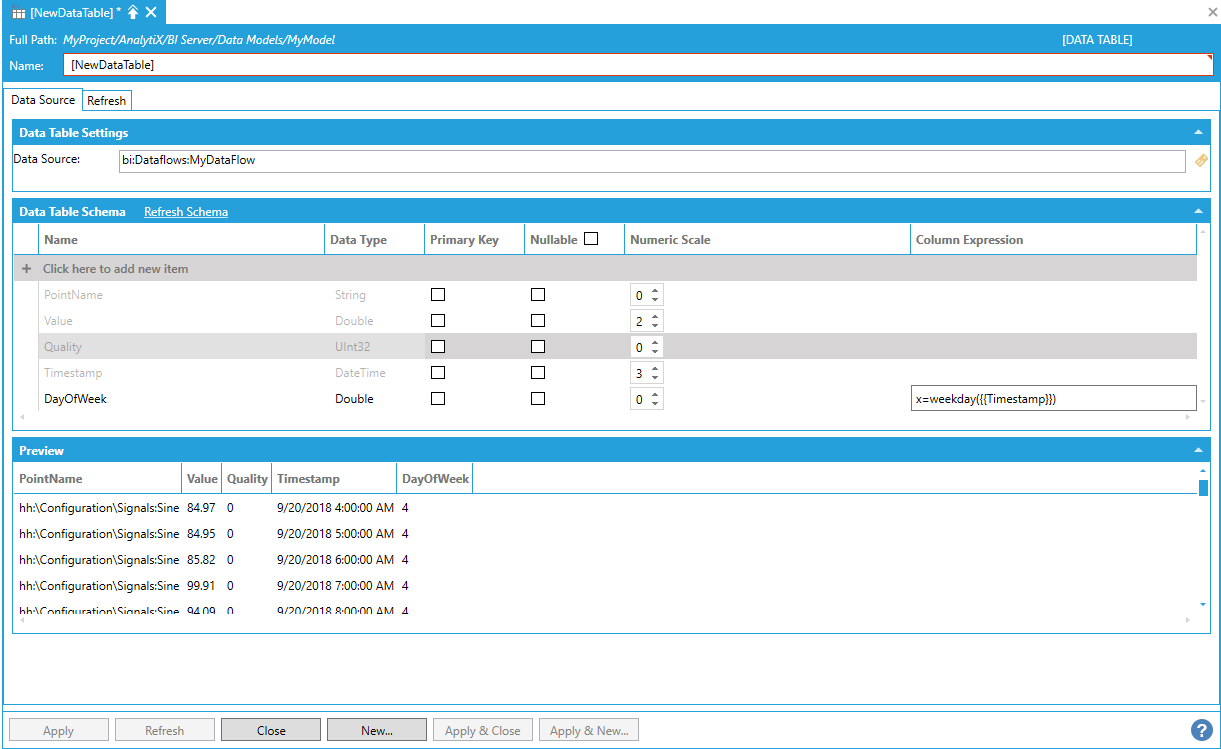
The Runtime Preview will not show the new calculated column yet because until the changes are applied the AnalytiX-BI Server runtime won’t be notified of the new column. The Runtime Preview area is however grayed out to hint that the preview is out of date. Applying the changes to the form will make the new column appear under the Runtime Preview panel as well.
New Column Shown in the Data Table Schema Panel
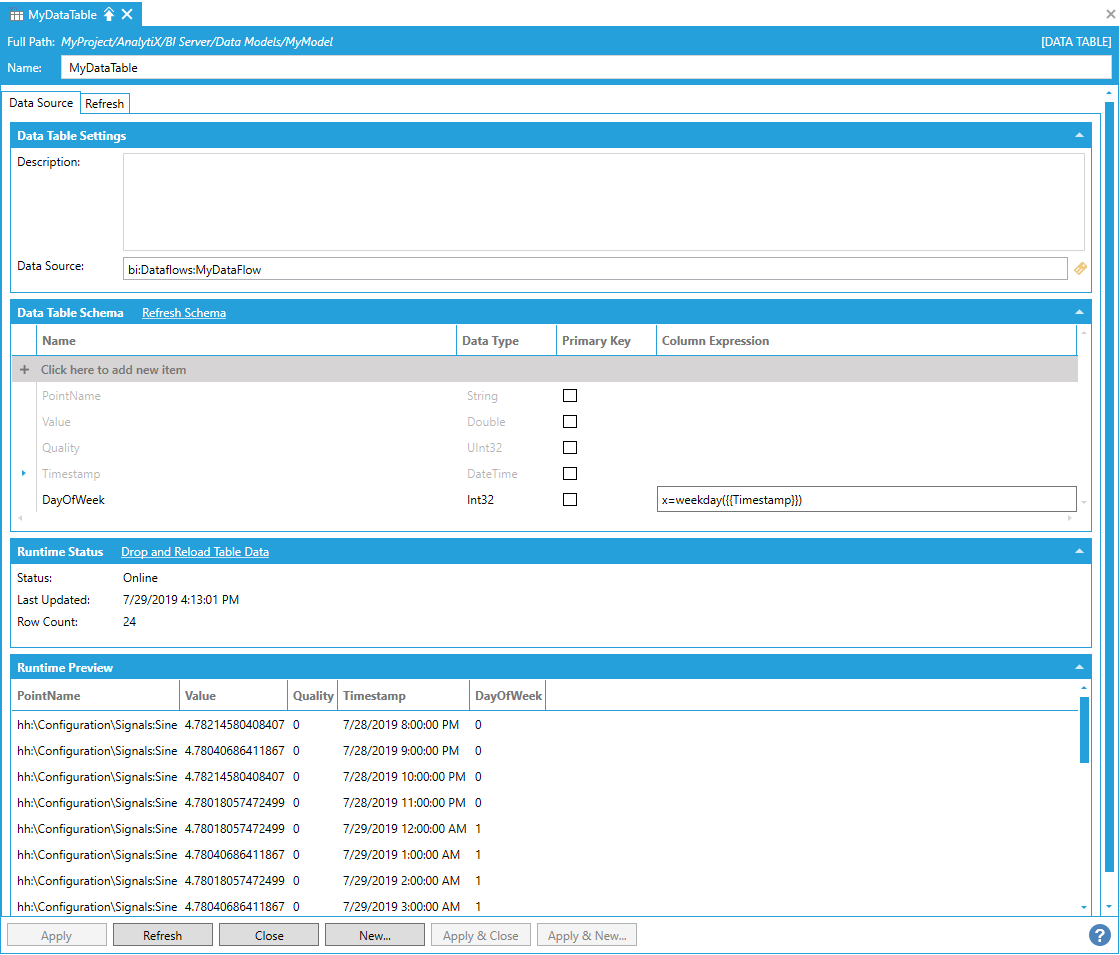
Note: If the expression for the calculated column produces values of a data type that is different from the type specified for the column under Data Type, a validation error will be shown, and you will be required to either change the specified Data Type to match the values returned from the expression or vice-versa.
Calculated columns can be used as variables for other calculated columns too. For example, we could create another calculated column that checks whether the timestamp falls on a weekend or not based on the value of the new DayOfWeek column.
Creating an Additional Calculated Column
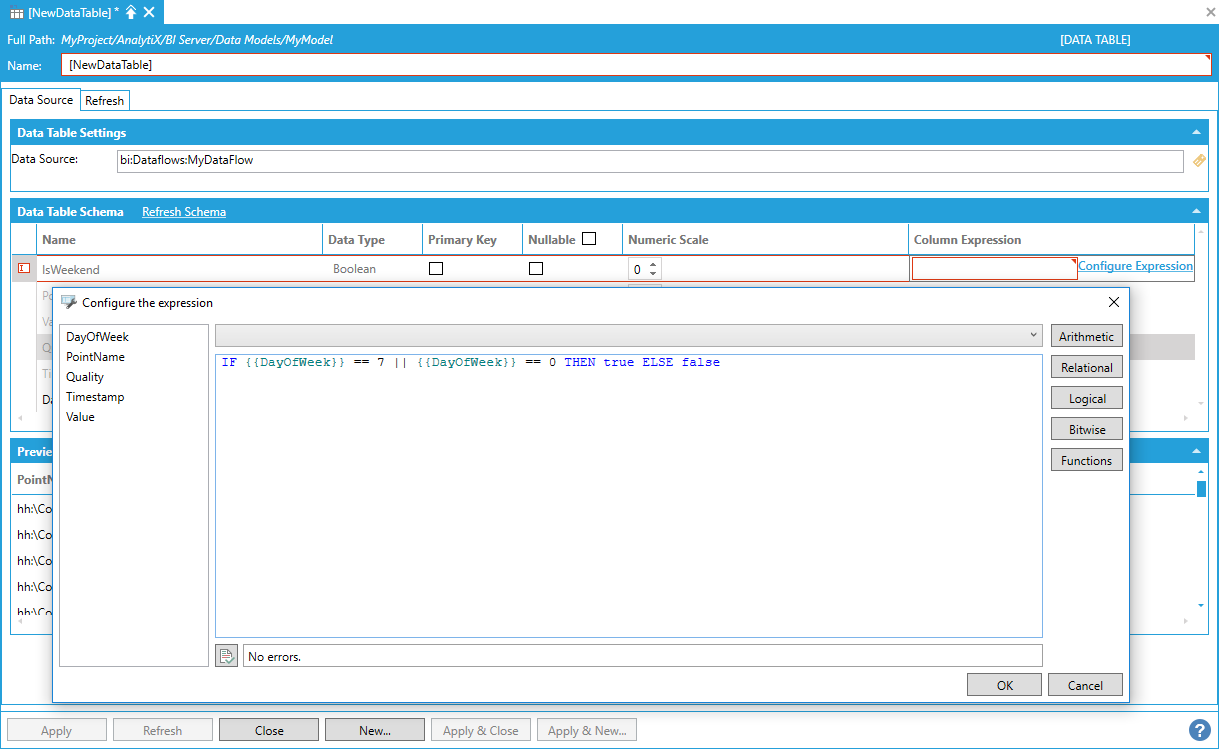
Calculated columns defined in a data table are virtual columns, which means they are always evaluated on the fly and not physically stored in the server’s memory.
To delete a calculated column, select it in the Data Table Schema and then select Delete.
Once a data source is configured for the Data Table and the parent Data Model is configured to be online, the AnalytiX-BI Server runtime will request data from the data source and fill the in-memory data table. This “snapshot” of the data source will be kept in memory by the AnalytiX-BI Server runtime and will not be automatically refreshed or synchronized with the underlying data source.
In cases where the ingested data could become stale, AnalytiX-BI can be instructed to requery the underlying data source and refresh data in the in-memory data table. To configure the refresh for a data table, switch to the Refresh tab in the data table configuration form.
Configuring the Refresh for a Data Table
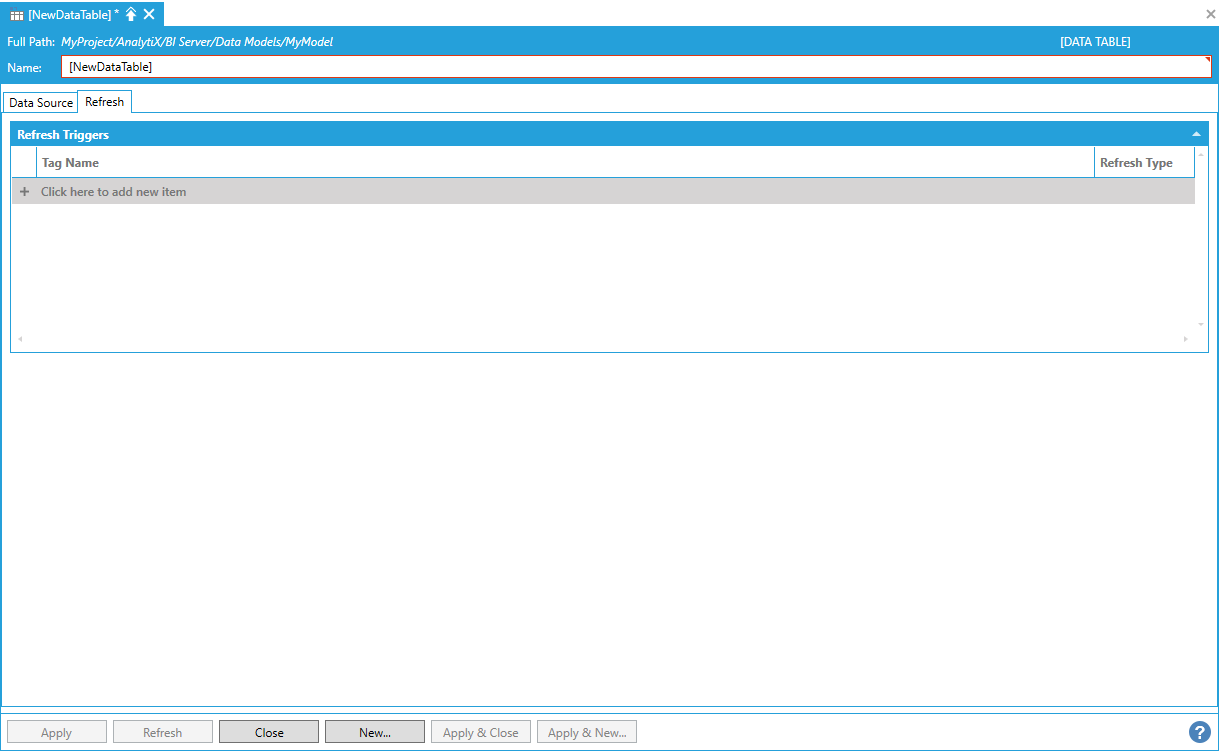
This tab allows users to schedule the refresh of the data table based on some external trigger. To add a refresh trigger, select Click here to add new item.
Adding a Refresh Trigger
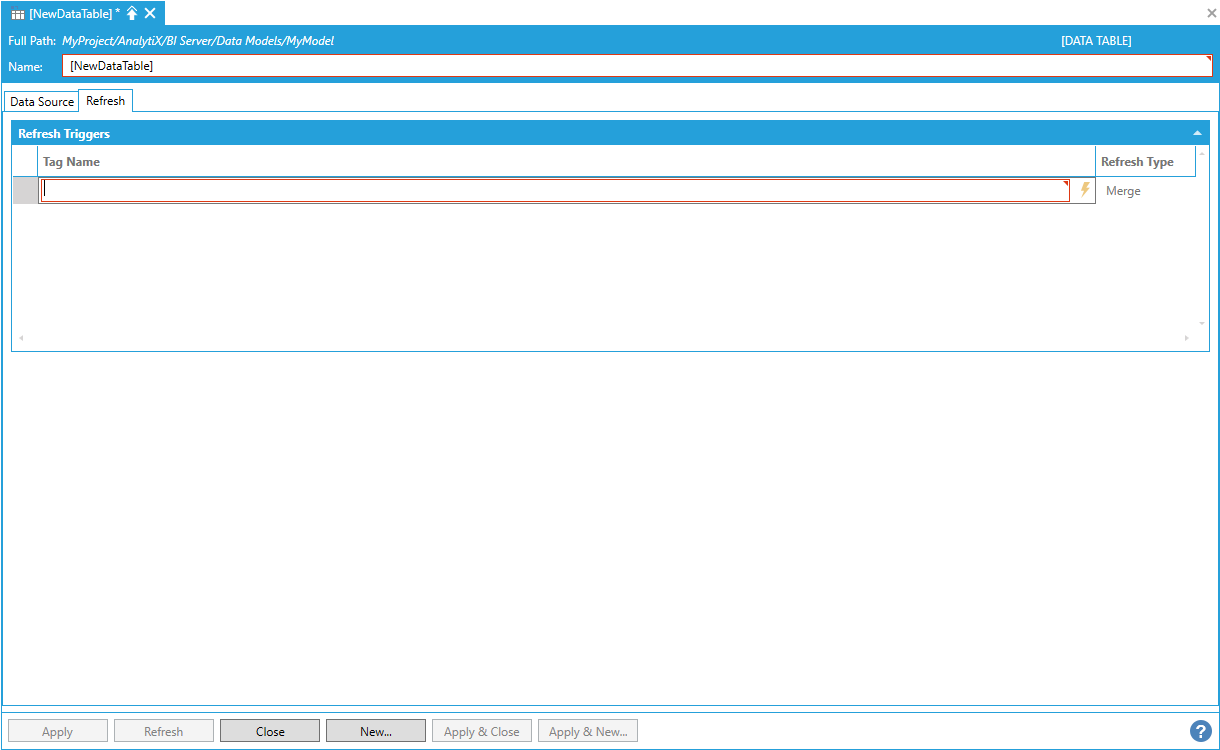
You can either type the trigger name manually, or browse it by selecting Click to browse triggers.
Typing or Browsing for the Trigger Name
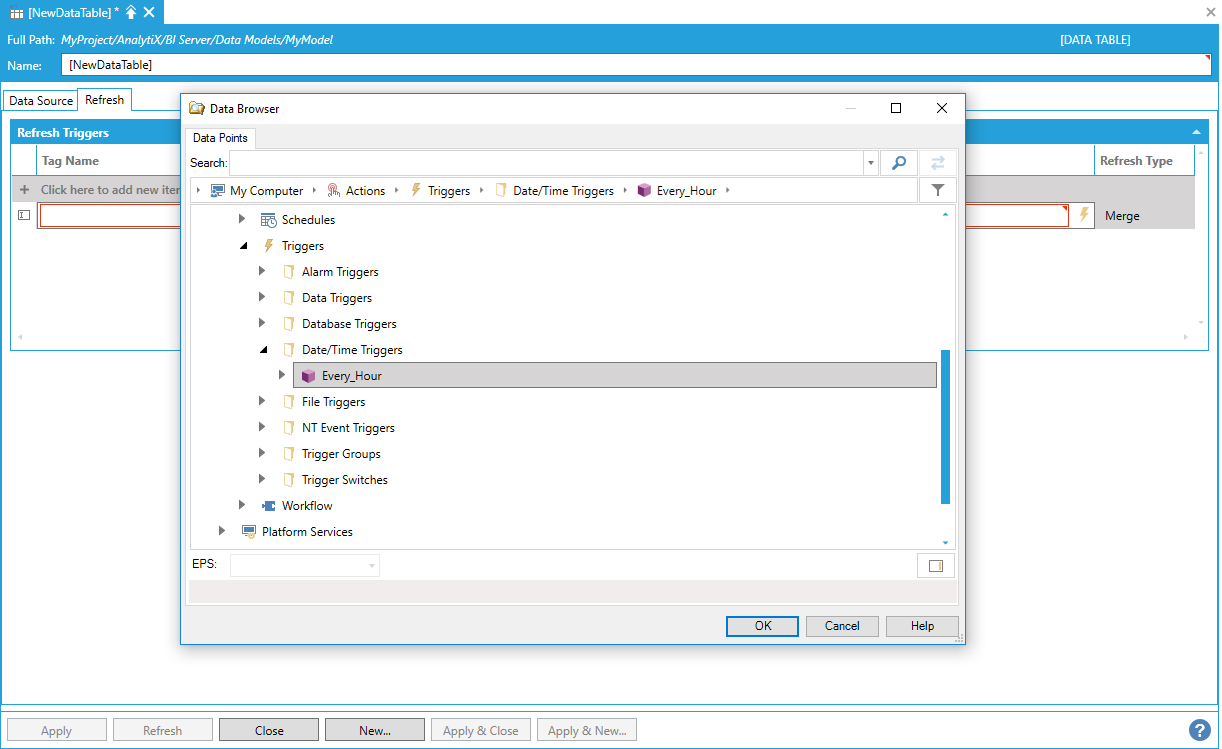
Any kind of trigger configured within the ICONICS system can be used. Once a selection is made, it is also possible to configure how data in the data table will be refreshed from the list under Refresh Type.
Configuring How Data Table Will be Refreshed
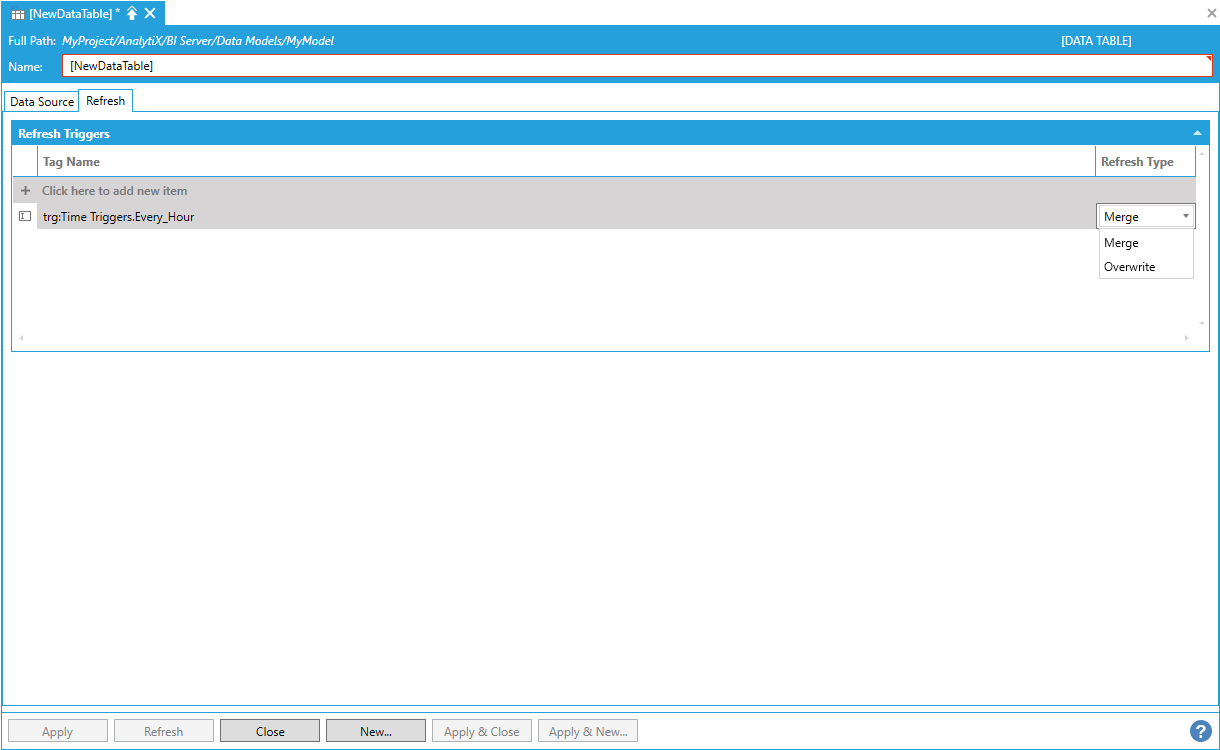
There are currently three available options, which are also explained under the Refresh Types panel:
Append new data. When the trigger fires, AnalytiX-BI runtime will re-query the underlying data source, but it will retain all the data currently in the in-memory table. New rows coming from the data source will be scanned and compared to rows already in memory by the primary key column(s) that have been defined for the table: if the new row coming from the source already exists in the table based on the configured primary key it will be discarded, otherwise it will be appended to the in-memory table. This is useful in cases where the underlying data source provides new data, but the old data is still valid (for example a historical data source that returns new samples stored since the last time it was queried).
Overwrite with new data. When the trigger fires, AnalytiX-BI runtime will re-query the underlying data source, then drop all current data in the in-memory table and replace it with the new data from the source. If the query to the data source fails the table will retain its original data. This is useful in cases where the underlying source provides a completely brand-new set of data, and the previous data is not relevant anymore (for example, a data source connected to a web service that returns the weather forecast for the next 12 hours).
Delete and insert. This is similar to the Overwrite with new data, with the difference that the table’s data will be dropped regardless before the data source is queried. If the query to the data source fails the table will be empty.
It is possible to define multiple refresh triggers for one data table to specify different events that affect the table refresh. It is not necessary for all triggers to occur at the same time.
Each trigger can have its Refresh Type configured individually, so some events could trigger a table overwrite (drop all existing data and reload), while some others just a merge. If a trigger fires while a refresh operation from a different trigger is still executing, the latest trigger will be ignored.
As discussed in the data source configuration section above, even if the data source for a data table supports parameters, it is not possible to dynamically pass values to those parameters when a refresh trigger is fired. However when using an Analytix-BI Data Flow as your data source, you can take advantage of the data flow's expression parameters and some AnalytiX-BI-specific functions to configure advanced scenarios, such as only requesting the delta since the last query from a historical data source.
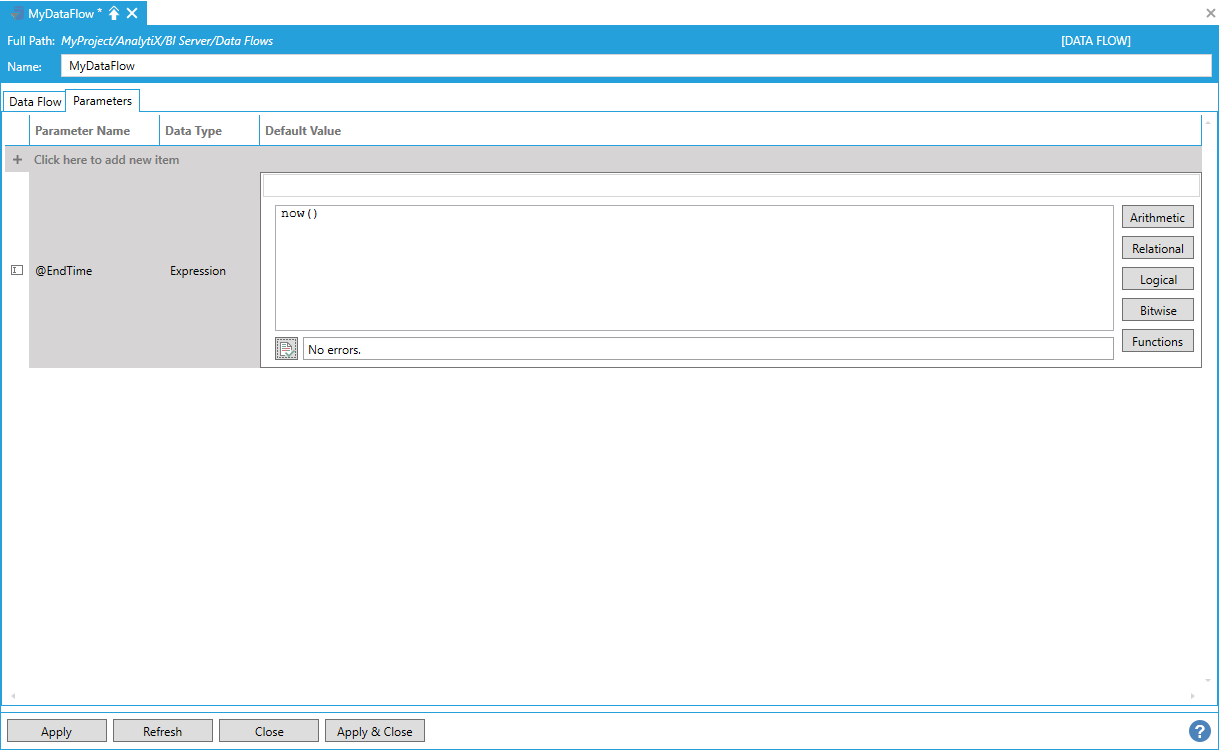
For example, assume that we changed our source data flow to use a StartTime and an EndTime parameter. We can configure the EndTime parameter using the now() expression which will always evaluate to the current date and time.
Configuring EndTime Parameter Using the now() Expression
For the StartTime parameter we can pick the AnalytiX-BI built-in sincelastupdate function.
Picking the AnalytiX-BI Built-In sincelastupdate Function
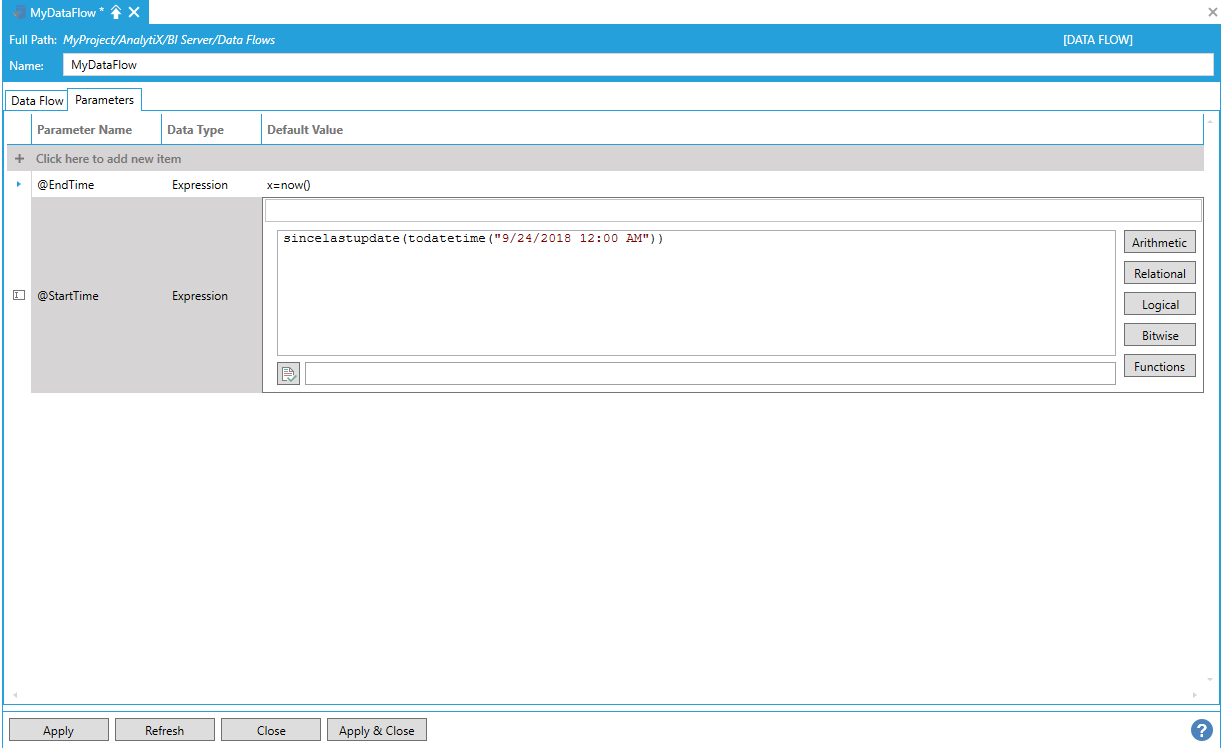
Sincelastupdate() takes one parameter of type DateTime or a String that can be converted to DateTime. This value, referred to as the default value, is what the function will return when there is no previous update, or the idea of an "update" does not apply. This includes any time the data flow is used outside the context of a data table (since updates only happen to data tables), in data flow previews, and when a data table has been populated for the first time.
When the AnalytiX-BI Server runtime executes the data flow for the first time, sincelastupdate() will return the default value and AnalytiX-BI will save the timestamp of when the table has finished loading the data. The next time sincelastupdate() is evaluated for the first time, it will return that saved timestamp and a new timestamp will be saved.
We can then modify our data flow to use these newly configured parameters as start and end times for the historical read.
Modifying the Data Flow to Use Newly Configured Parameters
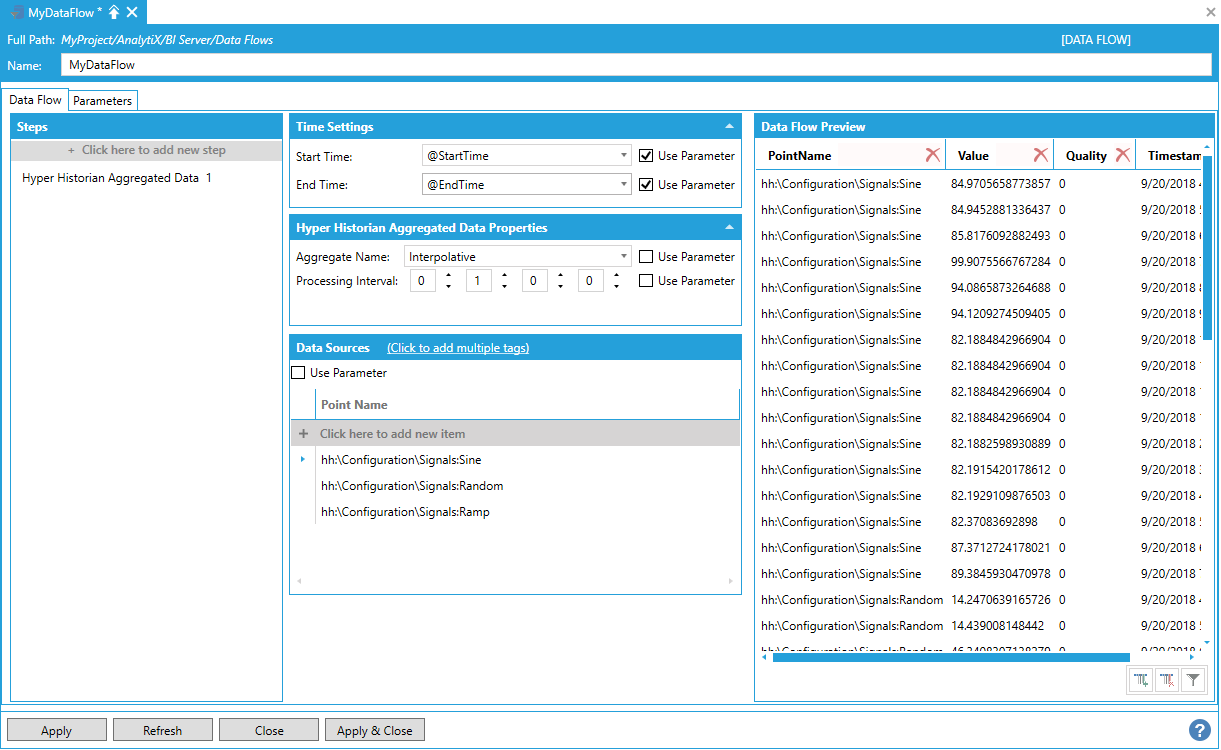
As described above, when using this data flow as source for our data table the first time, AnalytiX-BI runtime will evaluate StartTime parameter as the default value of the sincelastupdate() function and EndTime as the current date and time.
Using the Data Flow as Source for the Data Table for the First Time
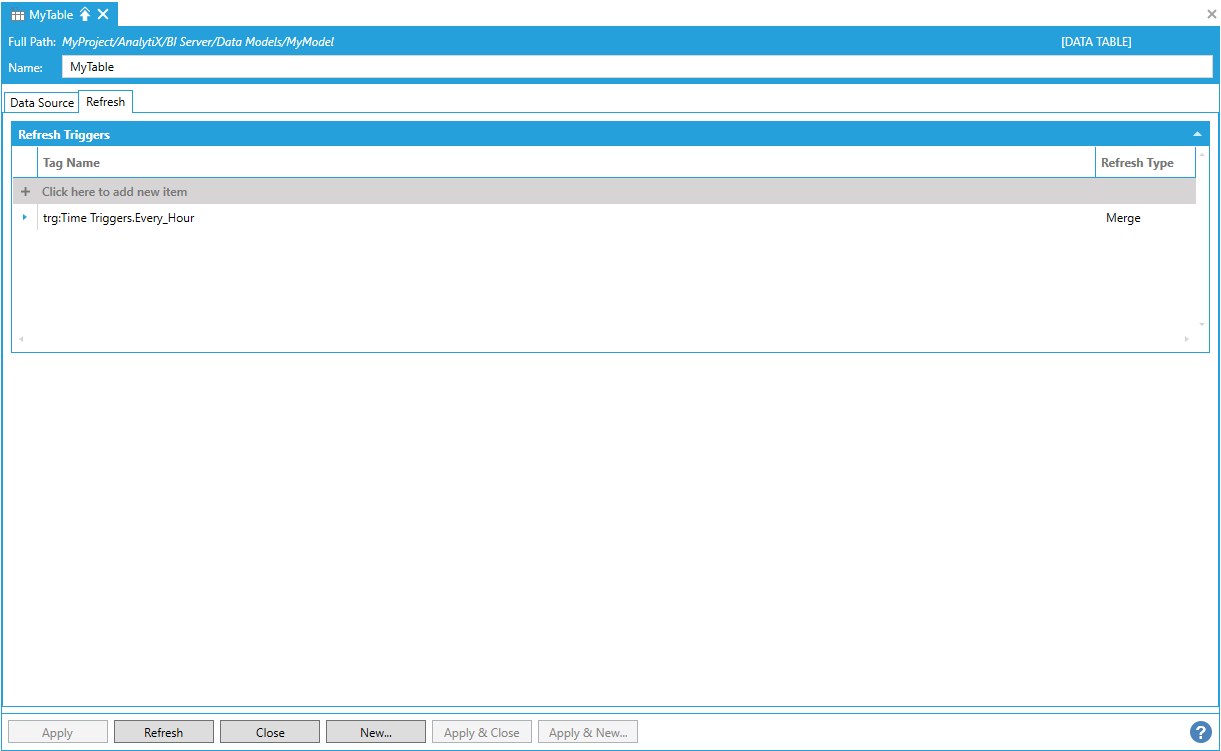
With this configuration, we can now configure a periodic trigger with the Append new data refresh type. Each trigger will append new records since the last trigger into our table. If we configure an hourly trigger, for example, the historical records for that hour will be read and added to the data table.
Configuring Refresh Using a Periodic Trigger Firing
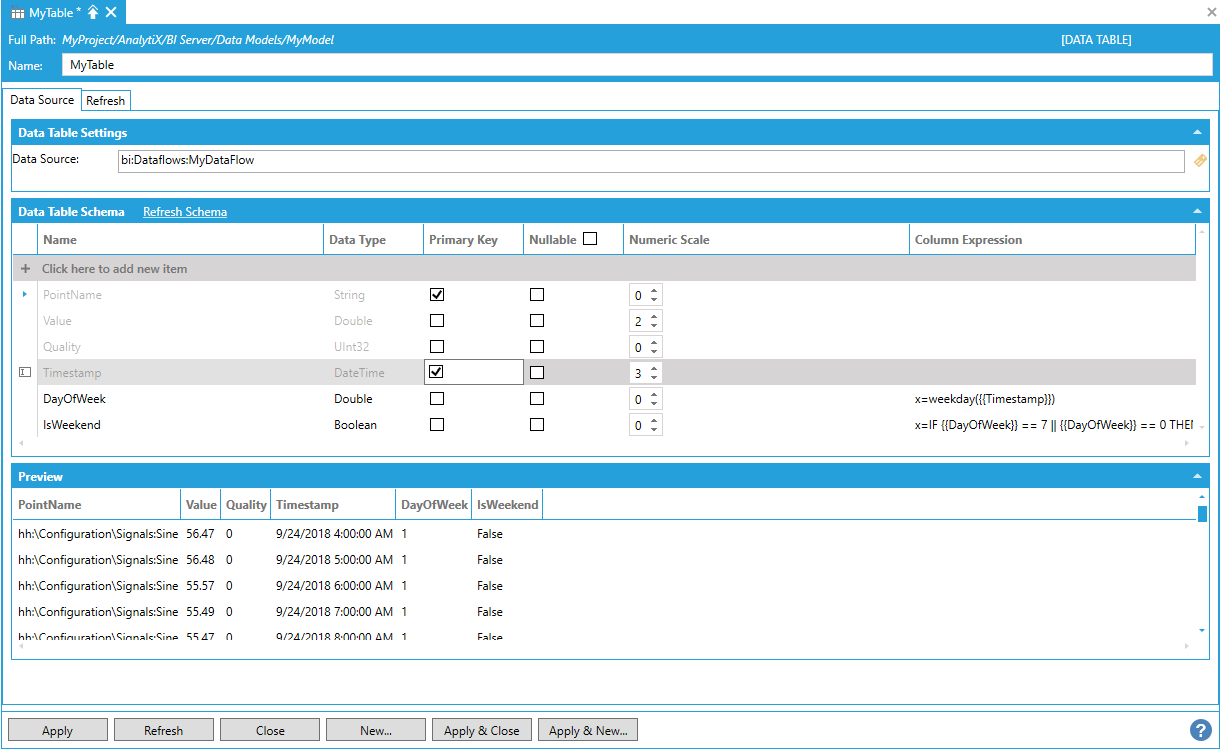
To properly merge new records in our table we have to specify at least one Primary Key column that AnalytiX-BI can use to compare if the new row is really a unique row or an update to an existing row. For historical data, we can use the combination of PointName and Timestamp as our primary key, since each historical sample is uniquely identified by the signal that produced it and the timestamp at which it was recorded (or calculated for processed data).
Properly Merging New Records in Table by Specifying a Primary Key
See Also: