|
|
The features on this page require an add-on to work with GENESIS64 Basic SCADA. |
|
|
The features on this page require an add-on to work with GENESIS64 Basic SCADA. |
The Networks node within the EtherNet/IP Manager provider in the Workbench can be used to add, edit, or remove networks to be used for EtherNet/IP device configuration.
At the top level Networks node, you can add a network.
To Add a Network
Open the Workbench then expand your project in the Project Explorer, then the Data Connectivity node, and then the Ethernet/IP node. Right-click the Networks node, then click on Add Network, as shown below.
Add Network from the Project Explorer in the Workbench

-OR-
Select the Networks node, then click on the Add Network button, shown below, in the Edit section of the Home ribbon in the Workbench.
Add Network Button

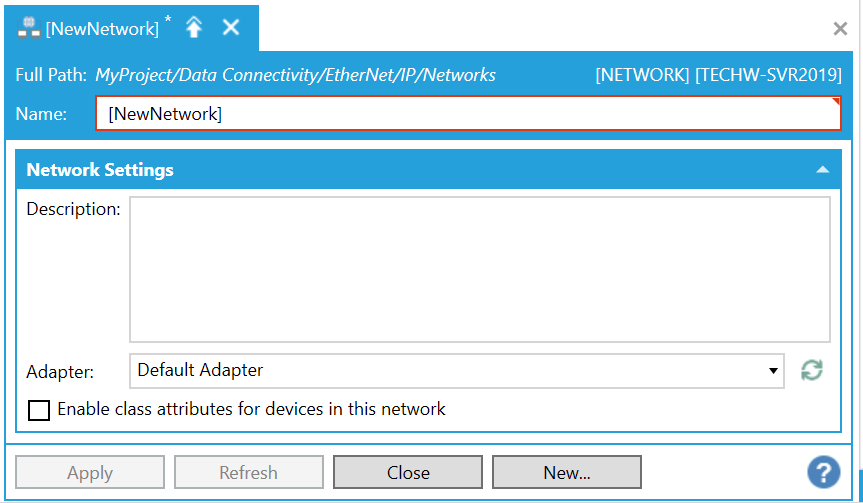
This opens the Network properties, shown below, in the middle of the Workbench. Enter a name for the Network in the Name text entry field.
Network Properties

Network Settings
Description - Enter a description of the network, to help distinguish it from others, in the text entry field.
Adapter -Use the pulldown menu to select from either Default Adapter (which defaults to the first available adapter) or, if applicable, from a recognized connected adapter (e.g. an existing Ethernet adapter on your network).
Enable class attributes for devices in this network -
Click Apply to save your changes and Close to return to the Workbench. Your added network will now appear in the Project Explorer.
Once you have added a network, or wish to configure the existing Default Network, you can edit it and can then explore the network for EtherNet/IP devices.
See Also: