|
|
The features on this page require a GENESIS64 Advanced license and are not available with GENESIS64 Basic SCADA . |

![]()
|
|
The features on this page require a GENESIS64 Advanced license and are not available with GENESIS64 Basic SCADA . |
![]()
The Workbench Classic is a centralized web-based environment where you can configure all GENESIS64 components. The Workbench Classic can also act as an advanced operator interface for service management and has built-in project management functionality. This topic gives you a general overview of the Workbench Classic capabilities.
You can configure all GENESIS64 applications within the Workbench Classic, allowing for faster development and cost savings in building any application. At a glance, the Workbench Classic has the following capabilities and advantages:
The Workbench Classic is installed with the GENESIS64. You can start it by going to Start -> Programs -> ICONICS GENESIS64 -> Workbench Classic.
NOTE: There is also a remote access capability to work with the Workbench Classic over Internet Explorer running on a Win32 system, for more information, please refer to the application note entitled GENESIS64 – Running in Internet Explorer.
The Workbench Classic consists of three main sections:
We will go through each of these different sections in this document. It is recommended that you should be familiar with the workspace inside the Workbench Classic and be able to customize it to allow for maximum productivity.
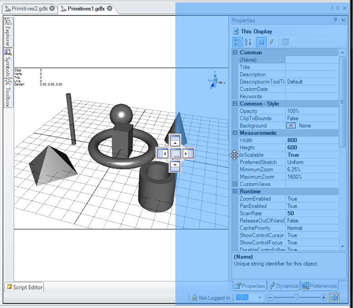
Figure 1 - The Workbench Classic
![]()
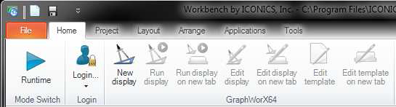
If you have worked with MS Office 2007, you will be familiar with the idea of working with ribbons. Like Office 2007, the ribbon in the Workbench Classic is content sensitive, meaning that when you choose an application from the project explorer, the content of the ribbon will change, displaying options that apply to the specific application. As an example, if you open a GraphWorX64 Display in configuration mode, the ribbon of the Workbench Classic will change to the ribbon for GraphWorX64 accordingly.
There are seven tabs in the Workbench Classic ribbon: File, Home, Project, Layout, Arrange, Applications and Tools. We will discuss some of these tabs in later sections. For additional information, refer to the Ribbon topic.
Figure 2 - Tabs of the Workbench Classic Ribbon
On the left side of the Workbench Classic you will see the ICONICS Tools inside the Project Explorer. This is not limited to ICONICS Application servers; you can add third-party application servers also. For more information regarding the addition of third-party application servers please contact ICONICS technical support.
Figure 3 - The Project Explorer in the Workbench Classic
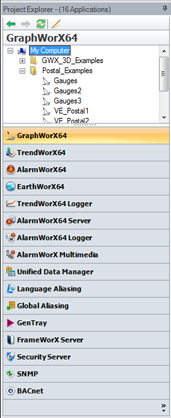
You will see that this increases the usability of the application servers. If your project needs just a few of the application servers, you can remove them in the project manager. For more information regarding the Project Explorer, refer to the Project Explorer topic.
Depending on the application you choose in the Project Explorer, you can open the corresponding configurator in the contents area. For example, if you want to edit a GraphWorX64 display, you can select GraphWorX64 from the application servers and navigate to find the display you want to edit. You can then right-click on it to bring up a content sensitive menu.
Figure 4 - Content Menu for GraphWorX64
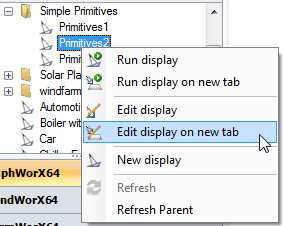
You can choose, among other options, to open the display in runtime mode or in configuration mode in the current working tab or in a new tab. Using tabbed windows allows you to have multiple displays or even multiple configurations from multiple application servers open, and you can select which to work on easily by clicking the respective tab.
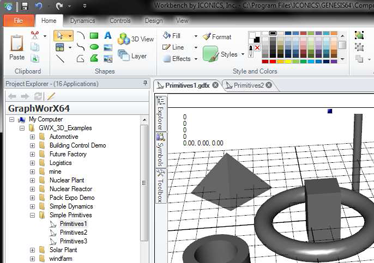
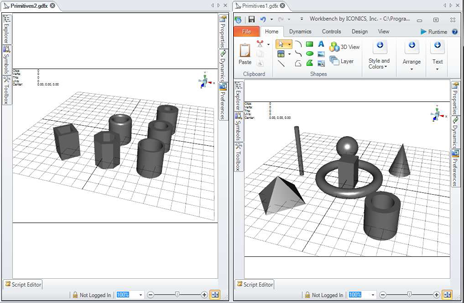
Notice that the contents of the ribbon change when you open a display, in this example in configuration mode. Also, notice that there are two displays opened, each in their own tab as shown in Figure 5.
Figure 5 - GraphWorX64 Displays in the Workbench Classic
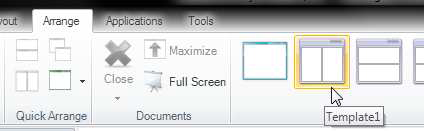
If you need to see both displays side by side or cascaded, you can choose a Template from the Arrange tab of the Workbench Classic ribbon.
Figure 6 - Workbench Classic Templates
Alternatively, you can grab the tab and drag it to the desired position. You will see docking squares in the middle of the monitor showing the options.
As your mouse moves, the particular part of the screen where the display may go highlights in blue to indicate where you can drop the display.
Figure 7 - Moving a Display to a Different Location
This is very useful if you want to copy objects from one display to the other. Just hold down the Ctrl key and click the object and drag it into place.
Figure 8 - Two Side-by-side Displays
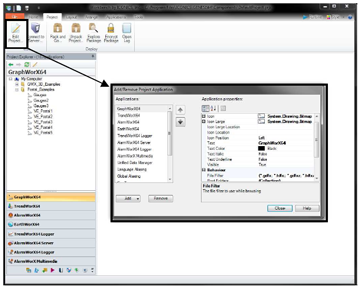
As mentioned before, you can add or remove application servers as needed to the specific project. This is done through the Project tab inside the Workbench Classic.
Figure 9 - Edit Project to Add or Remove Applications
You can also connect your Workbench Classic to a remote server using the “Connect to server” functionality from the Project tab.
Figure 10 - Connecting to a Different Project Server
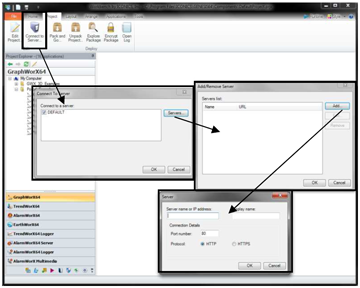
You can also pack your project for easy deployment, using the “Pack and Go…” functionality in the project tab.
Figure 11 - Pack Project Option
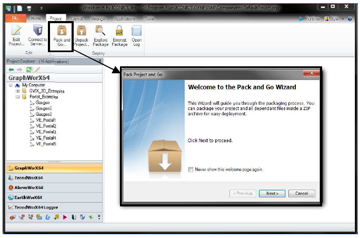
This will create a compressed *.zip file which can be unpacked, explored, and encrypted by the Workbench Classic.
NOTE: For more information on how to pack or deploy a project, refer to the Project Management Quick Start topic.
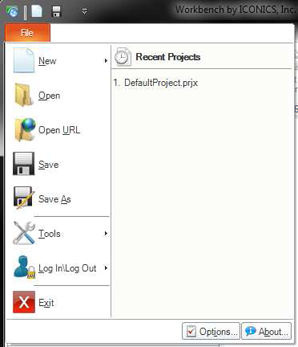
If you click on the File tab (highlighted tab at the top left corner), you get some general options as shown in Figure 12.
Figure 12 - Workbench Classic Options
The ones worth mentioning are Tools and Log In/Log Out.
NOTE: Tools are also available through Tools tab.
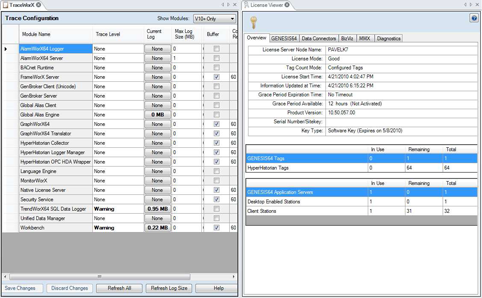
In the Tools option, you can start TraceWorX64 and view your license information as shown in Figure 13. This information could be helpful in case something behaves differently than you expect.
Figure 13 – TraceWorX64 and Licensing
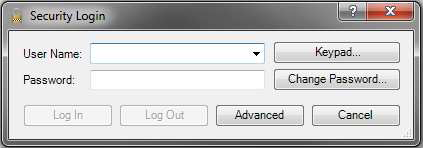
When you click the Log In/Log Out option, it will display a Security Login dialog. Using this dialog, you can log into ICONICS security. This is also important because once you enable security, you may need to login before you can see some of the options in the application tree. If you see a blank application tree when you click an application such as Global Aliasing, it could be because a lack of security. Using this option to login should bring back your configuration.
Figure 14 - Security Login Dialog
See also: